
Install
- Make
- Aston Martin
- Model
- V8 Vantage Factory Workshop Manual
- Year
- 2005–2010
- Section
- Valve Train › Install
03 EngineInstall
- Release and remove the camshaft sprockets complete with timing chain and tensioner from camshafts (refer to Figure 3).
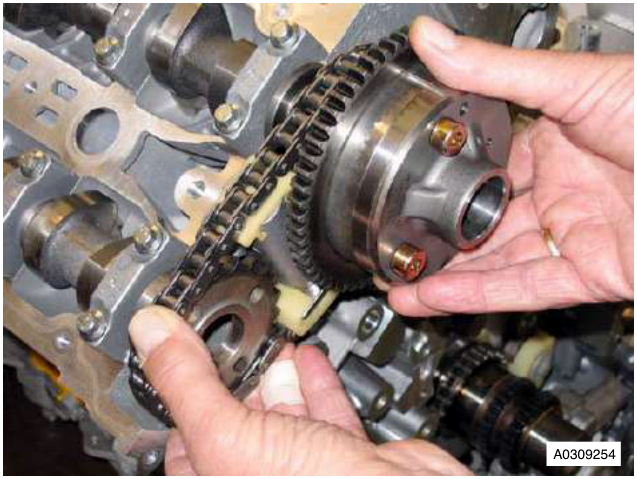
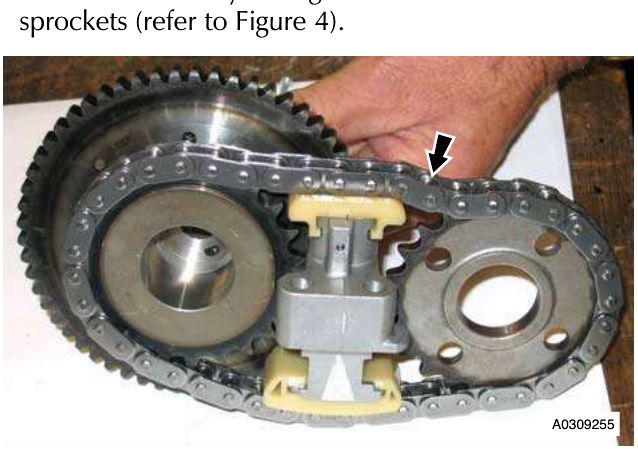
- Remove secondary timing chain and tensioner from sprockets (refer to Figure 4).
Install
- Clean the camshaft sprockets and tensioner.
- Install the secondary timing chain and tensioner on to the camshaft sprockets.
- Install the secondary timing chain assembly onto the camshafts.
- Install the spacer onto the M12 exhaust Torx bolt.
- Install the exhaust M12 Torx bolt to attach the exhaust camshaft sprocket. Do not tighten at this step.
- Install the inlet M12 Torx bolt to attach the inlet camshaft sprocket. Do not tighten at this step.
- Install and torque tighten the two M6 secondary tensioner bolts.
- Install the left primary timing chain guide.
- Install and torque the M6 bolt that attaches the left primary timing chain guide.
- Make sure that there is no tension in the chain at the tensioner side.
- Install the primary timing chain.
- Install primary timing chain tensioner blade.
13. Install and torque the M6 bolt that attaches the tensioner blade.
14. Install the primary timing chain tensioner assembly.
15. Install and torque tighten the two M6 bolts that attach the tensioner assembly.
16. Release tension on the timing chain tensioner piston, remove retaining special tool.
17. Install timing chain tensioning tool (303-532) into exhaust camshaft sprocket.
Apply an opposite force to the sprockets and chain while you tighten the sprocket bolts
18. Apply a force to the tool (303-532) in an anti-clockwise direction and torque tighten sprocket Torx bolts. Remove special tool.
19. Install LH/RH primary timing chain (refer to Workshop Manual procedure 03.09.AM/03.09.AN/03.09.CM/ 03.09.CN Chain - Timing Primary - LH/RH - Renew).
RH/LH Secondary Tensioner Assembly-Renew (with Engine Removed)
| Item | Code |
|---|---|
| Secondary Tensioner Assembly-Renew | LH 03.09.BR |
| Secondary Tensioner Assembly-Renew | RH 03.09.BS |
Remove
DO NOT GET USED ENGINE OIL ON YOUR SKIN. USED ENGINE OIL CAN BE HARMFUL.
- Remove the LH/RH primary timing chain (refer to Workshop Manual procedure 03.09.BM/03.09.BN/ 03.09.CM/03.09.CN Timing Chain - Primary - LH/RH - Renew With Engine Removed).
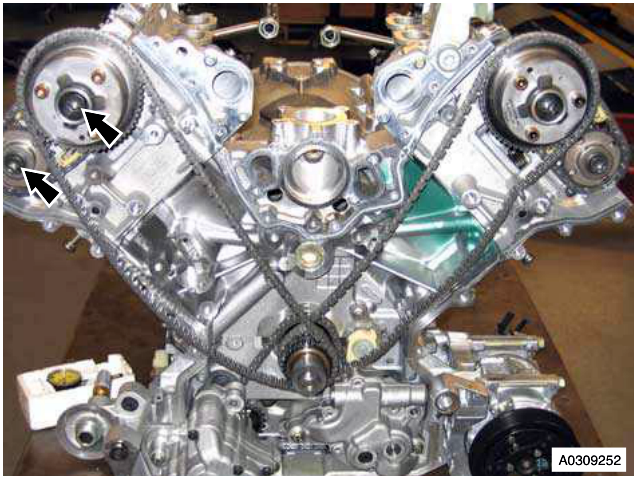
- Remove the two Torx head bolts, (there is a spacer on the exhaust Torx bolt), that attach the inlet and exhaust camshaft sprockets to the camshafts (refer to Figure 1).
Parts & tools for this job For 2005 Aston Martin V8 Vantage
- PARTEngine gasket setSearch: Aston Martin V8 Vantage 2005 engine gasket set
- TOOLTorque wrenchSearch: 3/8 inch torque wrench
- TOOLFeeler gauge setSearch: feeler gauge set
Links open Amazon search results in a new tab. As an Amazon Associate I earn from qualifying purchases.