audi Workshop Repair Guides

Audi Workshop Service and Repair Manuals

Removing and installing dual-mass flywheel; installation dimensions > < Measuring axial and radial clearance of crankshaft
6-Cylinder engine (5-valve turbo), Mechanics
Dismantling and assembling cylinder block, crankshaft and flywheel
Renewing crankshaft oil seals
 
V13-0837

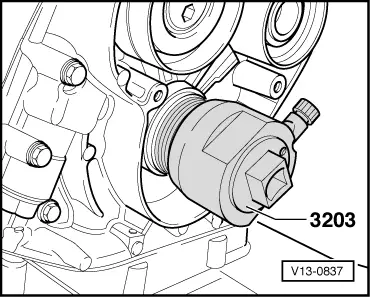
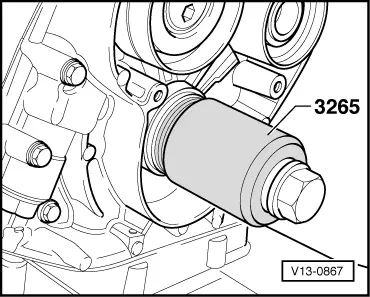
A - Toothed belt end

  • ‒ Remove toothed belt .
  • ‒ Remove toothed belt sprocket from crankshaft
  • ‒ → Pull out oil seal with oil seal extractor 3203.
  • ‒ Clean contact surface and sealing surface.
  • ‒ Do not lubricate sealing lip or outer circumference of seal before pressing in.

 
V13-0867
  • ‒ Push on seal using fitting sleeve 3202/1.
  • ‒ → Press in seal until flush using fitting sleeve 3265 and central bolt.

B - Flywheel end

Notes:

Renew oil seal together with sealing flange.

  • ‒ Drain off coolant.
  • ‒ Remove gearbox

=> 6-Speed manual gearbox 01E, four-wheel drive; Repair group 34; Removing and installing gearbox

 
V13-0842
  • ‒ Remove clutch.
  • ‒ → With crankshaft at TDC, screw in clamping bolt 3242.
  • ‒ Mark position of flywheel relative to engine -arrows-.
  • ‒ Remove dual-mass flywheel.
  • ‒ Remove sealing flange.

Installing

  • ‒ Install sealing flange.
  • ‒ Install dual-mass flywheel.

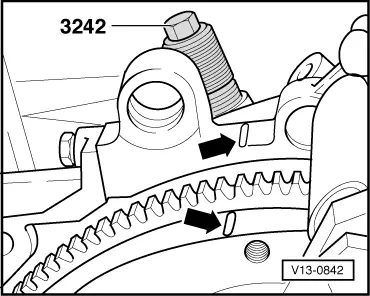
Note:

Always renew securing bolts for dual-mass flywheel.

 
V13-0842
  • ‒ → With crankshaft at TDC, unscrew clamping bolt 3242.
  • ‒ Install clutch

=> 6-Speed manual gearbox 01E, four-wheel drive; Repair group 30; Servicing clutch

  • ‒ Install gearbox

=> 6-Speed manual gearbox 01E, four-wheel drive; Repair group 34; Removing and installing gearbox

Tightening torques

Dual-mass flywheel to crankshaft

60 Nm + 180°

Clutch to dual-mass flywheel

20 Nm

Removing and installing dual-mass flywheel; installation dimensions > < Measuring axial and radial clearance of crankshaft