
Refitting
- Make
- Fiat
- Model
- Bravo /Brava (182) Factory Service Manual
- Year
- 1995–2001
- Section
- Removing-refitting cylinder head (1747 16v) › Refitting
10 EngineRefitting
Refitting
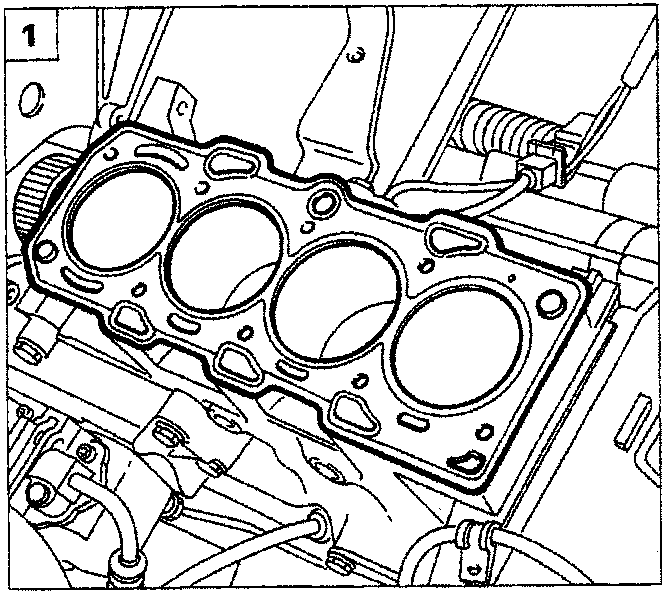
- Position the cylinder head gasket with the word "ALTO" facing towards the operator.
ASTADUR type cylinder head gaskets are used. On account of the special material from which they are made, these gaskets undergo a polymerization process during the operation of the engine, so that they harden considerably during usage. In order for the polymerization of the cylinder head gaskets to take place it is necessary:
- to keep the gasket sealed in its nylon container;
- to only take it out of its container shortly before fitting;
- not to lubricate or get oil on the gasket, taking care that the surfaces of the cylinder head and crankcase are clean.
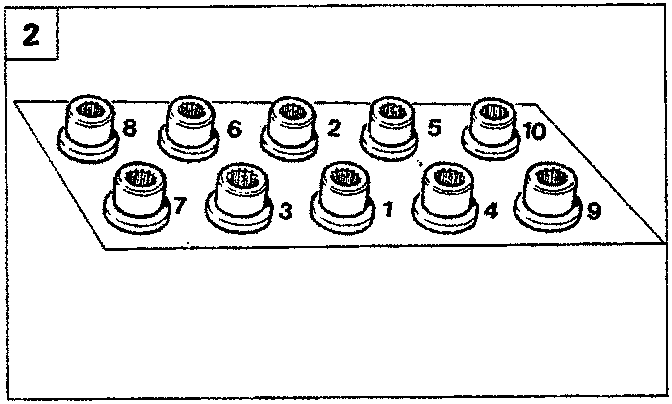
- Position the cylinder head, then tighten the fixing bolts bearing in mind that for each tightening stage described, the order is the one given in the diagram.
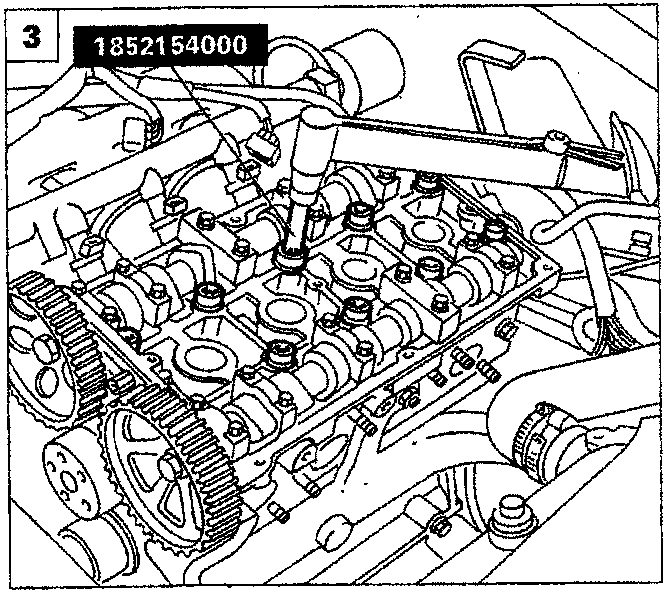
- Lubricate the bolts and washer and leave them to drain for at least 30 minutes; tighten the bolts to a torque of 2 daNm, then tighten to a torque of 4 daNm using spanner 1852154000.
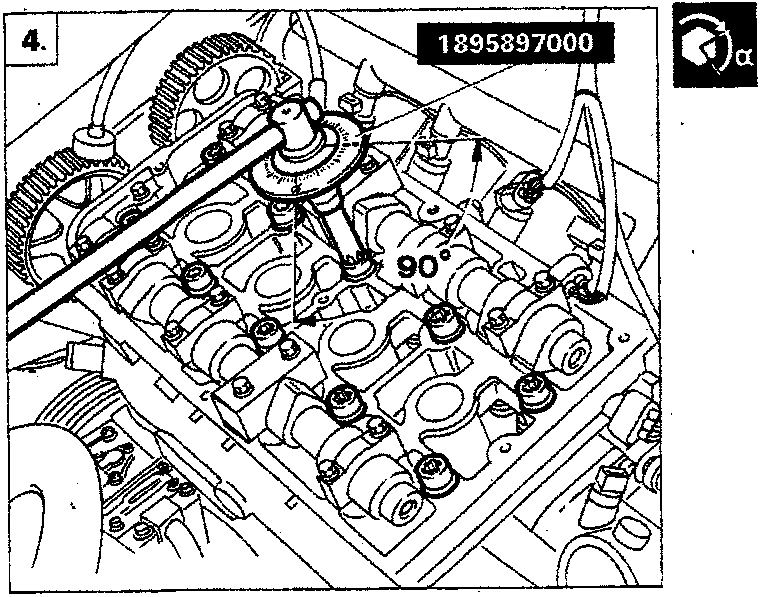
- Tighten the bolts through 270° in three distinct stages (90° + 90° + 90°) with the help of spanner 1852154000 and 1895897000.
Refit the remaining components reversing the order of the operations described for the removal. Fit and tension the timing and auxiliary shaft drive belts as described in the previous paragraphs.
Parts & tools for this job For 1995 Fiat Bravo
- PARTEngine gasket setSearch: Fiat Bravo 1995 engine gasket set
- TOOLTorque wrenchSearch: 3/8 inch torque wrench
- TOOLFeeler gauge setSearch: feeler gauge set
Links open Amazon search results in a new tab. As an Amazon Associate I earn from qualifying purchases.