
Positioning the replacement part
- Make
- Fiat
- Model
- Bravo /Brava (182) Factory Service Manual
- Year
- 1995–2001
- Section
- Replacing structural body panels › Positioning the replacement part
70 BodyworkPositioning the replacement part
Positioning the replacement part
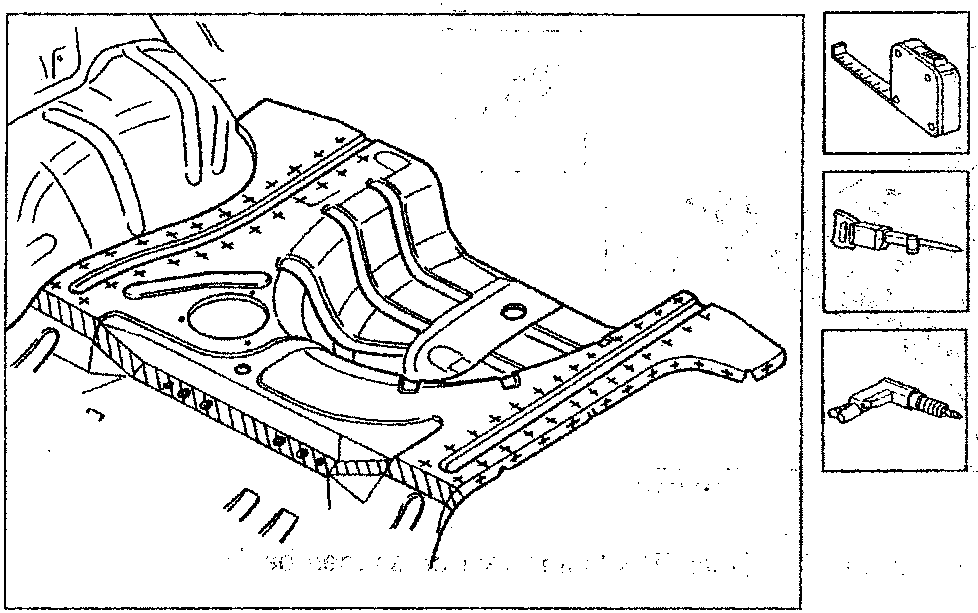
- Place the rear floor in position.
- Check that the panels are correctly superimposed in the join area.
- Mark the part to be removed on the bodyshell.
- Trace the points to be drilled along the contact area with the side members underneath and the wheel arches in order to be able to carry out the MIG welding for filling.
- Remove the replacement part, remove the excess from the bodyshell and drill the spare part. Also drill the sides of the replacement part which will be subsequently welded to the wheel arches.
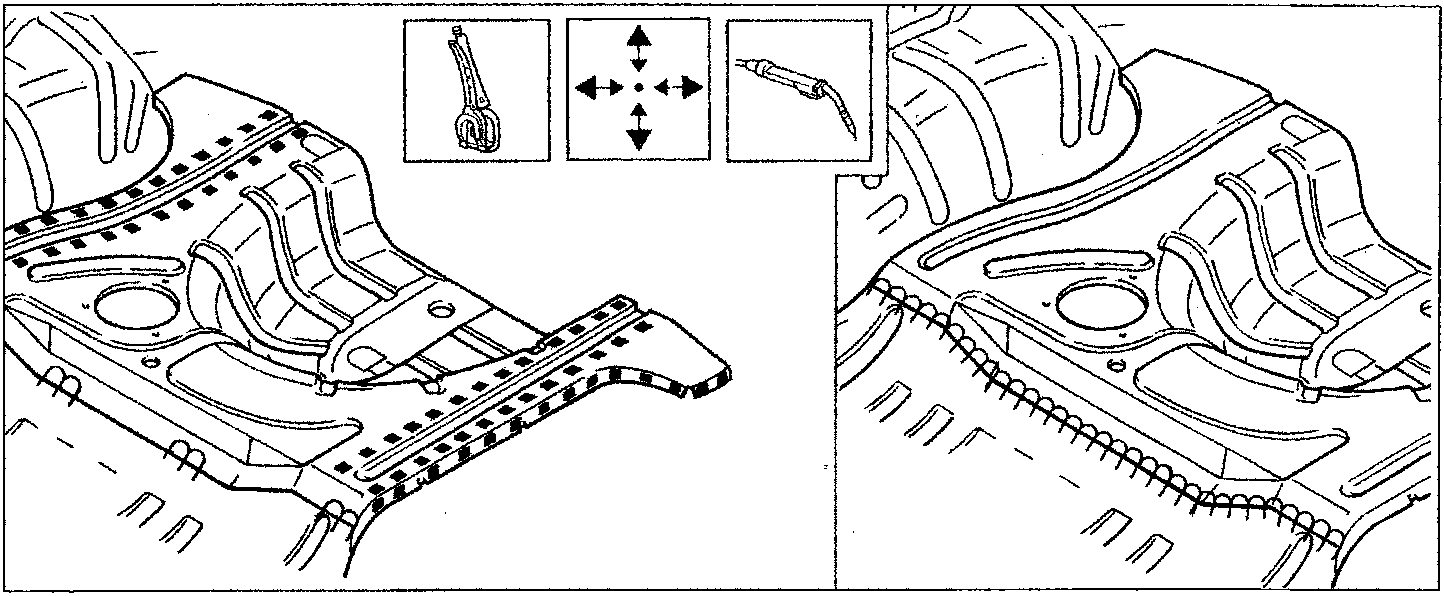
Welding the spare part
- Correctly reposition the replacement part and lock it with clamps.
- Fix the replacement part to the bodyshell tacking it to the parts to be welded, edge to edge.
- Weld and fill the holes made previously in the replacement part.
- Finish off the welding, edge to edge.
Parts & tools for this job For 1995 Fiat Bravo
- TOOLTrim removal tool kitSearch: trim removal tool kit
- PARTTouch-up paintSearch: Fiat touch up paint
- PARTPanel clip assortmentSearch: Fiat panel clips assortment
Links open Amazon search results in a new tab. As an Amazon Associate I earn from qualifying purchases.