
Safety belts a
- Make
- Fiat
- Model
- Seicento Factory Service Manual
- Year
- 1998–2010
- Section
- Mouldings and protections › Safety belts a
70 BodyworkSafety belts a
SAFETY BELTS A
(Cont. Op.7055B18)
Refitting
- Position rear bumper
- Screw upper and lower screw fixing bumper.
- Tighten screws fixing rear bumper to wings.
- Complete with Op. 5540A44 - REAR LIGHT CLUSTER (one), LH or RH - R.R
- Complete with Op. 5540A94 - NUMBER PLATE LIGHT (one), lh or rh - R.R.
7055B38 - SIDE MOLDING (ONE), LH OR RH, BUMPERS - R.R.
Removal
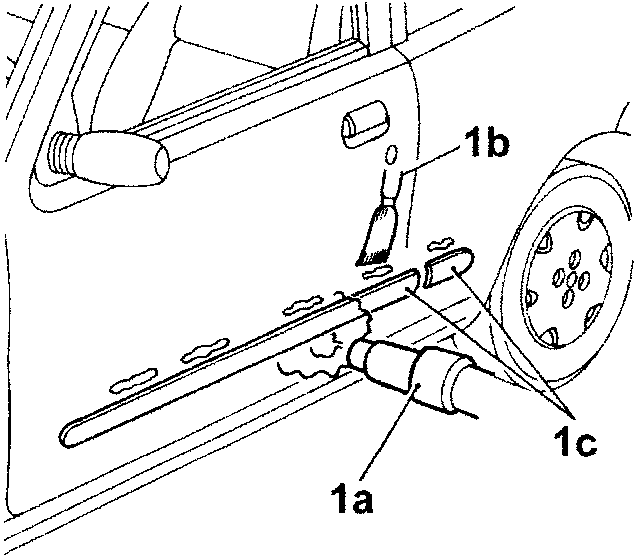
- Protect working area with masking tape, as suitable, so as to avoid scratches on body paint.
- Heat side molding,with hot air blower (1a), use a plastic spatula (1b), remove side moldings (1c).
Refitting
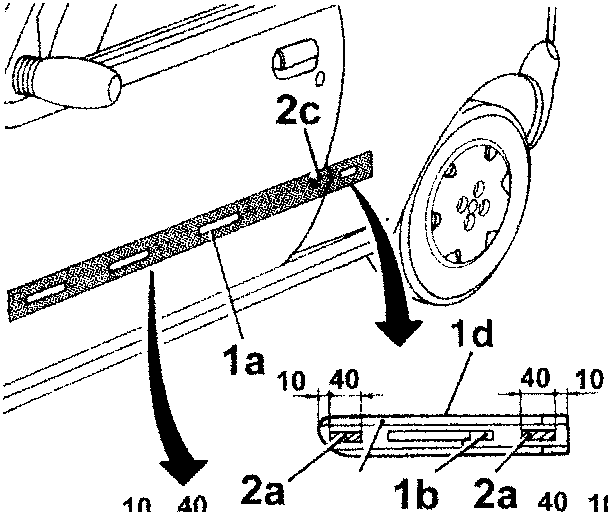
- Properly clean and degrease with heptane and disposable paper body zone(1a) concerned with glueing, check in zone (1b) of molding that has to be assembled (1c) front(1d)and rear the expiry date "PRIMER validity , check completeness of protective films on biadhesive tape (1b).
- Following operations of molding sticking, shall be carried out with temperature in body sticking zone and in molding ,that has to be assembled, equal to 40 - 45° C (lower temperatures alter body sticking polymerization with sticking decay consequences). - Apply a polyurethane glue cord in area (2a), dimensions Ø 3.5 x 40 mm. Remove the double adhesive tape liner (1b) and position the molding on the body coupling the reference pin (2b) and receptacle (2c). Start gluing from the reference pin side (2b) and continue towards the other side exerting a manual pressure along the molding.
- It is absolutely forbidden to touch adhesive surfaces with hands.
- Operate a continuous manual pressure again along whole molding length so as to assure total expulsion of air bubbles and consequent biadhesive perfect adhesion on body surface
7055B42 - FRONT WHEEL ARCH - R.R.
Removal
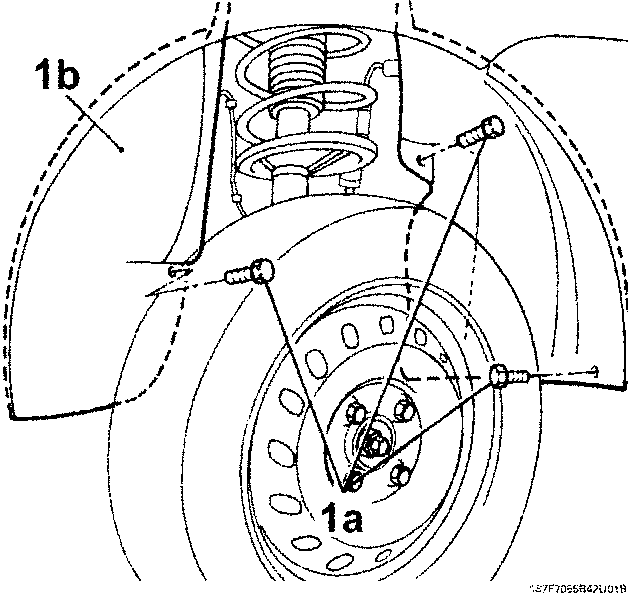
- Unscrew fixing screws(1a), remove front wheel arch (1b).
Refitting
- Position wheel arch.
- Screw fixing screws.
Parts & tools for this job For 1998 Fiat Seicento
- TOOLTorque wrenchSearch: 3/8 inch torque wrench
- TOOLSocket setSearch: socket set metric
- BOOKHaynes manualSearch: Haynes manual Fiat Seicento
Links open Amazon search results in a new tab. As an Amazon Associate I earn from qualifying purchases.