Hombre XS Space Cab L4-2.2L CPC (1997)

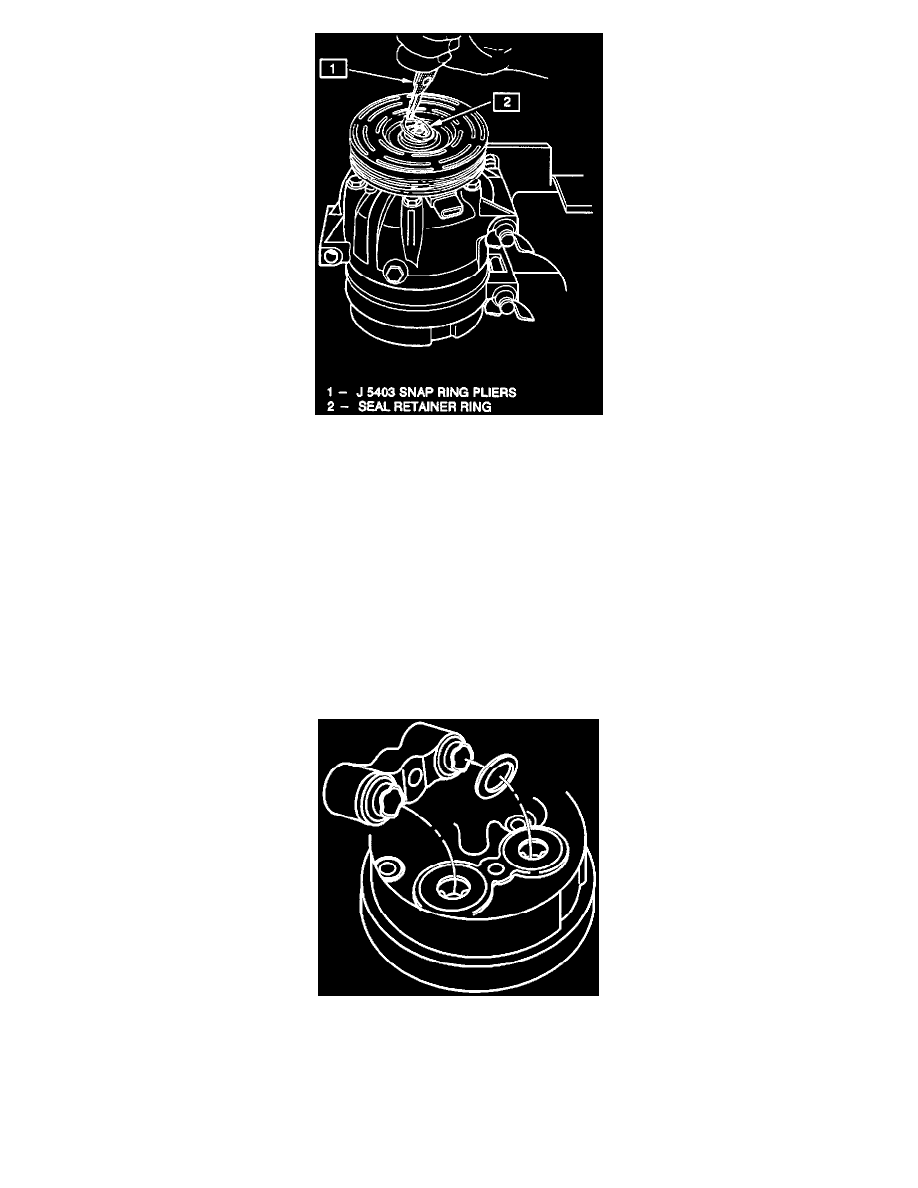
4. Install the new seal retainer ring with its flat side against the seal, using snap-ring pliers J 5403. Use the sleeve from O-ring installer J 33011 to
press in on the seal retainer ring so that it snaps into its groove.
5. To leak test, install compressor leak test fixture J 39893 on rear head of compressor and connect gage charging lines using J 39500 Refrigerant
Recovery System or equivalent. Pressurize suction and high-side of compressor with R134a Refrigerant. Temporarily install the shaft nut and, with
the compressor in horizontal position. rotate the compressor shaft in normal direction of rotation several turns by hand. Leak test the seal area and
correct any leak found. Recover refrigerant. Remove shaft nut.
6. Remove any excess oil resulting from installing the new seal parts from the shaft and inside the compressor neck.
7. Install the clutch plate and hub assembly as described in minor repair procedures.
8. Reinstall the compressor, belt and tighten bracket.
9. Evacuate and charge the refrigerant system using J 39500.
Compressor Sealing Washers
-
When installing sealing washers, keep dirt and foreign material from getting on the sealing surfaces of the washers, hose block, or compressor
ports. Clean all sealing surfaces with a lint-free rag.
-
Do not reuse sealing washer.
-
Sealing washers do not have to be oiled prior to assembly.
1. Install sealing washer onto pilots of suction/discharge block fitting. Washers must be seated against surface of the block fitting.
