
Timing Belt: Diagrams (page 12 of 12)
- Make
- Kia
- Model
- Optima
- Engine
- L4-2.4L VIN 6
- Year
- 2006
- Section
- Timing Belt
MaintenanceDiagrams · page 12 of 12
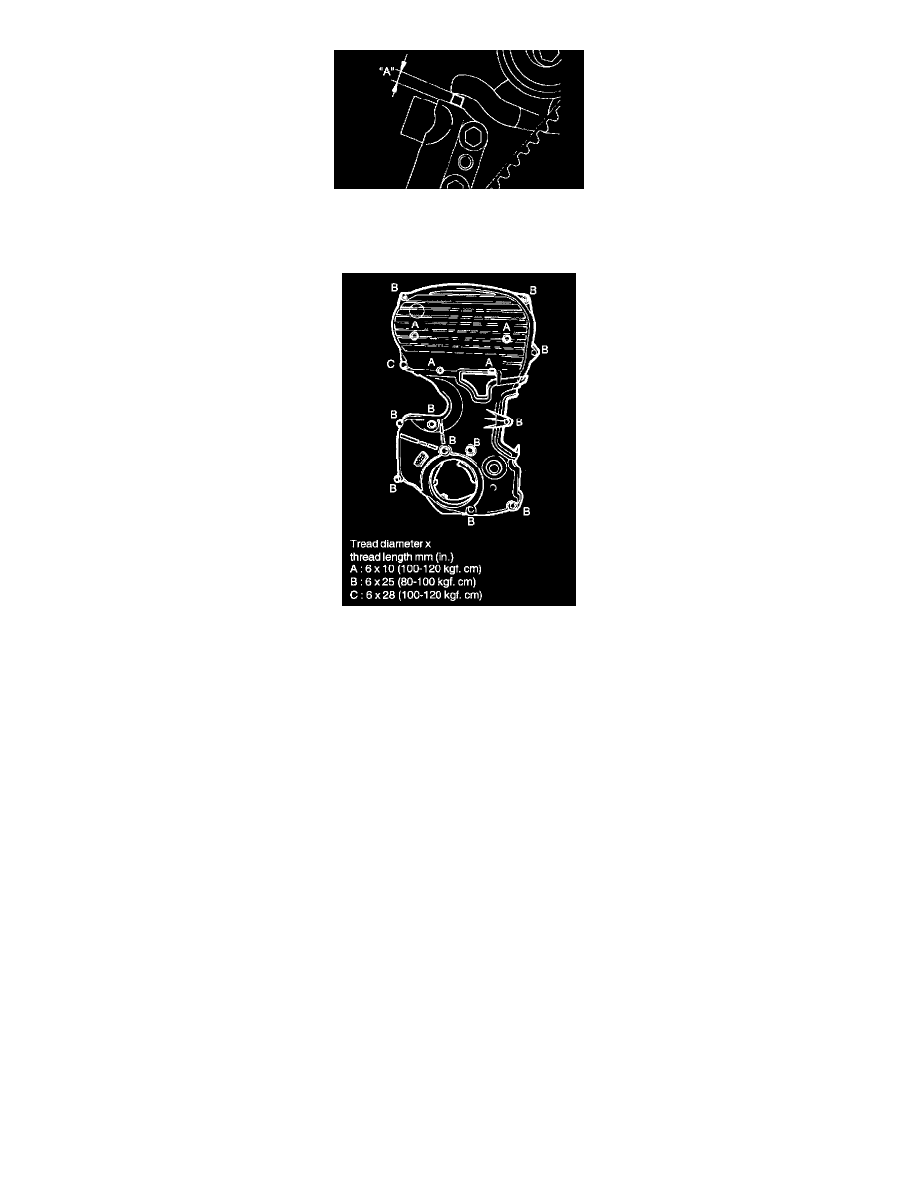
27. Rotate the crankshaft two complete turns clockwise and leave it for about 15 minutes. Then, measure the auto tensioner protrusion "A"
(distance between the tensioner arm and auto tensioner body) to ensure that it is up to specification.
Standard value 6 - 9 mm (0.24 - 0.35 inch)
28. Install the timing belt lower cover and the timing belt upper cover.
Pinch or Ctrl + scroll to zoom. Double-tap to reset.
The same page in: Optima L4-2.4L (2001), Optima L4-2.4L (2001), Optima L4-2.4L VIN 6 (2006).
Parts & tools for this job For 2006 Kia Optima 2.4L
- PARTTiming belt kitSearch: Kia Optima 2006 2.4L timing belt kit
- TOOLEngine timing tool setSearch: Kia engine timing tool set
- TOOLTorque wrenchSearch: 3/8 inch torque wrench
Links open Amazon search results in a new tab. As an Amazon Associate I earn from qualifying purchases.