
Damper - front (page 2 of 2)
- Make
- Land Rover
- Model
- Freelander Workshop Manual
- Year
- 1998–2000
- Section
- Repairs
Front suspensionDamper - front · page 2 of 2
- LH Damper only : Remove jacking kit from mounting.
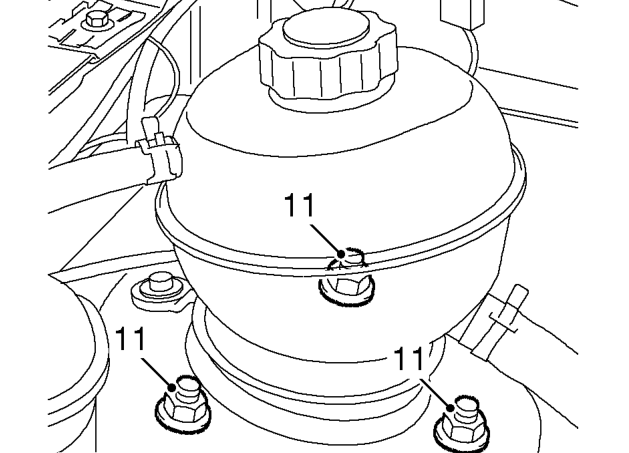
- Remove 3 nuts securing damper top mounting to body.
- LH Damper : Collect jacking kit mounting.
- Remove damper and spring assembly.
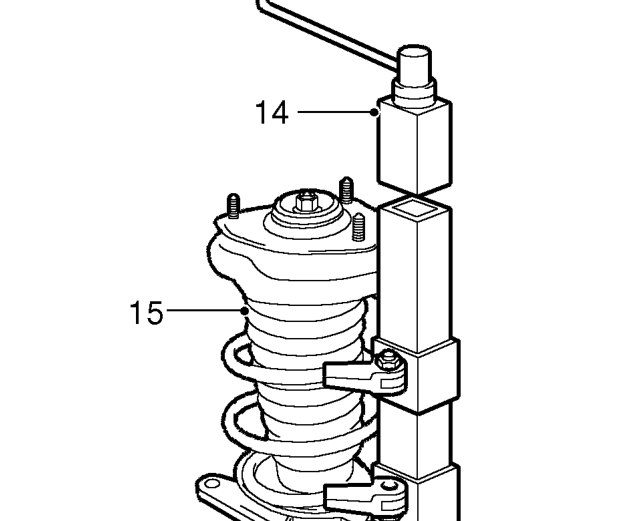
- Position a suitable spring compressor tool in vice.
- Position damper and spring assembly to spring compressor and locate in arms.
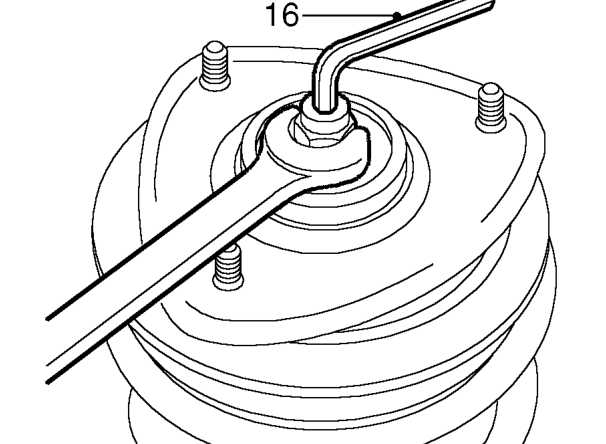
- Compress spring by 2 to 3 cm until loose, hold damper shaft with Allen key, remove and discard mounting plate nut.
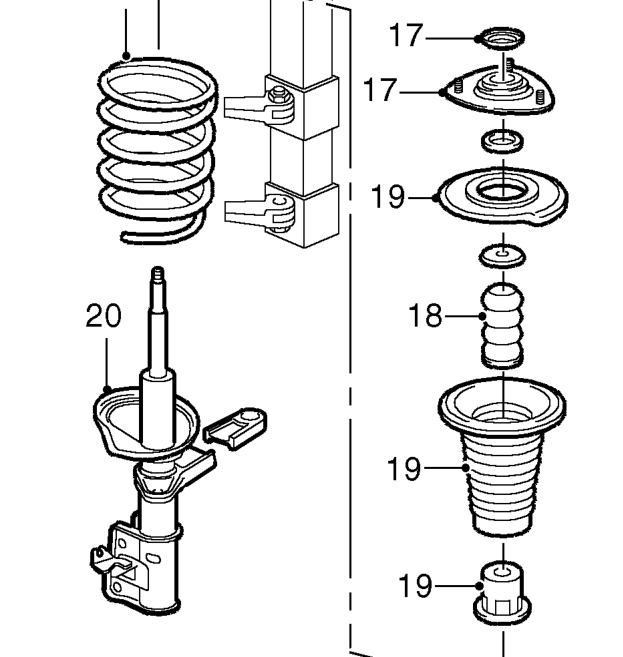
- Remove rebound washer and top mounting plate.
- Remove bump washer and spring aid.
- Remove spring seat, dust cover and bump cup.
- Remove damper from spring.
- Release and remove spring from spring compressor.
Parts & tools for this job For 1998 Land Rover Freelander
- TOOLCoil spring compressorSearch: coil spring compressor
- TOOLBall joint separatorSearch: ball joint separator
- PARTFront shock absorbersSearch: Land Rover Freelander 1998 front shock absorbers
Links open Amazon search results in a new tab. As an Amazon Associate I earn from qualifying purchases.