
Fuel tank
- Make
- Land Rover
- Model
- Freelander Workshop Manual
- Year
- 1998–2000
- Section
- Repairs › Fuel tank
FUEL TANK
Service repair no - 19.55.01
Remove
WARNING: Fuel pressure of up to 3.5 bar will be present in the system of petrol vehicles, even if the engine has not been run for some time. Always depressurise the system before disconnecting any components in the fuel feed line (between the fuel pump and the fuel rail). The spilling of fuel is unavoidable during this operation. Ensure that all necessary precautions are taken to prevent fire and explosion. See ENGINE MANAGEMENT SYSTEM - MEMS, Information.
CAUTION: Fuel system must be fully drained before fuel tank is removed. See this section.
- Fold rear seat forward and release RH front corner of load space carpet.
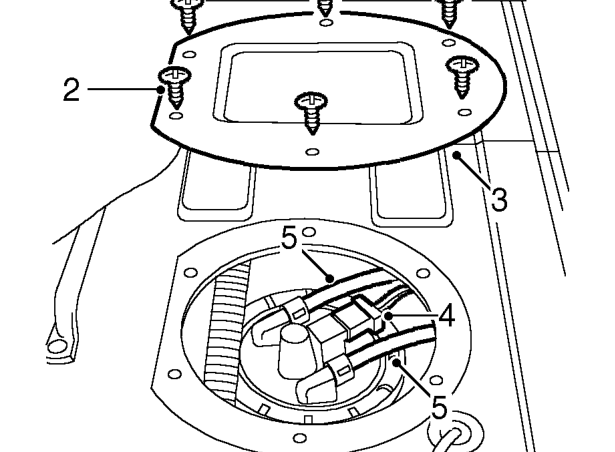
- Remove 6 screws from fuel gauge unit cover.
- Remove fuel gauge unit cover.
- Disconnect multiplug from fuel gauge unit.
Diesel models
- Disconnect fuel feed and return hoses from fuel gauge unit.
Petrol models
- Disconnect fuel feed hose from fuel gauge unit.
CAUTION: Plug the connections.
All models
- Remove intermediate exhaust pipe. See MANIFOLD & EXHAUST SYSTEMS, Repairs.
- Remove propeller shaft. See DRIVE SHAFTS, Repairs.
- Remove rear road wheels.
- Remove 4 scrivets from front of RH rear wheel arch liner and release liner from rear wing.
- Remove clip securing vent hose to filler neck.
- Disconnect vent hose from filler neck.
- Disconnect 2 breather hoses from filler neck if petrol model or 1 hose for diesel model.
CAUTION: Plug the connections.
- Support the weight of the rear sub frame on a transmission jack.
- Remove 4 bolts securing sub frame to body.
- Lower sub frame.
CAUTION: Do not allow sub frame to hang on rear brake hoses.
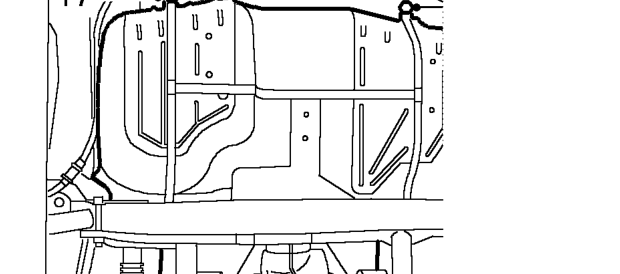
- With assistance, remove 4 bolts securing fuel tank to body.
- Remove fuel tank.
NOTE: Pull vent and breather hoses through body panel while lowering fuel tank.
Parts & tools for this job For 1998 Land Rover Freelander
- PARTFuel filterSearch: Land Rover Freelander 1998 fuel filter
- TOOLFuel pressure test kitSearch: fuel pressure test kit
- TOOLFuel line disconnect toolSearch: fuel line disconnect tool
Links open Amazon search results in a new tab. As an Amazon Associate I earn from qualifying purchases.