
CX-7 L4-2.3L Turbo (2007)
5.
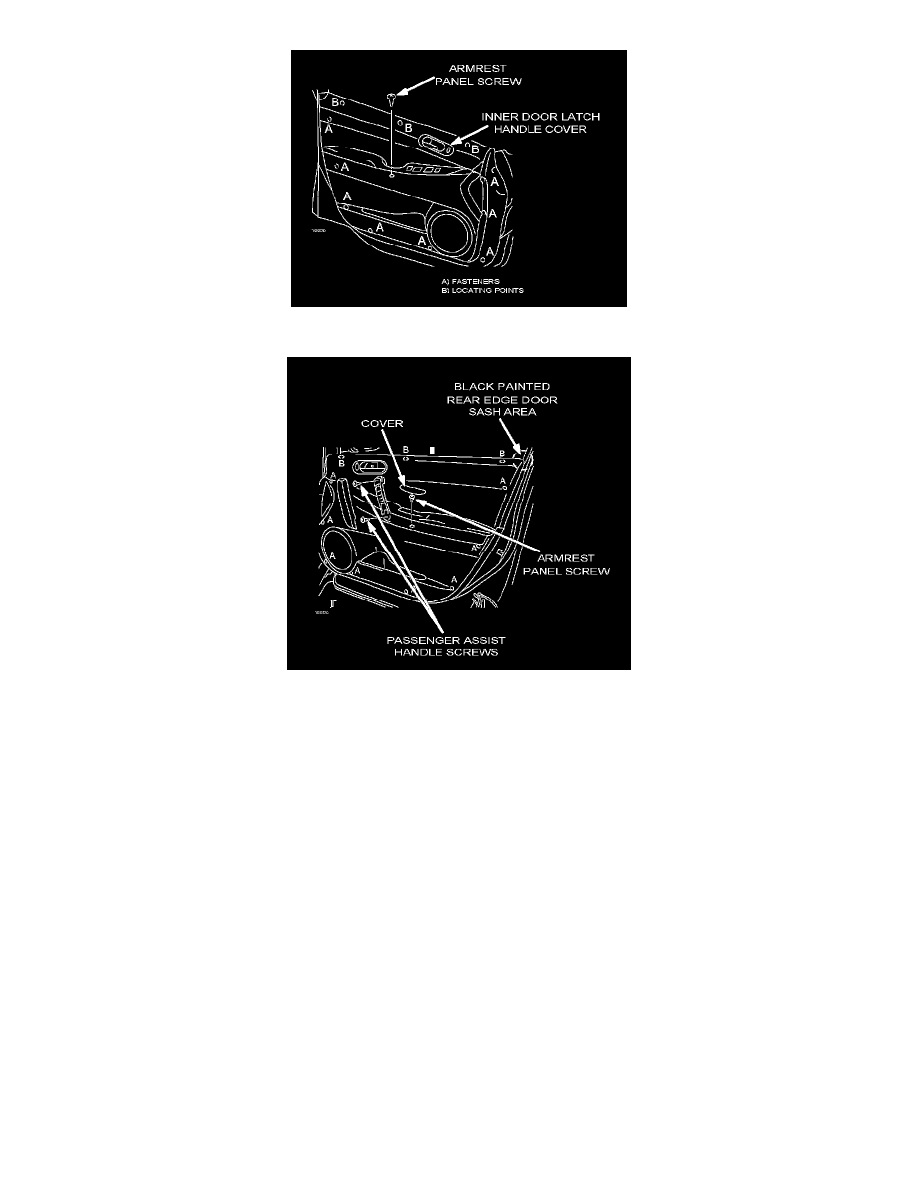
Carefully remove inner door latch handle cover by inserting pointed plastic trim tool between lock knob and cover, then remove panel screw.
6.
Remove passenger assist handle by inserting pointed plastic trim tool underneath bottom of outer plastic cover, then remove two (2) locating
screws.
7.
Prior to removing door panel, apply masking tape to rear edge door sash area (important to prevent damage to black painted area).
8.
Remove door trim, pulling initially from front hinge side and release all eight (8) lower plastic door panel fasteners.
9.
Detach inner door latch handle by pushing assembly from backside and sliding out through hole (handle carefully and do not damage door cables
or door lock connectors).
10.
Disconnect mirror and window switch connectors (three on driver's side and one on passenger side).
NOTE:
During door panel removal it maybe necessary to use a door fastener removal tool (protect door from damage by wrapping tool end with
masking tape to prevent scratches).
Upper Door Trim Disassembly
1.
Pull down white felt insulation from three (3) adhesion points on inside upper panel.
2.
Remove eight (8) screws and separate upper panel from lower panel.