
Removal / Inspection / Installation
- Make
- Mazda
- Model
- MX-5 (NA) Factory Workshop Manual
- Year
- 1990–1992
- Section
- Lower arm › Removal / Inspection / Installation
SuspensionRemoval / Inspection / Installation
Removal / Inspection / Installation
- Jack up the front of the vehicle and support it with safety stands.
- Remove the undercover.
- Remove in the order shown in the figure, referring to Removal Note.
- Inspect all parts and repair or replace as necessary.
- Install in the reverse order of removal, referring to Installation Note.
- Tighten all nuts and bolts to the specified torques, referring to the figure.
Note
- Loosely tighten the lower arm, shock absorber, and stabilizer control link bolts. Lower the vehicle and tighten all nuts and bolts to the specified torques with the vehicle unladen.
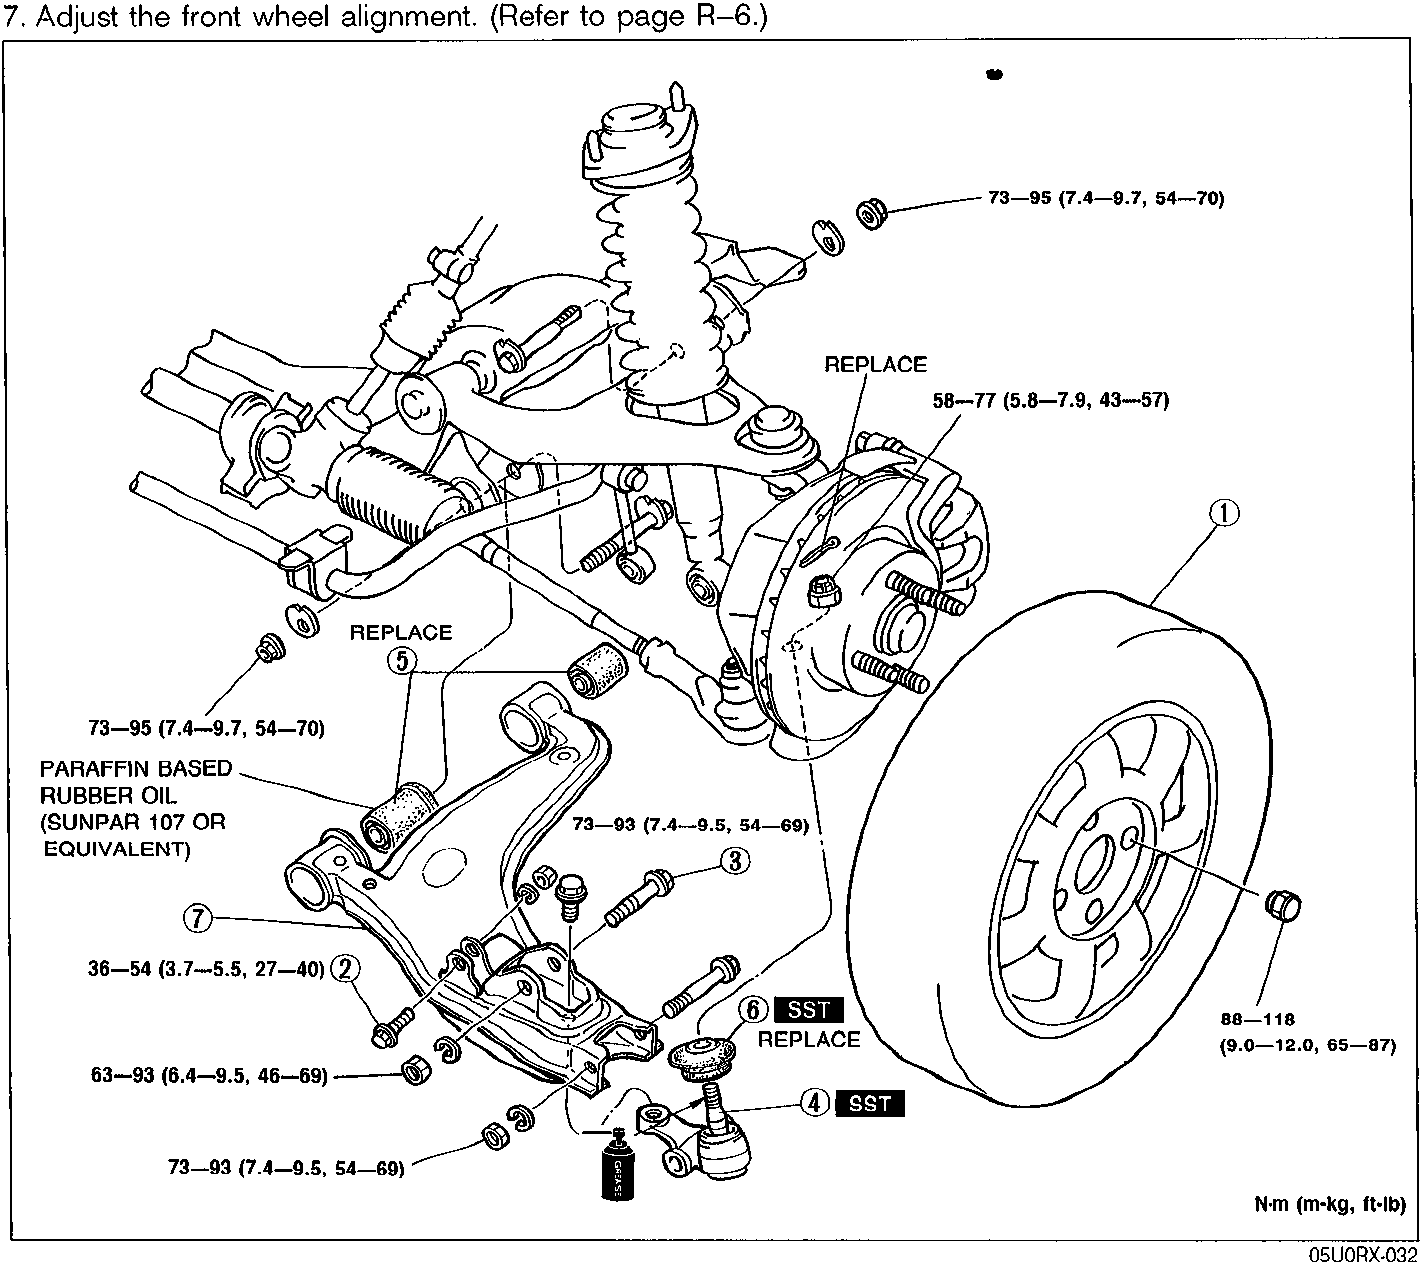
- Wheel and tire
- Stabilizer control link bolt
- Shock absorber bolt
- Lower arm ball joint
- Removal Note.................................... page R–16
- Inspection........................................... page R–16
- Lower arm bushing (front and rear)
- Inspect for deterioration and wear
- Ball joint dust boot
- Removal Note.................................... page R–16
- Installation Note................................. page R–16
- Lower arm
- Inspect for damage and cracks
Parts & tools for this job For 1990 Mazda MX-5
- TOOLCoil spring compressorSearch: coil spring compressor
- TOOLBall joint separatorSearch: ball joint separator
- PARTShock absorbersSearch: Mazda MX-5 1990 shock absorbers
Links open Amazon search results in a new tab. As an Amazon Associate I earn from qualifying purchases.