
Rear screen (page 5 of 5)
- Make
- Rover
- Model
- 400 Body Repair Manual
- Year
- 1995–2000
- Section
- Screens
BodyRear screen · page 5 of 5
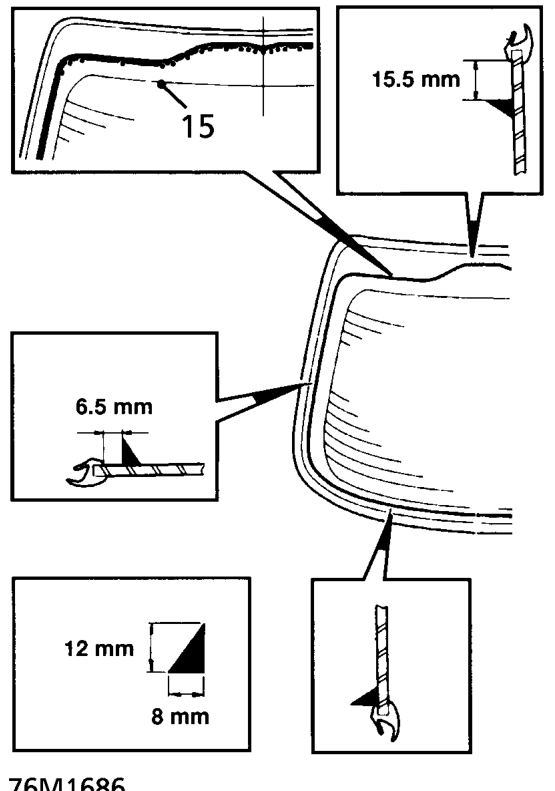
- Apply a continuous bead of sealant around edge of glass as shown.
NOTE: Use printed dots as guide.
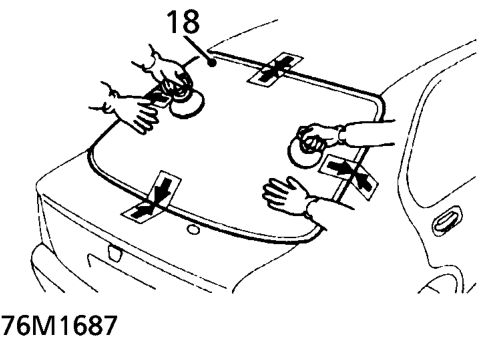
- Remove protection from double sided tape on sub-moulding.
- Open a front door window.
- With assistance: Lift glass and carefully align to tapes and lower onto tailgate flange. Lightly push down on the glass until all edges are seated on the sealant and glass is aligned with body.
- Remove protective coverings and tape.
- Remove excess sealant and use solvent to wipe it from glass.
- Let sealant dry for at least 1 hour, then spray water over glass and check for leaks. Mark any leaking areas, let the glass dry then reseal.
- Connect 2 leads to demister panel.
- Fit trim to upper flange.
- Fit trim casing. See Interior trim components.
- Fit centre high mounted stop lamp (if fitted). See ELECTRICAL, Repairs.
- Operate, then switch off wiper motor to ensure spindle is in ’park’ position.
- Fit wiper arm, tighten nut to 14 Nm and fit nut cover.
NOTE: Position tip of wiper blade to alignment mark on screen.
CAUTION: A curing time of 6 hours is desirable, during this time leave the window open and do not slam doors. If the car must be used, drive slowly.
Parts & tools for this job For 1995 Rover 400
- TOOLTrim removal tool kitSearch: trim removal tool kit
- PARTTouch-up paintSearch: Rover touch up paint
- PARTPanel clip assortmentSearch: Rover panel clips assortment
Links open Amazon search results in a new tab. As an Amazon Associate I earn from qualifying purchases.