
Drive shaft inner joint - ’d’ series
- Make
- Rover
- Model
- 400 Workshop Manual
- Year
- 1995–2000
- Section
- Repairs › Drive shaft inner joint - ’d’ series
‹ Prev Drive shaft outer joint - ’k’, ’l’ & ’t’ seriesNext › Drive shaft and inner joint - ’k’, ’l’ & ’t’ series
Drive shaftsDrive shaft inner joint - ’d’ series
DRIVE SHAFT INNER JOINT - ’D’ SERIES
Service repair no - 47.10.14
Remove
- Remove drive shaft. See this section.
- Place drive shaft in vice.
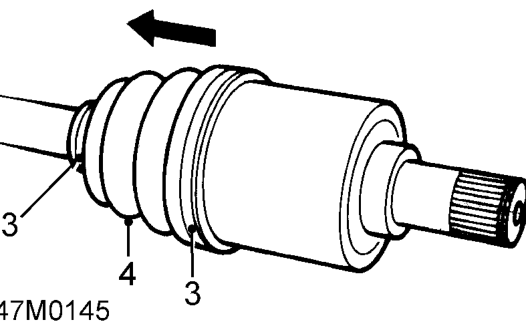
- Release both gaiter clips and discard.
- Slide gaiter along shaft to gain access to inner joint.
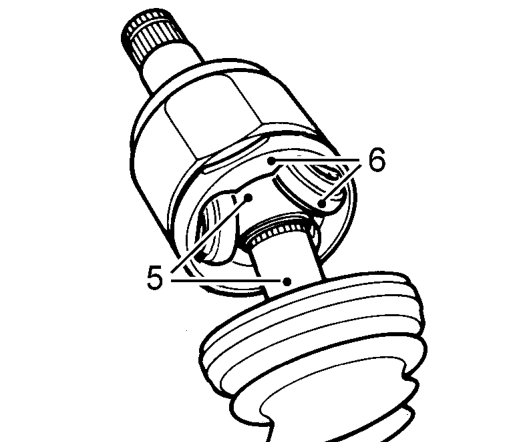
- Mark shaft to spider relationship for reassembly.
- Mark bearing to outer joint relationship for reassembly.
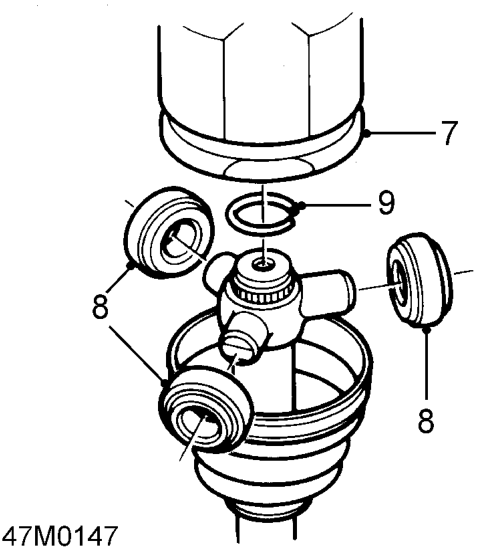
- Remove inner joint from shaft.
- Remove bearings from spider.
- Remove circlip retaining spider to shaft.
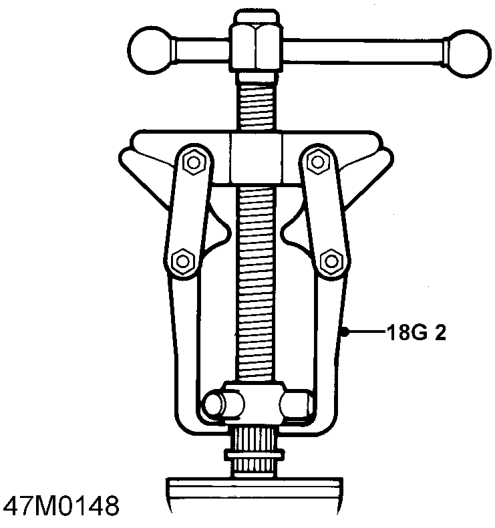
- Using tool 18G 2 remove spider from shaft.
‹ Prev Drive shaft outer joint - ’k’, ’l’ & ’t’ seriesNext › Drive shaft and inner joint - ’k’, ’l’ & ’t’ series
Parts & tools for this job For 1995 Rover 400
- PARTWheel bearingSearch: Rover 400 1995 wheel bearing
- TOOLBearing puller kitSearch: wheel bearing puller kit
- PARTCV boot kitSearch: Rover 400 1995 cv boot kit
Links open Amazon search results in a new tab. As an Amazon Associate I earn from qualifying purchases.