
Example A
- Make
- Rover
- Model
- 600 Rover 600 Repair Manual - Volumes 1 and 2 - 2nd Edition
- Section
- Repairs › Example A
Differential – manual gearboxExample A
- Recheck the tapered roller bearing preload.
- How to select the correct thrust shim.
- 1)Compare the tapered roller bearing preload you get with the thrust shim that was removed, with the specified preload of 1.4 – 2.6 Nm .
- 2)If your measured tapered roller bearing preload is less than specified, subtract yours from the specified.
If yours is more than specified, subtract the specified from your measurement.
For example, with a 2.17 mm thrust shim:
Example A
Specified torque = 2.6 Nm
Your measurement = 0.6 Nm
Subtract 0.6 Nm from 2.6 Nm = 2.0 Nm less
Example B
Your measurement = 3.4 Nm
Specified torque = 2.6 Nm
Subtract 2.6 Nm from 3.4 Nm = 0.8 Nm more
- 3)Each shim size up or down from standard makes about 0.3 – 0.4 Nm difference in tapered roller bearing preload.
- In example A, your measured tapered roller bearing preload was 2 Nm less than standard, so you need a thrust shim five sizes thicker than standard – try the 2.32 mm thrust shim and recheck.
- In example B, yours was 0.8 Nm more than standard, so you need a thrust shim two sizes thinner – try the 2.11 mm thrust shim and recheck.
- After adjusting the tapered roller bearing preload, assemble the transmission and install the transmission housing, see MANUAL GEARBOX.
Torque
10 x 1.25 mm = 45 Nm.
8 x 1.25 mm = 28 Nm.
- Rotate the differential assembly in both directions to seat the tapered roller bearings.
Differential Oil Seal Installation
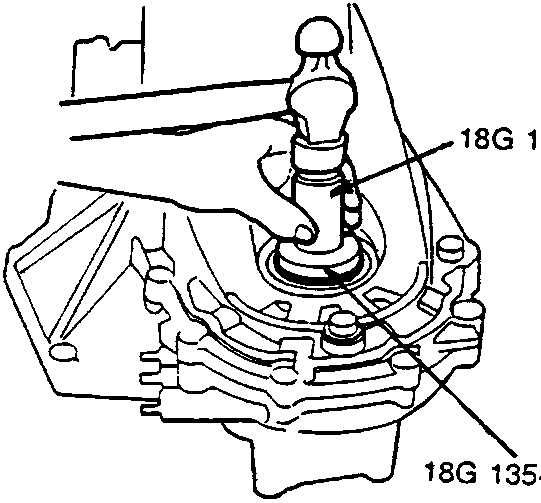
54M0022
- Install the new oil seal flush with the transmission housing using the special tools as shown.
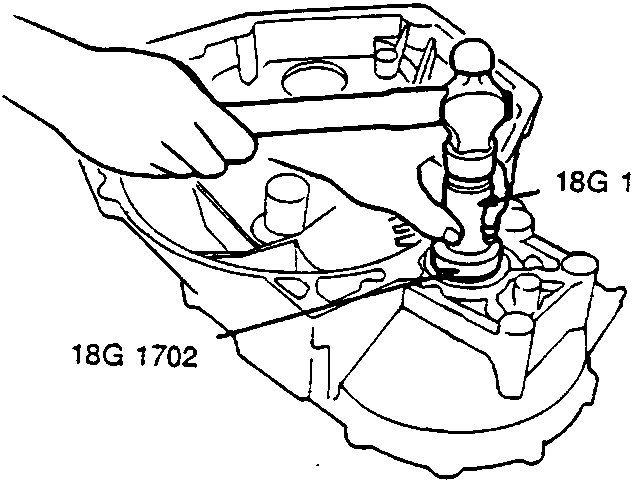
54M0023
- Install the new oil seal into the clutch housing using the special tools as shown.
Parts & tools for this job For Rover 600
- PARTClutch kitSearch: Rover 600 clutch kit
- TOOLClutch alignment toolSearch: clutch alignment tool
- FLUIDGear oilSearch: Rover 600 manual gearbox oil
Links open Amazon search results in a new tab. As an Amazon Associate I earn from qualifying purchases.