seat Workshop Repair Guides

SEAT Workshop Service and Repair Manuals

Removing and installing parking aid control unit > < Adjusting volume and frequency of rear parking aid warning buzzer
Removing and installing rear parking aid senders
The following parking aid senders are built into the rear bumper cover:
t  Rear left parking aid sender -G203-
t  Rear parking aid sender in middle -G796-
t  Rear right parking aid sender -G206-
  Note
t  3 parking aid senders are built into the rear bumper cover:
t  The bumper cover does not have to be removed to install or remove the two outer senders; the senders can be reached through the wheel housing.
t  Removal and installation of the rear parking aid senders from and in the sender brackets is carried out in the same way for all senders and is described as follows for just one sender.
Removing:
–  Switch off ignition and all electrical consumers, and remove ignition key.
  Caution
The order for removing the senders must be adhered to under all circumstances.
The sender may otherwise be damaged. Fractures may occur if too much pressure is applied to the sender, and this may cause the sender to fail.
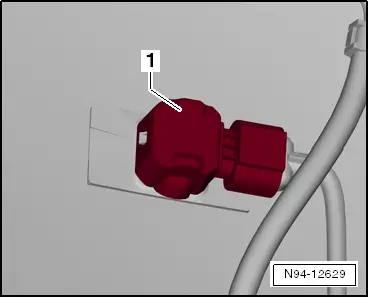
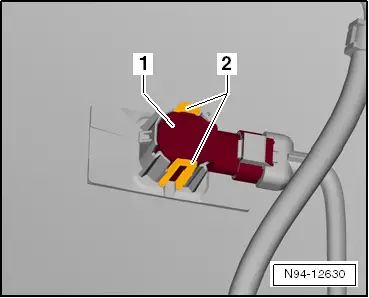
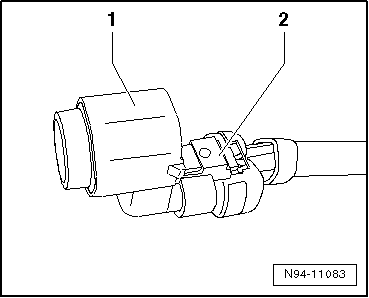
First, remove sender from holder and then release and pull off connector of sender.
Only for removing and installing the sender in the middle:
–  Remove rear bumper cover → General body repairs, exterior; Rep. gr.63.
Removal and installation of all senders, continued:
   
–  Unclip rubber cap -1- from sender bracket.
  N94-12629
–  Push fasteners -2- on sender bracket outwards.
–  Pull out sender -1- with wiring connected backwards from sender holder.
  Note
t  When removing the sender, make sure that the isolation ring (black silicone ring) on the sender head does not remain in the bracket or become lost.
t  Stretching the isolation ring must be avoided under all circumstances.
  N94-12630
–  Release connector -2- and then pull it off sender -1-.
Installing:
Install in the same way but in reverse order of removal. When doing this, note the following:
  Caution
Function problems could occur if an incorrect or damaged isolation ring is used.
Stretching the isolation ring must be avoided under all circumstances.
Replace any damaged isolation rings and make sure that the right isolation ring is fitted in each case.
  N94-11083
–  Check isolation ring -1- of sender for damage and renew if necessary.
  Note
t  When installing the sender, ensure that the isolation ring has been correctly fitted onto the sender head and does not ride or roll up on insertion into the sender bracket.
t  Both locking lugs of sender retainer must audibly engage when installing the sender.
t  Attach rubber cap to sender bracket so that it latches into place securely.
  N94-11088
–  After installing the sender, check that the sender is correctly seated in the bracket. The size -a- of the ring gap which is visible on the outer side of the bumper and is located between sender head and bumper cover must be the same all round.
–  Check functions of parking aid system.
  N94-10605

Removing and installing parking aid control unit > < Adjusting volume and frequency of rear parking aid warning buzzer