| –
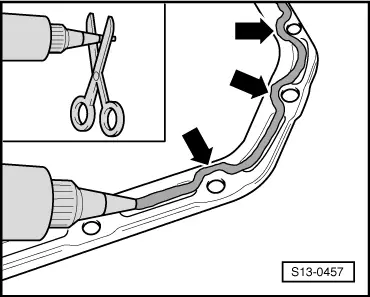
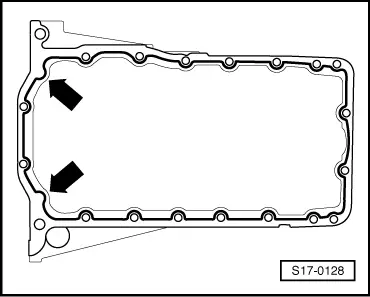
| Apply silicone sealant to the clean sealing surface of the oil pan, as shown in the illustration. |

Note | Take particular care when applying sealant in the area of the sealing flange at the rear. There are two bore holes in the cylinder block situated at the locations marked with an arrow. |
| –
| Place the M10 bolts in the oil pan before assembling on the oil pan. |
| –
| Fit oil pan immediately and lightly tighten all bolts. |
| –
| Tighten up the M7 oil pan bolts crosswise using a torque of 15 Nm. |
| –
| Tighten up the M10 bolts on the oil pan/cylinderblock using a torque of 45 Nm. |
| –
| Tighten up the bolts on the oil pan/gearbox to a torque of 45 Nm. |
Note | After installing the oil pan, allow the sealant to dry for about 30 minutes. Only then may engine oil be filled in. |
| The further assembly is carried out in reverse order to disassembly. |
| –
| Install the stop for the torque arm and adjust according to the installed gearbox → Chapter. |
|
|
|