Body EquipmentReplace front folding roof - L67
|
Replace front folding roof - L67
 Remove Remove
|
| 1. |
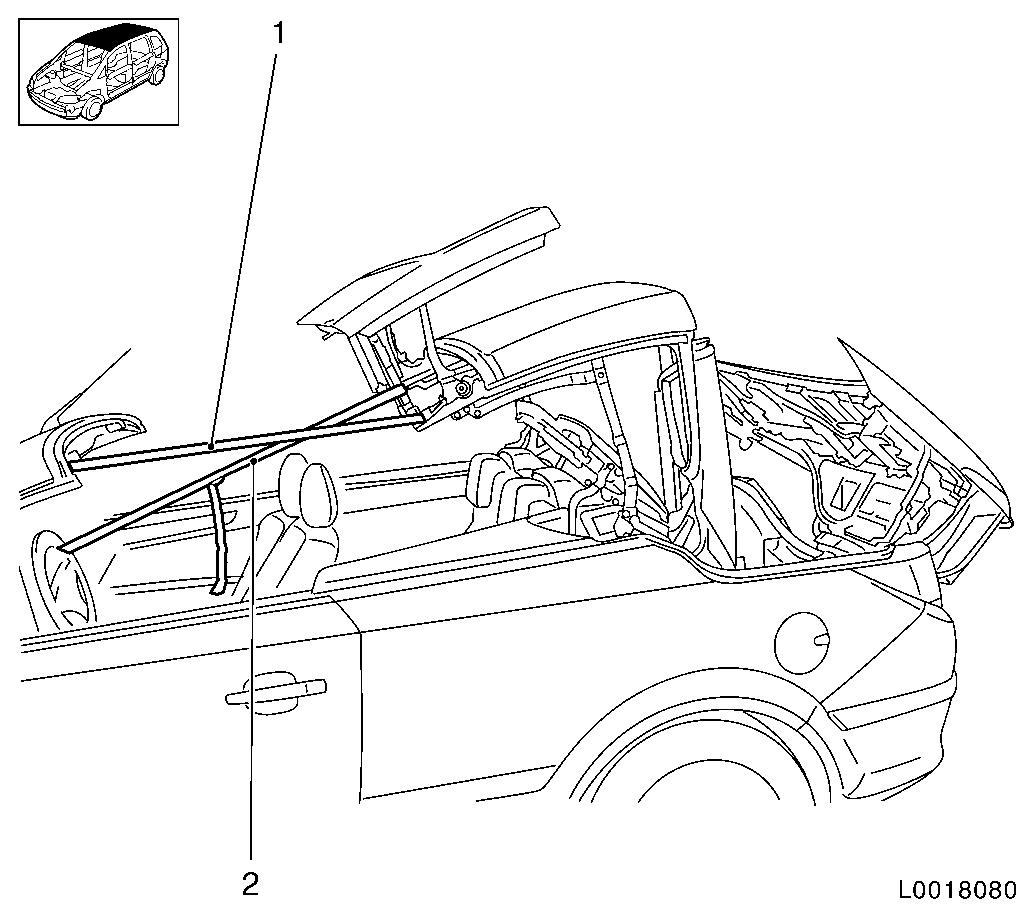
Place folding top in service position
| • |
Use special tool BO-47651-200 (1)
|
| • |
Secure roof with accompanying tensioner belt (2)
|
|
|
|
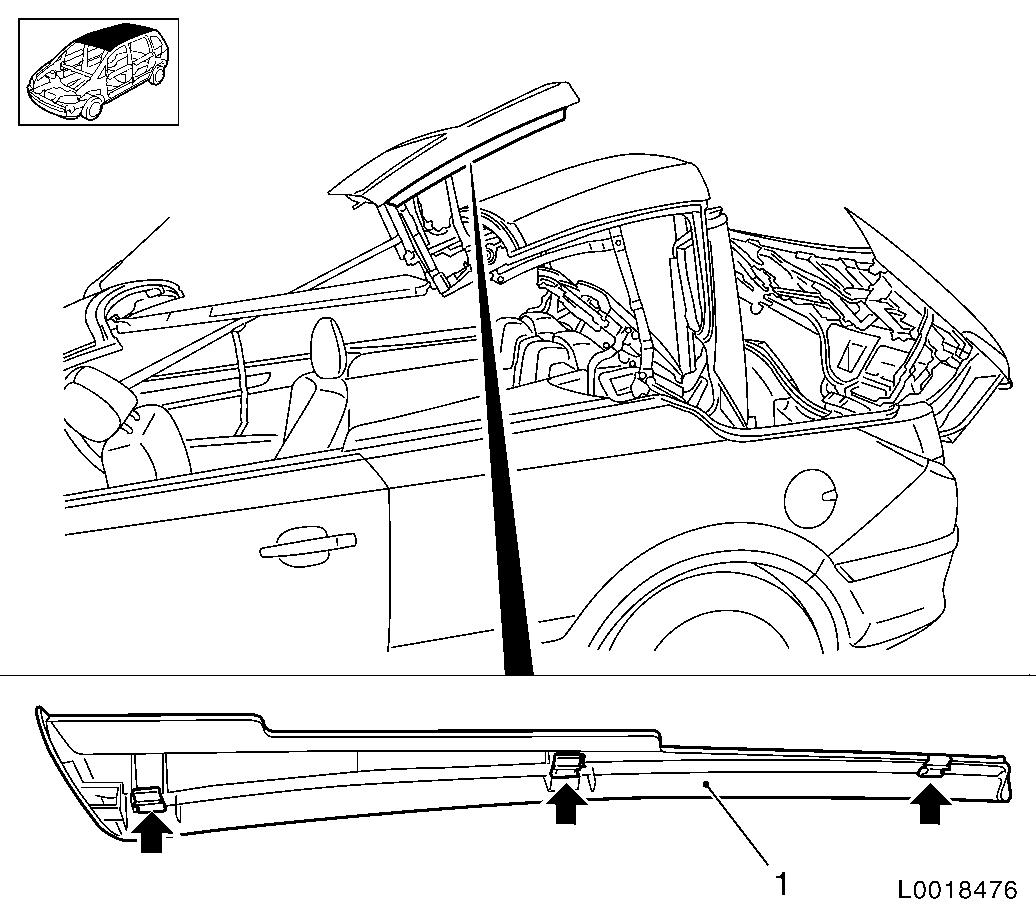
| 2. |
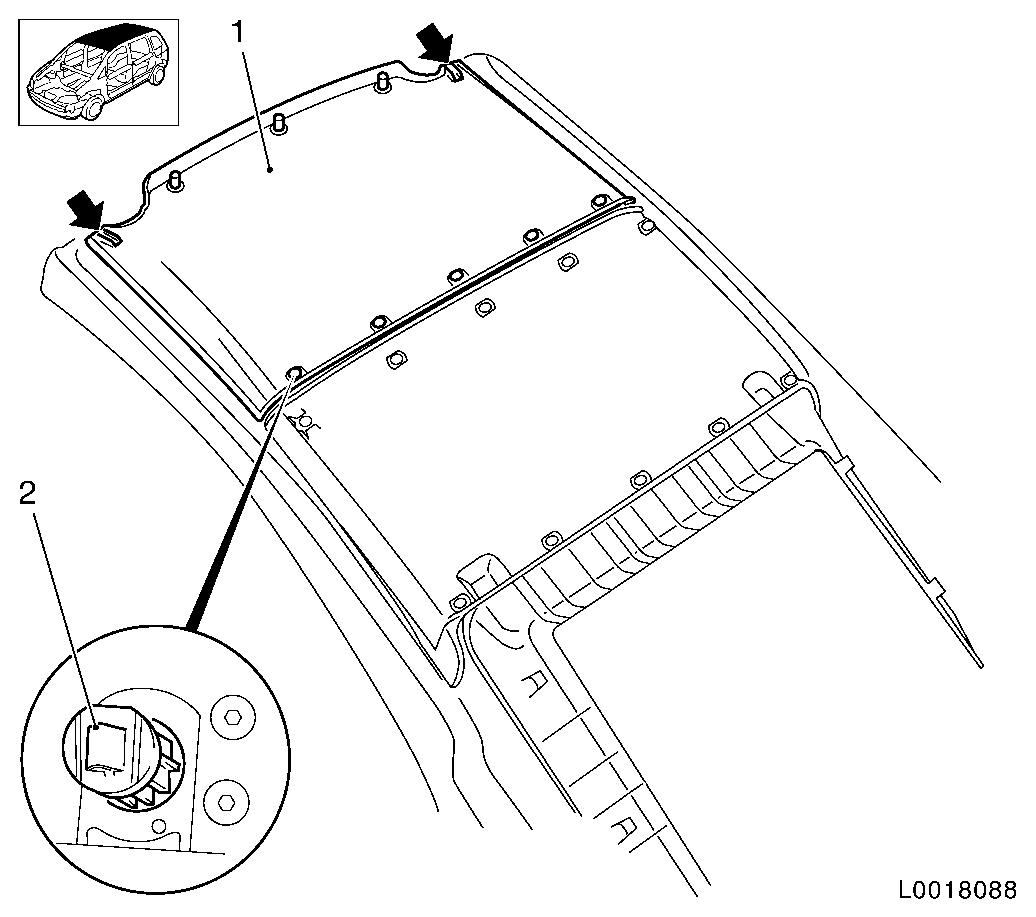
Remove moulded headlining (1)
| • |
Open velcro 2x (arrows)
|
|
|
|
| 3. |
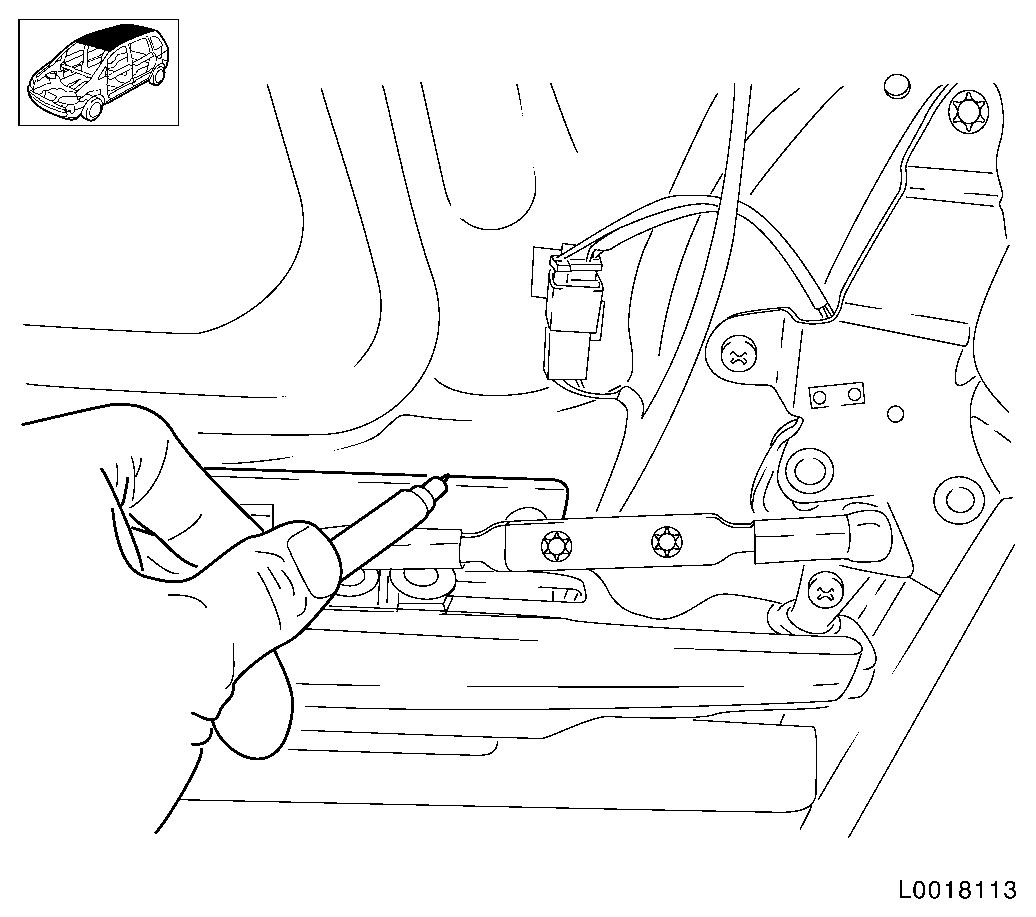
Mark position of front folding roof
| • |
Mark position of the folding roof on both sides
|
|
|
|
| 4. |
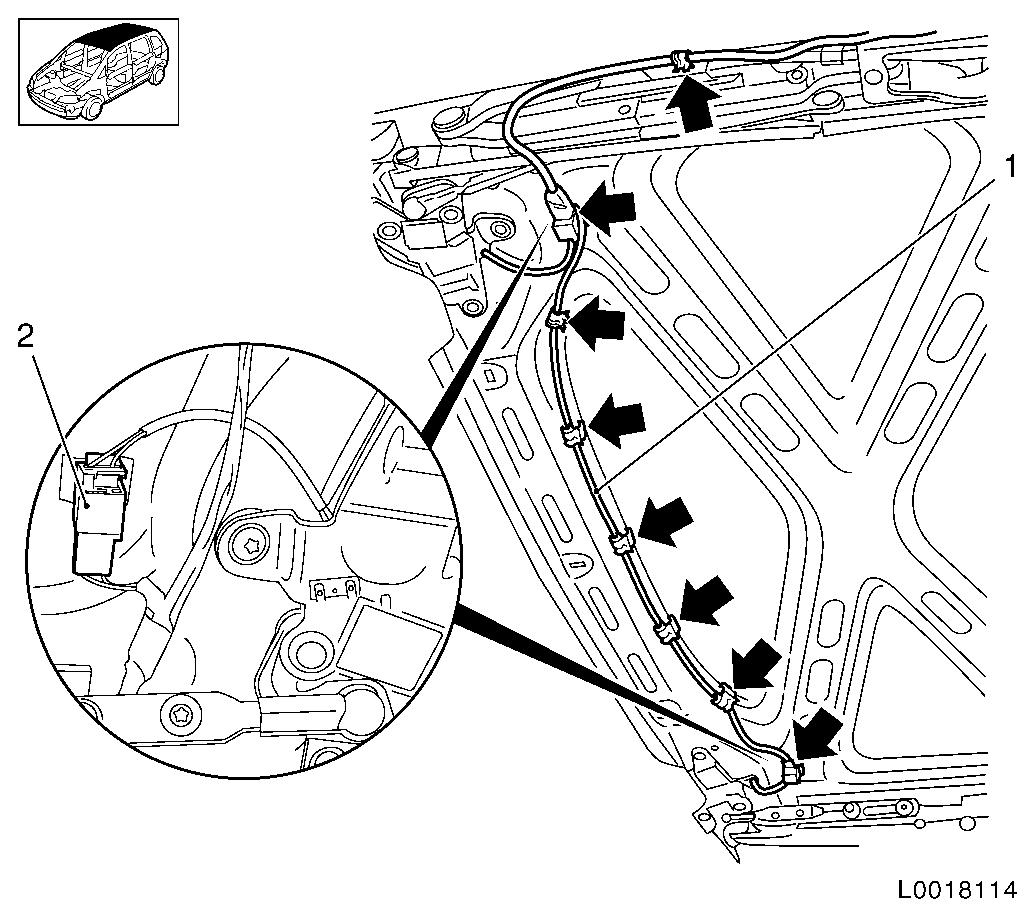
Detach wiring harness connecting plate (1)
| • |
Disconnect 2x wiring harness plugs (2)
|
|
|
|
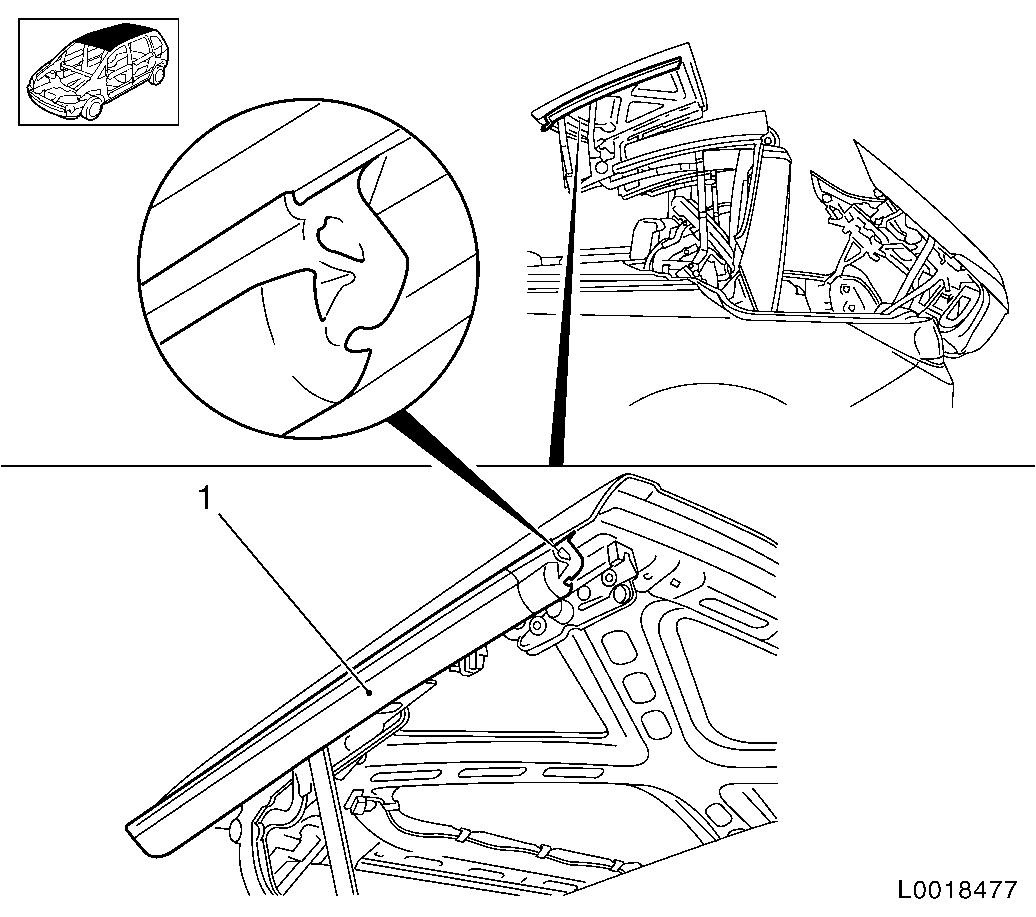
| 5. |
Detach front hinge panelling (1) - both sides
| • |
Detach 3x clamps (arrows)
|
|
|
|
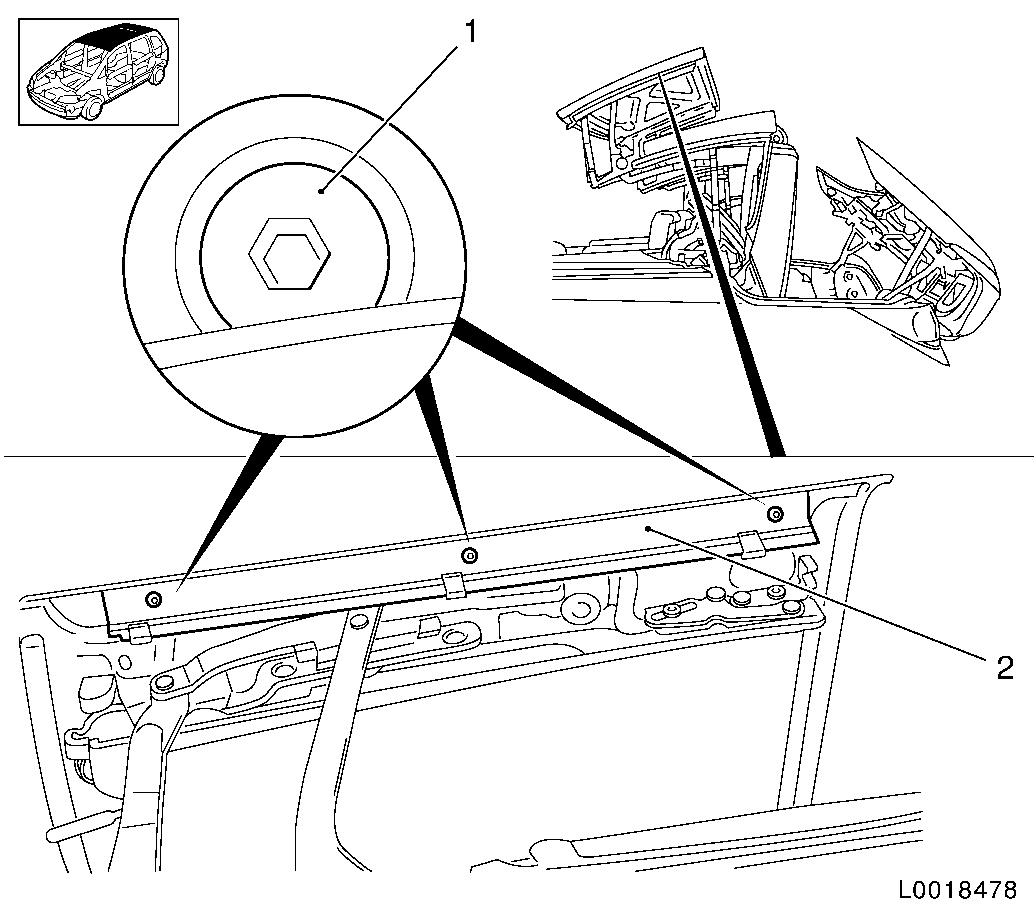
| 6. |
Attach seal (1) - both sides
|
|
|
| 7. |
Detach seal retainer (2) - both sides
|
|

|
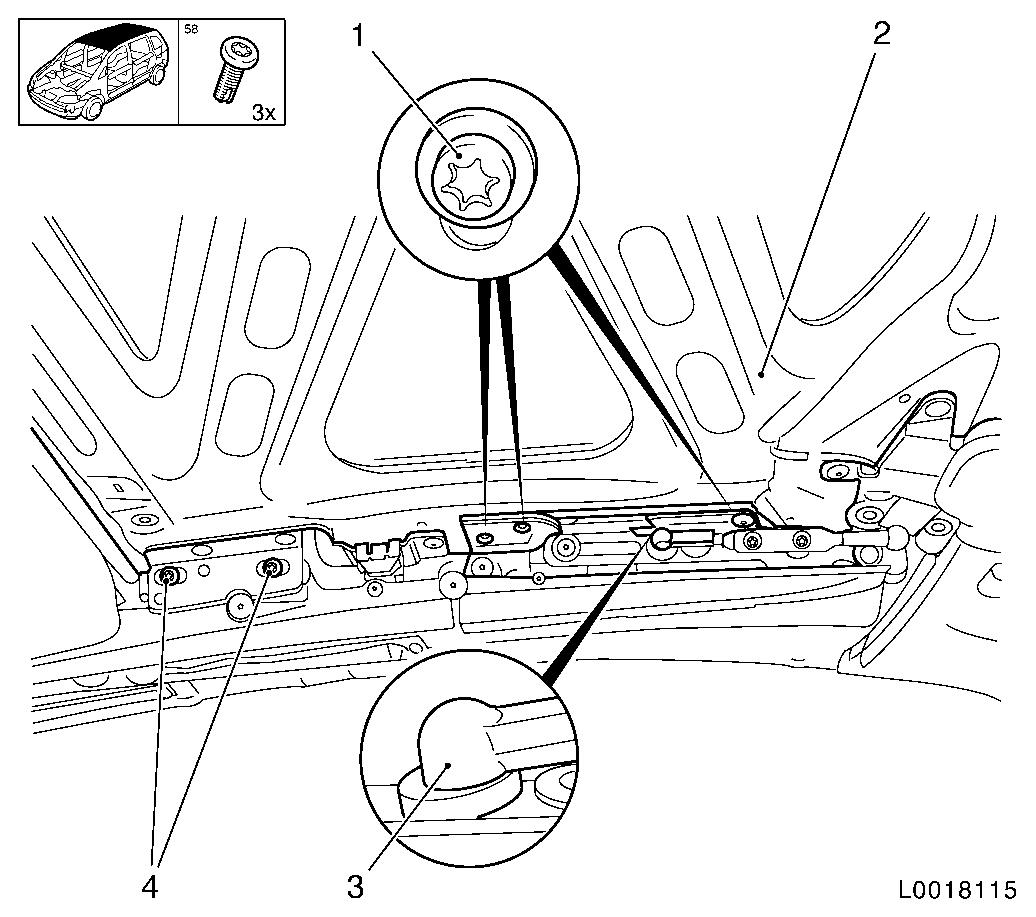
| 8. |
Attach retaining plate (1) - both sides
Note: Note the numbers
of shims in position.
Note: From MY2007,
plastic and steel washers are fitted instead of shims.
| • |
Unscrew 3x bolt (arrows)
|
|
|
|
| 9. |
Detach folding roof, front (2)
Note: Only the left
side is shown to improve the illustration.
| • |
Unclip 2x connecting rods (3)
|
| • |
Unscrew 4x centering pin retainer screws (4)
|
| • |
Unscrew 6x console (1) bolts
Note: Note the numbers
of shims in position.
|
|
| 10. |
Remove folding roof, front
Note: 2nd mechanic
required.
|
| 11. |
Detach various small parts
|
|
 Install
| 12. |
Attach various small parts
|
| 13. |
Attach left front lock
| • |
Tighten 3x bolts 13 Nm
Note: Note number of
shims in position. From MY2007, plastic and steel washers are
fitted instead of shims.
Note: Screws are
microencapsulated and must be replaced! Threads re-cut!
|
|
| 14. |
Attach right front lock
| • |
Tighten 3x bolts 13 Nm
Note: Note number of
shims in position. As of MY2007, plastic and steel washers are
fitted instead of shims.
Note: Screws are
microencapsulated and must be replaced! Threads re-cut!
|
|
| 15. |
Attach seal seat, right
|
| 16. |
Attach seal, right
| • |
Insert seal from rear, beginning in guide
Note: Pay attention to
installation position
|
|
| 17. |
Attach front right hinge panelling
|
| 18. |
Attach seal seat, left
|
| 19. |
Attach left seal
| • |
Insert seal from rear, beginning in guide
Note: Pay attention to
installation position
|
|
| 20. |
Attach front left hinge panelling
|
| 21. |
Insert folding roof
Note: 2nd mechanic
required.
Pay attention to marks
|
| 22. |
Attach folding roof
Note: Screws are
microencapsulated and must be replaced! Threads re-cut!
| • |
Tighten 6x console bolts 13 Nm
|
| • |
Tighten centering pin retainer 4x screws 9 Nm
|
| • |
Clip 2x connecting rods
|
|
| 23. |
Attach front lock cable harness
| • |
Connect 2x wiring harness plugs
|
|
| 24. |
Close folding top
| • |
Remove special tool BO-47651-200
|
|
| 25. |
Adjust steel cover if needed
|
| 26. |
Attach front moulded headlining
|
|
|
04 Body & interior
