
Installation
- Make
- Aston Martin
- Model
- DB9 Factory Workshop Manual
- Year
- Issue 2, 2005
- Section
- Glass, Frame and Mechanism › Installation
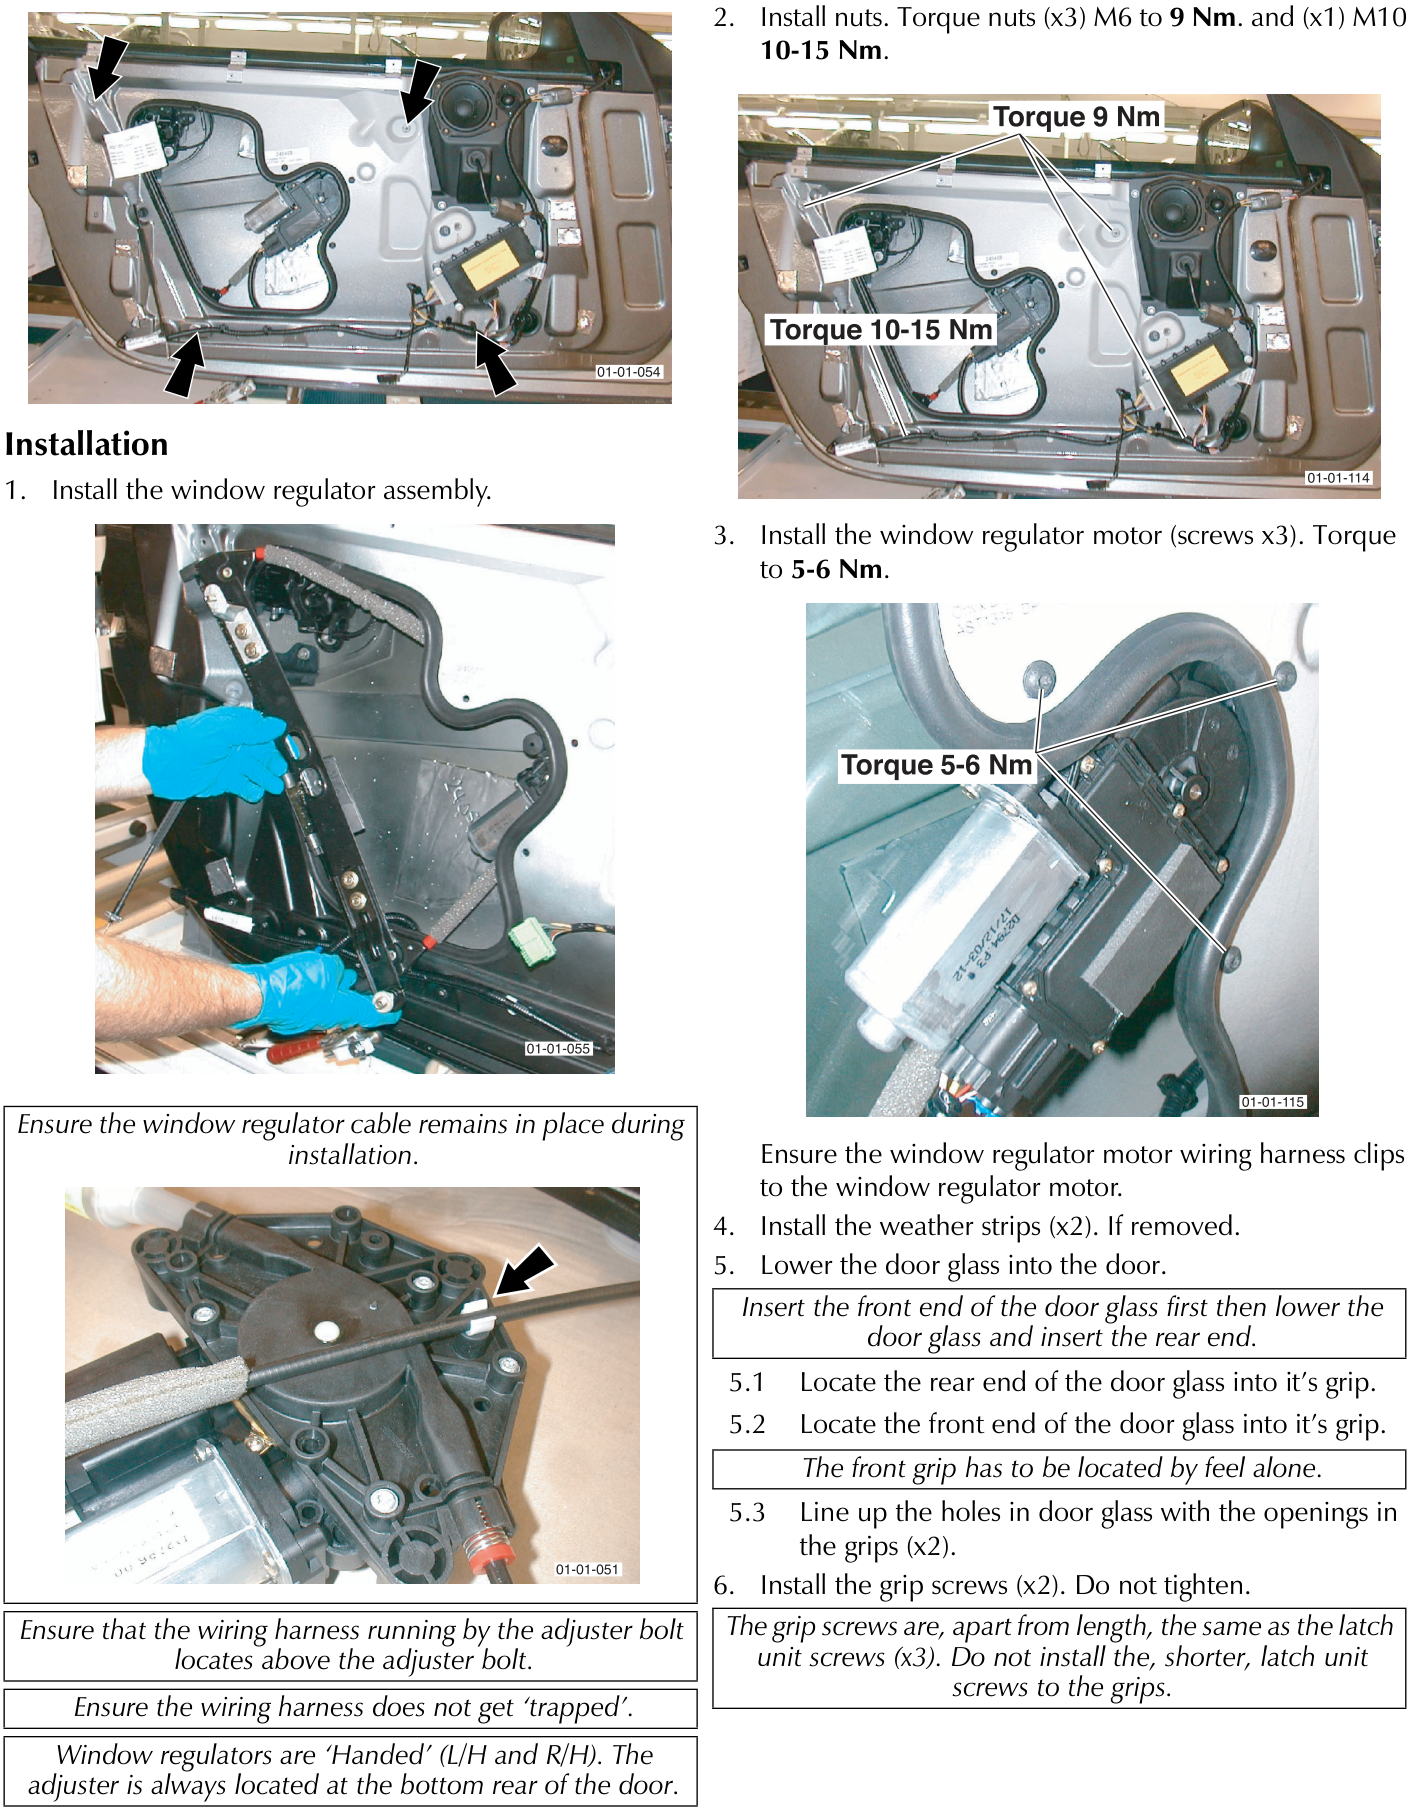
Installation
- Install the window regulator assembly.
Ensure the window regulator cable remains in place during installation.
Ensure that the wiring harness running by the adjuster bolt locates above the adjuster bolt.
Ensure the wiring harness does not get ‘trapped’.
Window regulators are ‘Handed’ (L/H and R/H). The adjuster is always located at the bottom rear of the door.
Place the window regulator unit into position and locate the four mountings through the door inner skin.
- Install nuts. Torque nuts (x3) M6 to 9 Nm. and (x1) M10 10-15 Nm.
- Install the window regulator motor (screws x3). Torque to 5-6 Nm.
Ensure the window regulator motor wiring harness clips to the window regulator motor.
- Install the weather strips (x2). If removed.
- Lower the door glass into the door.
Insert the front end of the door glass first then lower the door glass and insert the rear end.
- Locate the rear end of the door glass into it’s grip.
- Locate the front end of the door glass into it’s grip.
The front grip has to be located by feel alone.
- Line up the holes in door glass with the openings in the grips (x2).
- Install the grip screws (x2). Do not tighten.
The grip screws are, apart from length, the same as the latch unit screws (x3). Do not install the, shorter, latch unit screws to the grips.
Parts & tools for this job For 2005 Aston Martin DB9
- TOOLTrim removal tool kitSearch: trim removal tool kit
- PARTTouch-up paintSearch: Aston Martin touch up paint
- PARTPanel clip assortmentSearch: Aston Martin panel clips assortment
Links open Amazon search results in a new tab. As an Amazon Associate I earn from qualifying purchases.