
16. Manual Gearbox Only.
- Make
- Aston Martin
- Model
- DB9 Factory Workshop Manual
- Year
- Issue 2, 2005
- Section
- Instrument Panel (IP) › 16. Manual Gearbox Only.
01 Body system16. Manual Gearbox Only.
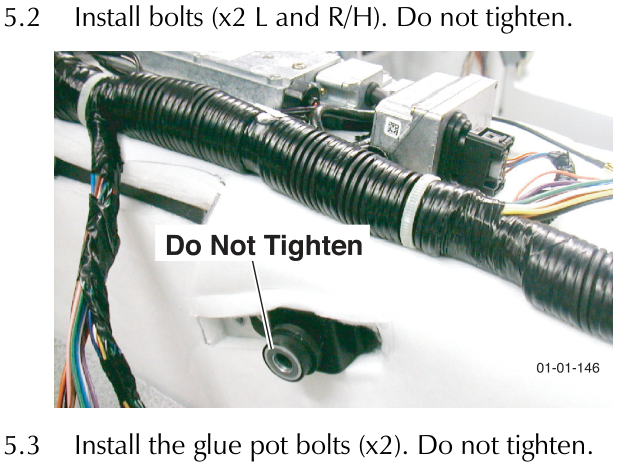
5.3 Install the glue pot bolts (x2). Do not tighten.
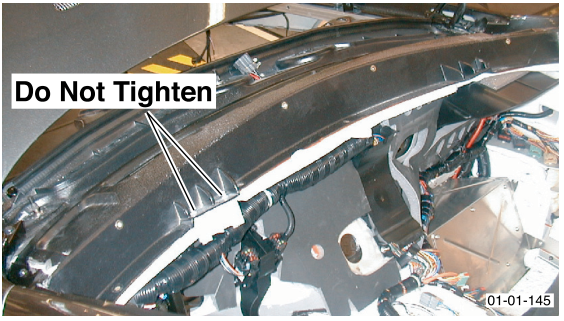
- Torque the bolts in the following order.
- Bolts (x6 (L and R/H)).
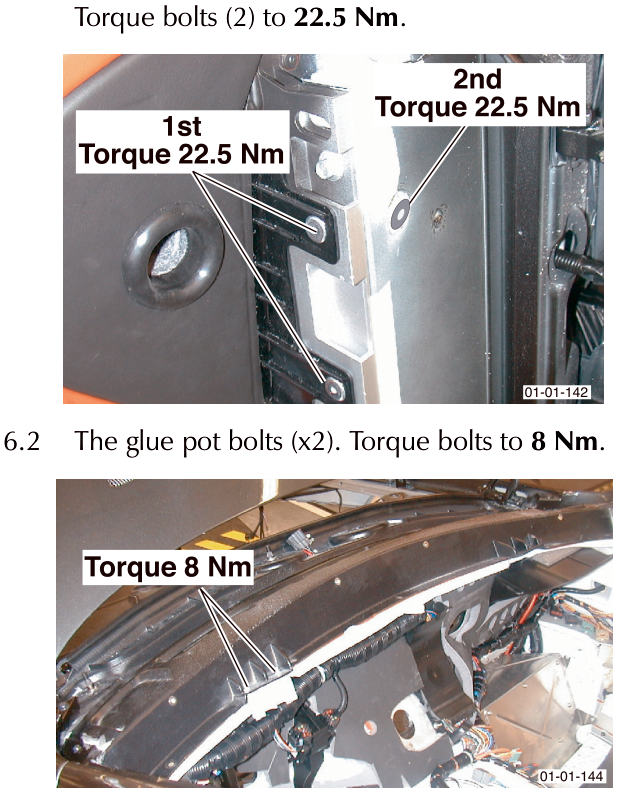
Torque bolts (1) to 22.5 Nm
6.2 The glue pot bolts (x2). Torque bolts to 8 Nm.
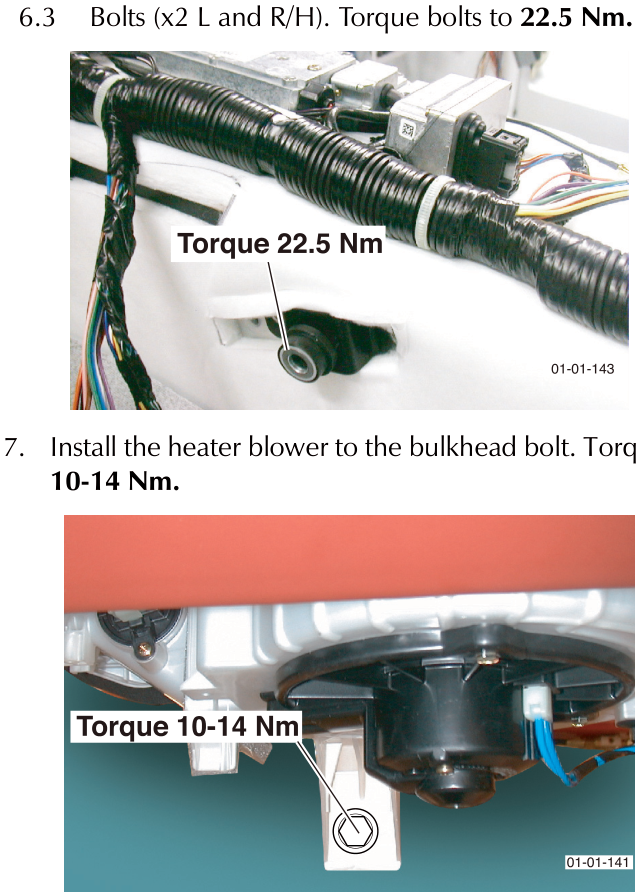
Bolts (x2 L and R/H). Torque bolts to 22.5 Nm.
- Install the heater blower to the bulkhead bolt. Torque to 10-14 Nm.
- Connect the wiring harness plugs.
If removed, install the bonnet pull lever.
- Install screws (x3 each) that secure the window defrost air ducts.
- Engage clips (x3) for each window defrost air duct vent panel.
- Install the steering column (Refer to ‘Steering Column’, page 11-3-1).
Note the steering rack to steering column position from removal.
- Install the cant rail (Refer to ‘Roof Trim’, page 1-4-2).
- Connect the A/C pipes.
- Install the fusebox mounting bracket, fusebox and fusebox wiring harness blocks.
- Install the rear trim (Refer to ‘Rear Trim’, page 1-4-5), front carpets and centre arm rest.
16. Manual Gearbox Only.
Install the gear-lever.
- Install the road wheel arch liner.
- Install the road wheels (Refer to ‘Road Wheel Nut Torque Tightening’, page 4-5-7).
- Install the seats (Refer to ‘Seating (01.10)’, page 1-7-1).
- Install the doors (Refer to ‘Body Closures (01.03)’, page 1-3-1).
- Connect the vehicle battery.
- Charge the A/C system (Refer to ‘Air Conditioning (A/C) System (12.03)’, page 12-3-1).
Parts & tools for this job For 2005 Aston Martin DB9
- PARTClutch kitSearch: Aston Martin DB9 2005 clutch kit
- TOOLClutch alignment toolSearch: clutch alignment tool
- FLUIDGear oilSearch: Aston Martin DB9 manual gearbox oil
Links open Amazon search results in a new tab. As an Amazon Associate I earn from qualifying purchases.