
Installation
- Make
- Aston Martin
- Model
- DB9 Factory Workshop Manual
- Year
- Issue 2, 2005
- Section
- Instrument Panel (IP) › Installation
01 Body systemInstallation
To prevent the screws falling down the air ducts - place a rag / cloth into the air ducts.
- Glue pot bolts (x2).
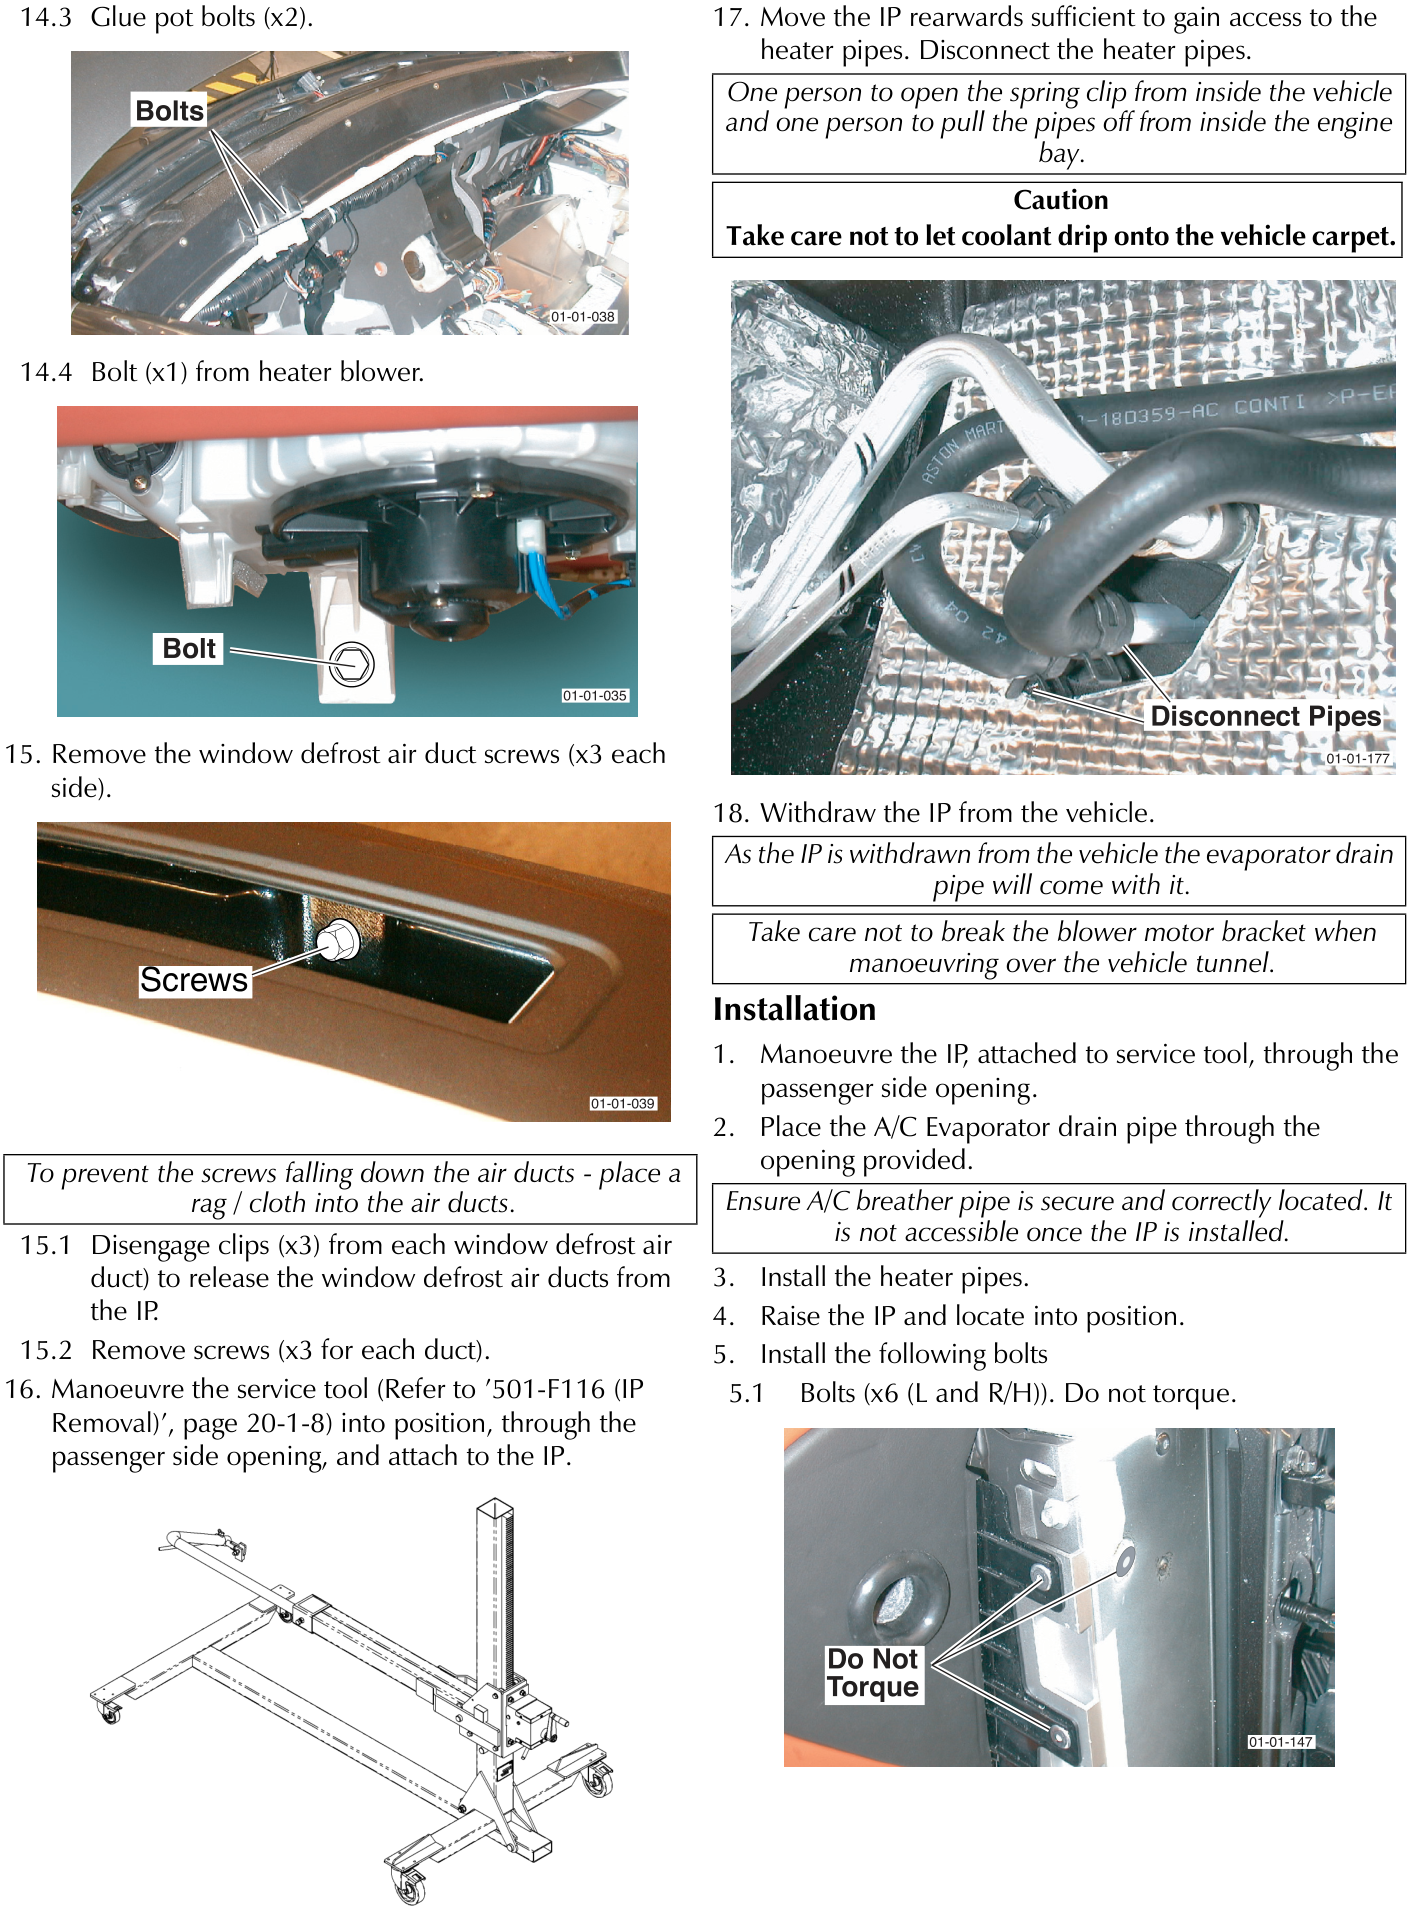
- Bolt (x1) from heater blower.
- Remove the window defrost air duct screws (x3 each side).
- Disengage clips (x3) from each window defrost air duct) to release the window defrost air ducts from the IP
- Remove screws (x3 for each duct).
- Manoeuvre the service tool (Refer to '501-F116 (IP Removal)', page 20-1-8) into position, through the passenger side opening, and attach to the IP.
- Move the IP rearwards sufficient to gain access to the heater pipes. Disconnect the heater pipes.
One person to open the spring clip from inside the vehicle and one person to pull the pipes off from inside the engine bay.
Caution
Take care not to let coolant drip onto the vehicle carpet.
- Withdraw the IP from the vehicle.
As the IP is withdrawn from the vehicle the evaporator drain pipe will come with it.
Take care not to break the blower motor bracket when manoeuvring over the vehicle tunnel.
Installation
- Manoeuvre the IP, attached to service tool, through the passenger side opening.
- Place the A/C Evaporator drain pipe through the opening provided.
Ensure A/C breather pipe is secure and correctly located. It is not accessible once the IP is installed.
- Install the heater pipes.
- Raise the IP and locate into position.
- Install the following bolts
- Bolts (x6 (L and R/H)). Do not torque.
Parts & tools for this job For 2005 Aston Martin DB9
- TOOLTrim removal tool kitSearch: trim removal tool kit
- PARTTouch-up paintSearch: Aston Martin touch up paint
- PARTPanel clip assortmentSearch: Aston Martin panel clips assortment
Links open Amazon search results in a new tab. As an Amazon Associate I earn from qualifying purchases.