
Restraining Devices: Specifications
- Make
- Aston Martin
- Model
- DB9 Factory Workshop Manual
- Year
- Issue 2, 2005
- Section
- Restraining Devices › Specifications
01 Body systemSpecifications
Warning
Do not place any objects on the top of the deployable rollbar covers behind the rear seat backs.
Warning
Do not allow any person to sit on the deployable rollbar covers at any time.
Warning
If the roof is not stowed and the deployable rollbars deploy they will break through the rear glass.
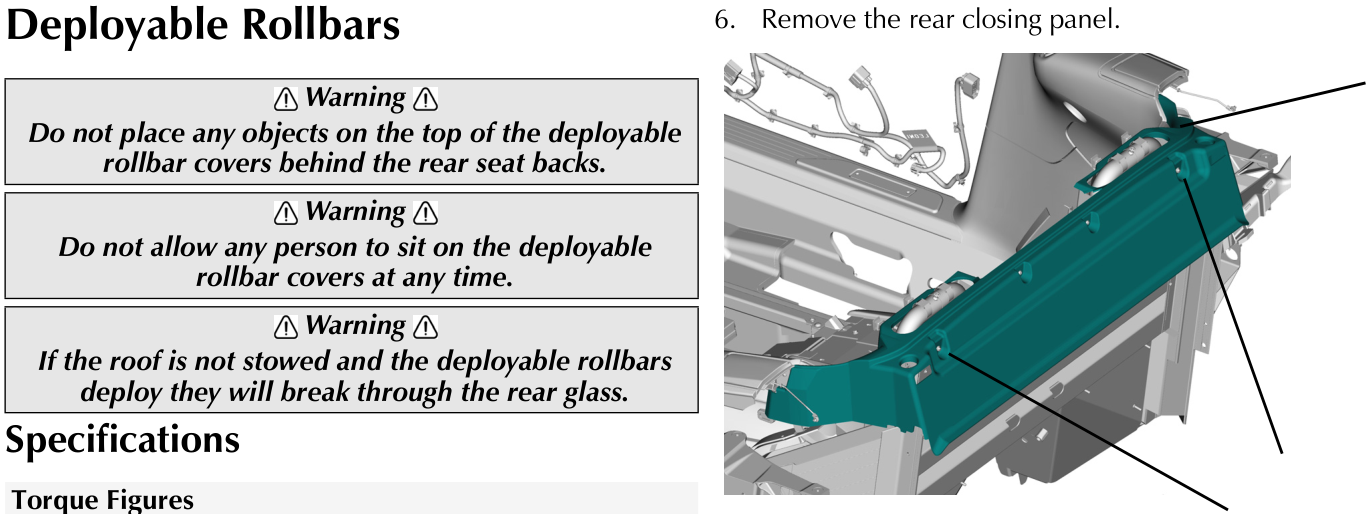
- Remove the rear closing panel.
Specifications
Torque Figures
| Description | Nm | lb. / ft. |
|---|---|---|
| Deployable Rollbar Unit | 20-30 | 15-22.5 |
| Deployable Rollbar Sensor Unit | TBA |
Maintenance
Rollbar Unit
Remove
- Disconnect the vehicle battery at the negative terminal and ensure the ignition key is removed.
Warning
Allow a two minute power down period before proceeding. This will ensure that there is no power to the deployable rollbar system.
Warning
Do not lean over the rollbars. If the rollbars deploy while someone is leaning over them, they will cause severe injury.
- Remove the rear seat bases and backs (Refer to 'Rear Seats', page 1-7-3).
- Remove the rollbar trim cover.
- LH Rollbar unit only.
Remove the rear centre console (Refer to 'Rear Trim', page 1-4-5).
To gain access to the LH ROPS unit wiring harness plug.
- Disconnect the wiring harness plug.
Image to follow
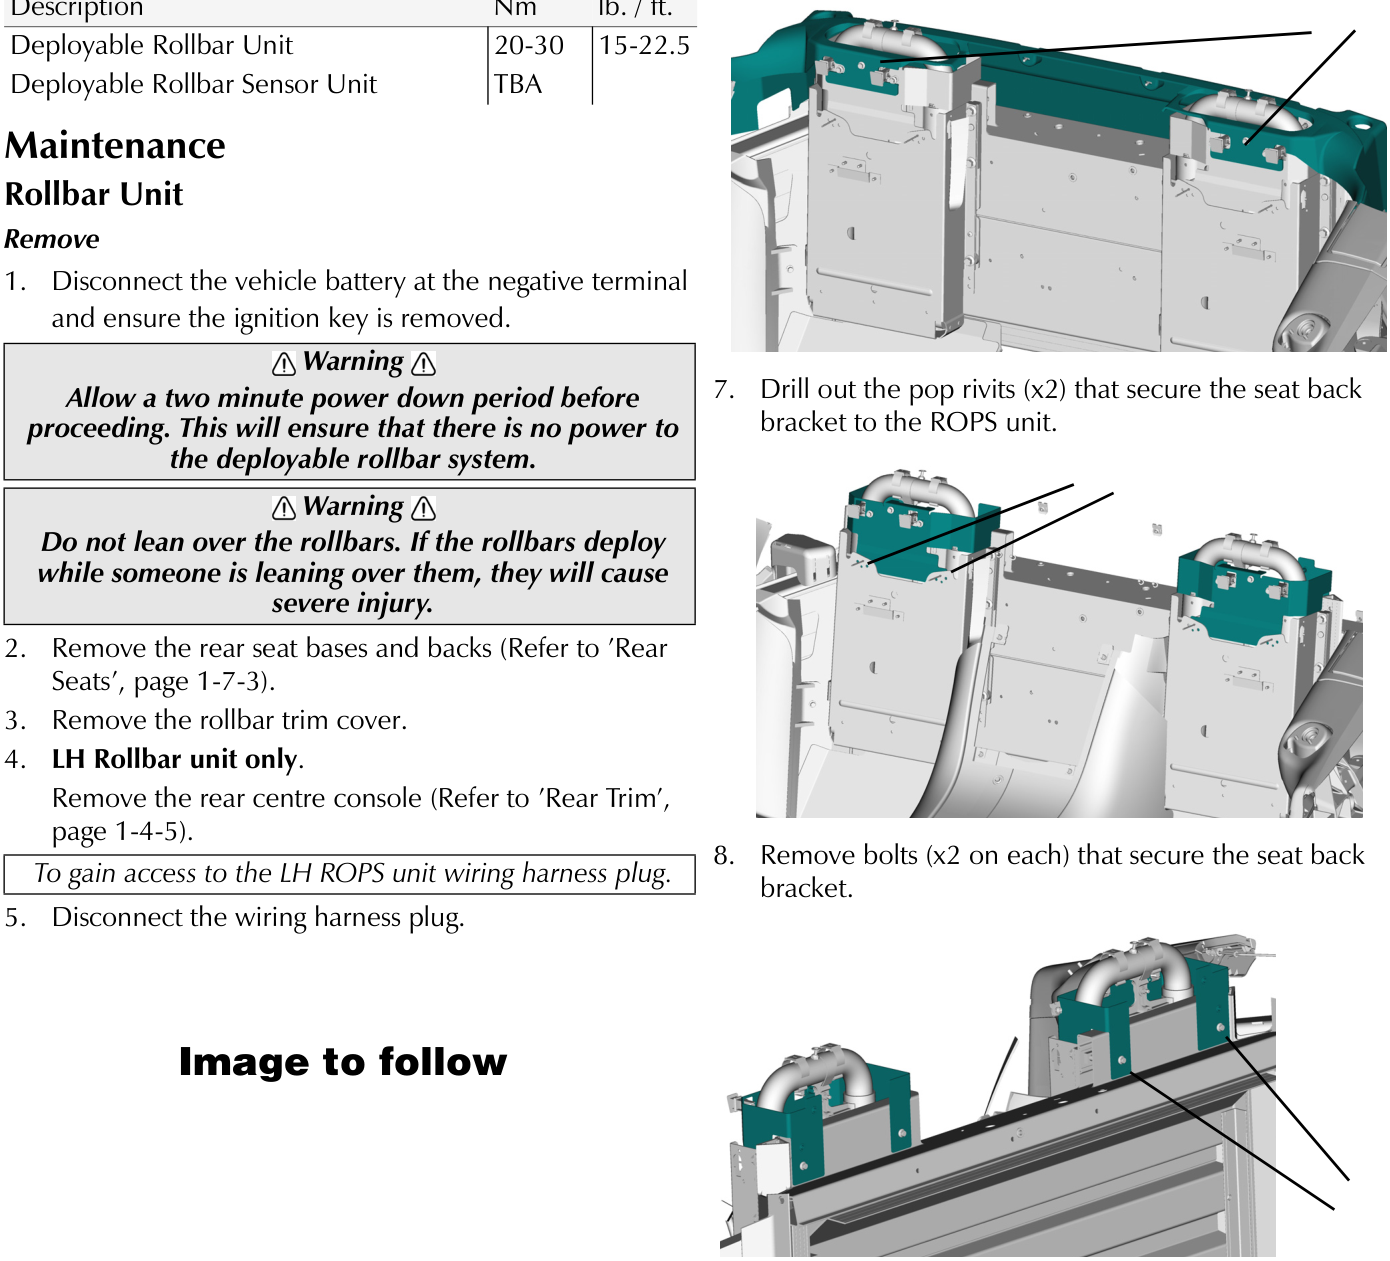
- Drill out the pop rivits (x2) that secure the seat back bracket to the ROPS unit.
- Remove bolts (x2 on each) that secure the seat back bracket.
Parts & tools for this job For 2005 Aston Martin DB9
- TOOLTrim removal tool kitSearch: trim removal tool kit
- PARTTouch-up paintSearch: Aston Martin touch up paint
- PARTPanel clip assortmentSearch: Aston Martin panel clips assortment
Links open Amazon search results in a new tab. As an Amazon Associate I earn from qualifying purchases.