
Installation
- Make
- Aston Martin
- Model
- DB9 Factory Workshop Manual
- Year
- Issue 2, 2005
- Section
- Engine Sealing › Installation
03 EngineInstallation
Remove bolts (x15) that secure the camshaft cover. Withdraw the camshaft cover. Discard all camshaft cover seals.
- Repeat from Step 1. for second camshaft cover.
Installation
- Apply a bead of sealant where indicated.
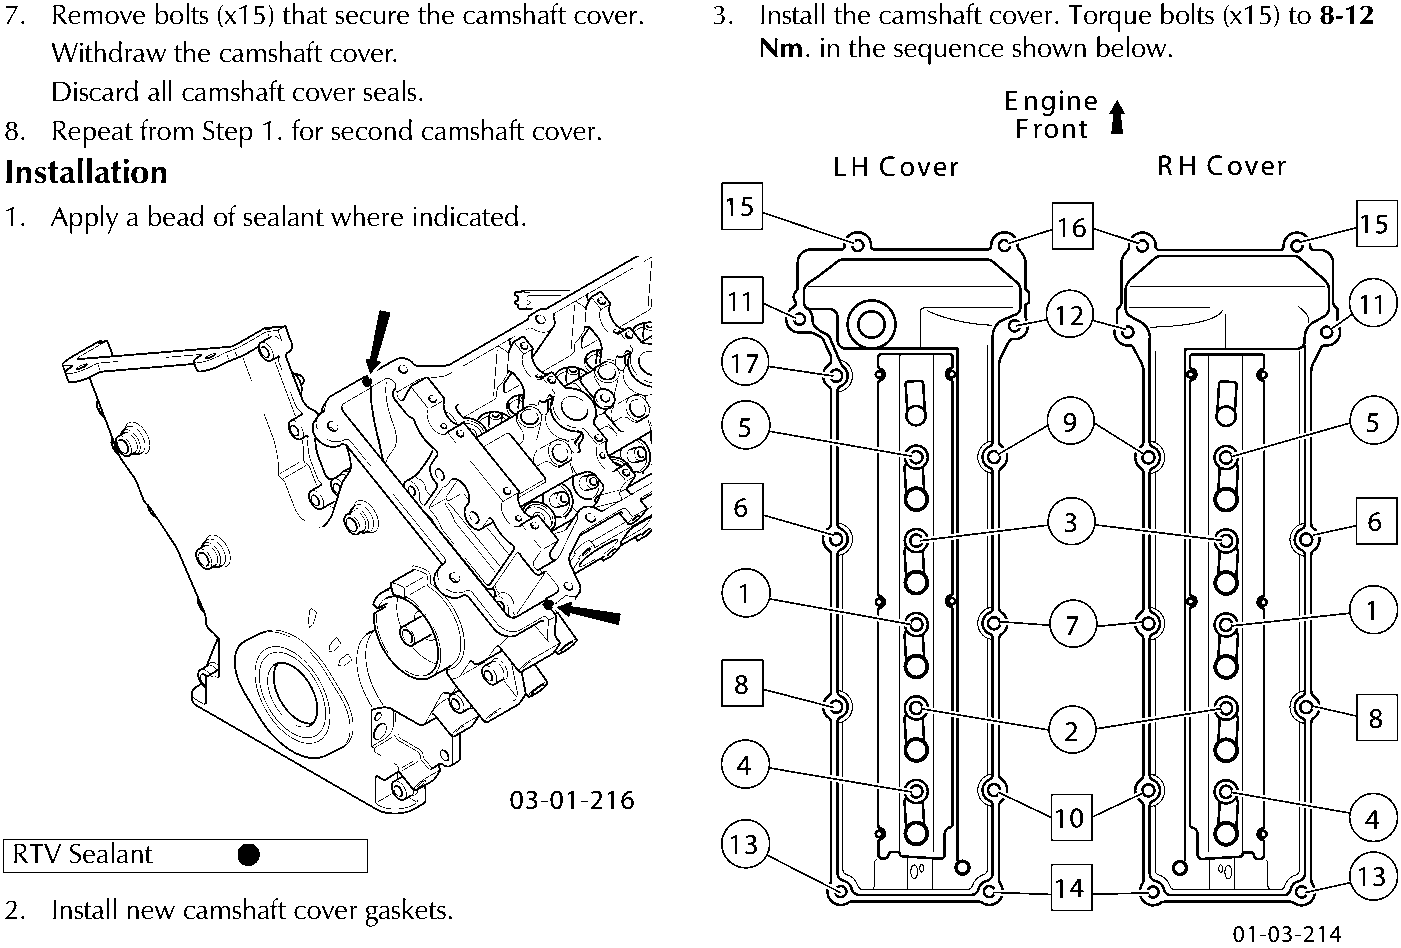
| RTV Sealant | ● |
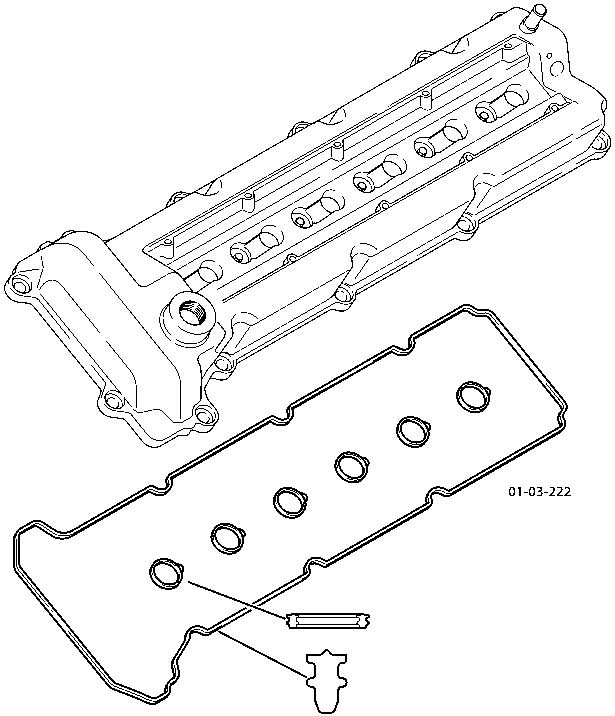
- Install new camshaft cover gaskets.
- Install the camshaft cover. Torque bolts (x15) to 8-12 Nm. in the sequence shown below.
- Place the wiring harness carrier and the electrical device over the camshaft studs. Torque bolts (x2) to 8-12 Nm.
- Install the rear suspension (Refer to 'Rear Suspension (04.02)', page 4-3-1).
- Install the ignition coils. Torque bolts to 5-7 Nm. Connect the ignition coils wiring harness plugs.
- Install the spark plug cover. Torque bolts to 2.5-3.5 Nm.
- Connect the camshaft cover ventilation pipe and camshaft sensor wiring harness plug.
- Install the inlet manifold (Refer to 'Inlet Manifold', page 3-2-7).
Parts & tools for this job For 2005 Aston Martin DB9
- PARTEngine gasket setSearch: Aston Martin DB9 2005 engine gasket set
- TOOLTorque wrenchSearch: 3/8 inch torque wrench
- TOOLFeeler gauge setSearch: feeler gauge set
Links open Amazon search results in a new tab. As an Amazon Associate I earn from qualifying purchases.