
Installation
- Make
- Aston Martin
- Model
- DB9 Factory Workshop Manual
- Year
- Issue 2, 2005
- Section
- Engine Sealing › Installation
03 EngineInstallation · page 1 of 2
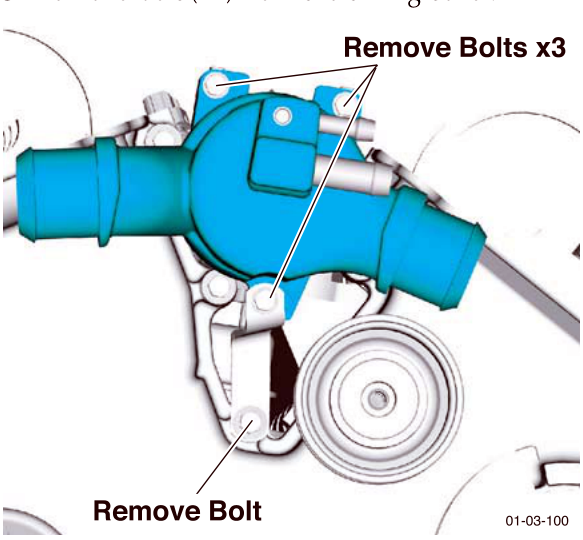
- Remove the thermostat housing.
- Remove hoses (x4).
- Remove bolts (x3).
- Remove bolt (x1) from the timing cover.
- Remove bolts (x2) securing the sump to the timing cover.
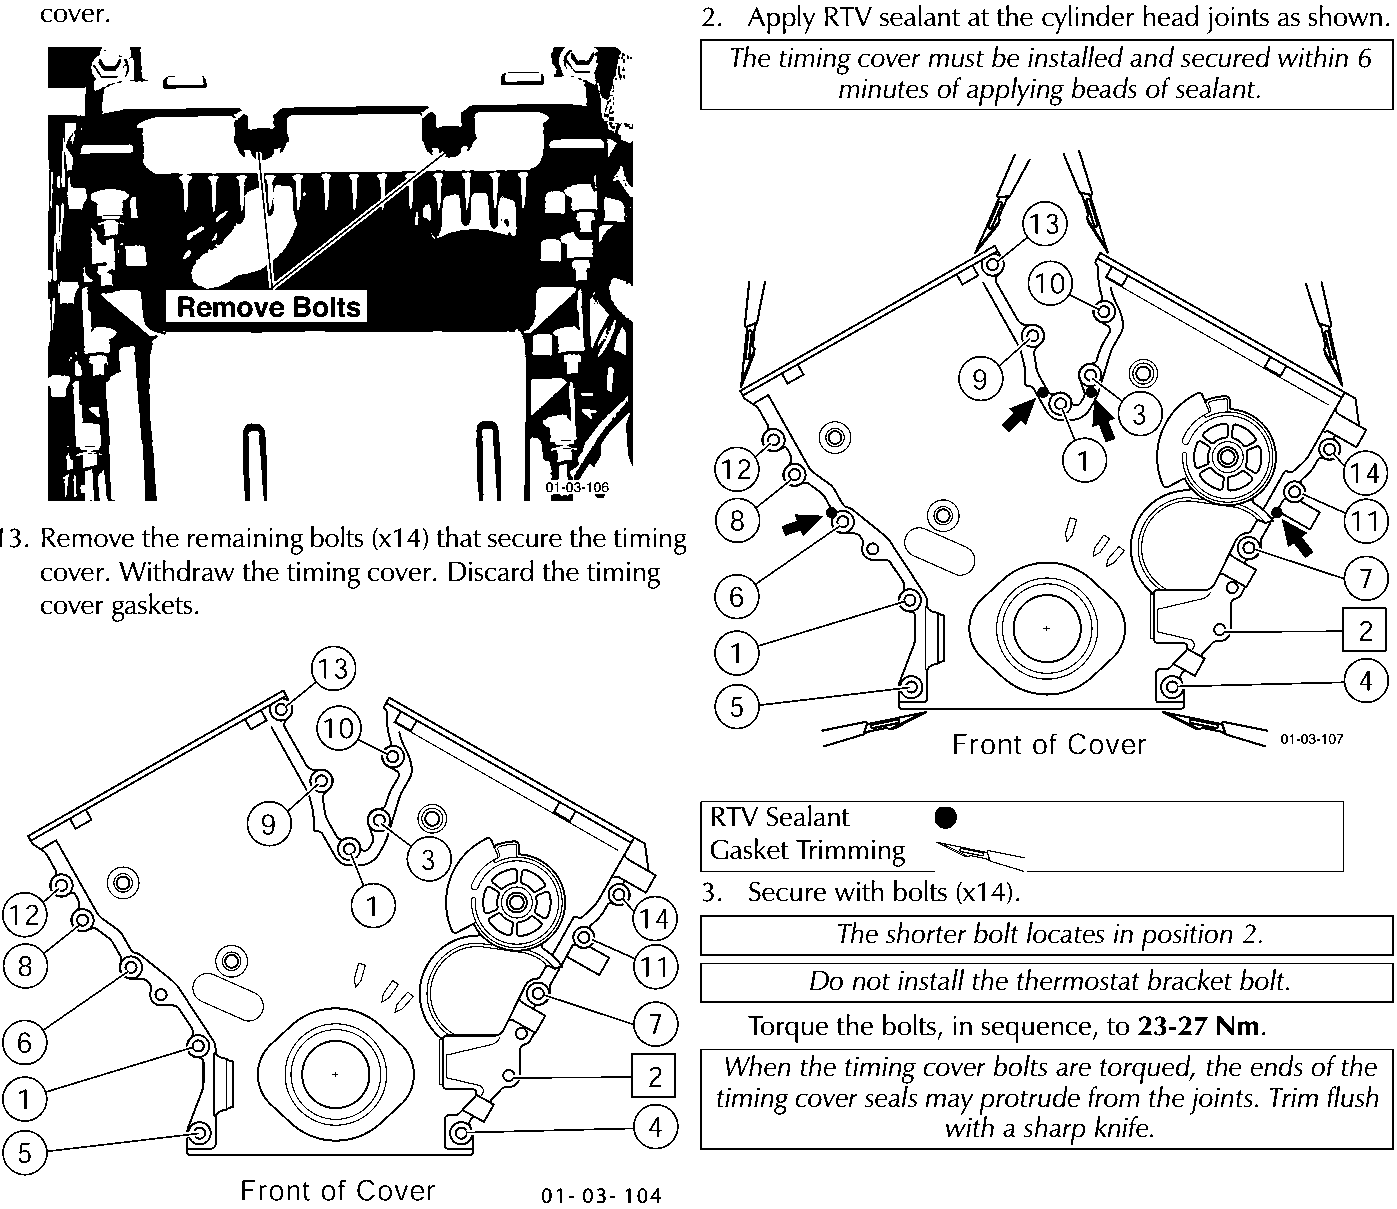
- Remove the remaining bolts (x14) that secure the timing cover. Withdraw the timing cover. Discard the timing cover gaskets.
Installation
- Ensure mating surfaces are clean and smooth. Install new timing cover seals.
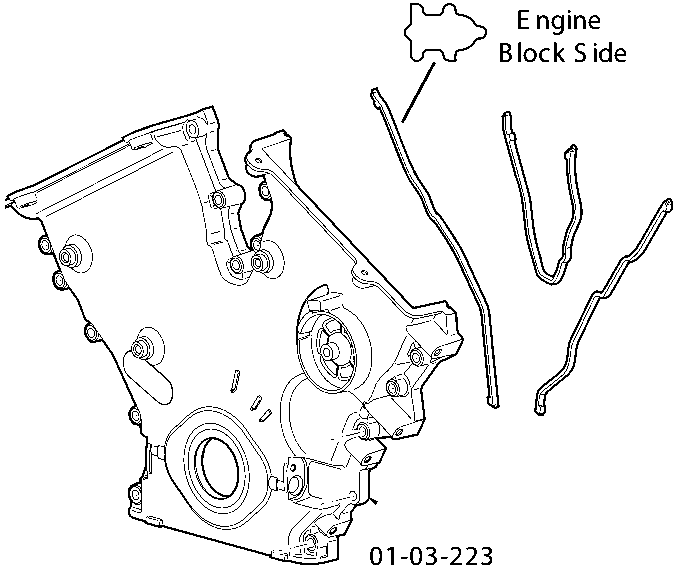
- Apply RTV sealant at the cylinder head joints as shown.
The timing cover must be installed and secured within 6 minutes of applying beads of sealant.
| RTV Sealant | ● |
|---|---|
| Gasket Trimming | [icon] |
| 3. Secure with bolts (x14). | |
| The shorter bolt locates in position 2. | |
| Do not install the thermostat bracket bolt. | |
| Torque the bolts, in sequence, to 23-27 Nm. | |
| When the timing cover bolts are torqued, the ends of the timing cover seals may protrude from the joints. Trim flush with a sharp knife. | |
Parts & tools for this job For 2005 Aston Martin DB9
- PARTEngine gasket setSearch: Aston Martin DB9 2005 engine gasket set
- TOOLTorque wrenchSearch: 3/8 inch torque wrench
- TOOLFeeler gauge setSearch: feeler gauge set
Links open Amazon search results in a new tab. As an Amazon Associate I earn from qualifying purchases.