
Removal
- Make
- Aston Martin
- Model
- DB9 Factory Workshop Manual
- Year
- Issue 2, 2005
- Section
- Engine Sealing › Removal
| Repair Operation Time (ROT) | |
|---|---|
| Item | Code |
| Crankshafts Rear Oil Seal | TBA |
Removal
- Automatic Gearbox Only
Remove the rear subframe complete with the transaxle (Refer to 'Rear Subframe', page 2-1-4).
- Manual Gearbox Only
Remove the transaxle (Refer to 'Manual Transmission (07.03)', page 7-3-1)
- Remove the torque tube (Refer to 'Torque Tube', page 5-1-2).
- Remove the flywheel (Refer to 'Flywheel', page 3-12-9).
- Using the service tools (Refer to 'TBA (Crankshaft Rear Oil Seal and Slinger Removal)', page 20-1-4) extract the oil seal slinger and oil seal from the oil seal retainer.
Details on removal procedure (Refer to 'Crankshaft Rear Oil Seal Remove (TBA)', page 20-1-11)
- Clean the oil seal recess and mating surface of the oil seal retainer. Clean the mating surfaces on the engine block and sump. Ensure all mating surfaces are oil free.
Installation
Caution
Throughout this procedure it is essential that all parts remain clean, free of dirt, grease and debris.
- Lubricate the seal recess and seal surface with engine oil.
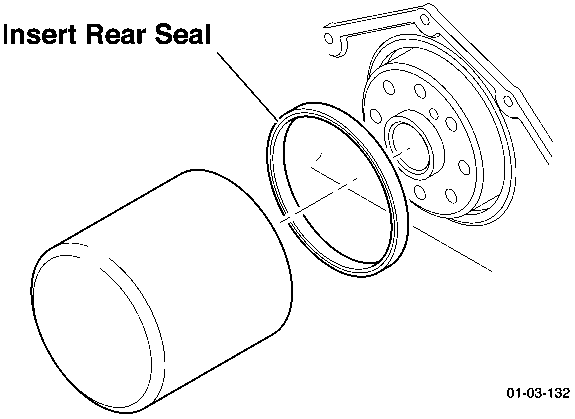
- Install the rear crankshaft oil seal (Refer to '303-664 (Crankshaft Rear Oil Seal Install)', page 20-1-5).
Spring side towards the engine
When the oil seal install tool has bottomed out on the oil seal housing the new oil seal has been installed to the correct depth.
Insert the seal ensuring it sits squarely into the retainer recess.
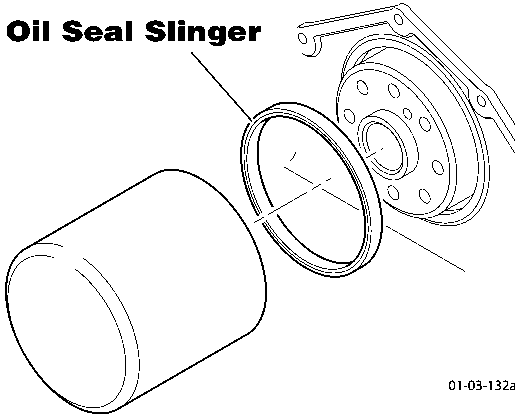
- Install the oil seal slinger (Refer to 'TBA (Crankshaft Rear Oil Seal Slinger Install)', page 20-1-4).
The oil seal slinger installs one way only on the oil seal slinger install tool.
When the oil seal install tool has bottomed out on the oil seal housing the new oil seal has been installed to the correct depth.
Insert the seal ensuring it sits squarely into the retainer recess.
- Install the flywheel (Refer to 'Flywheel', page 3-12-9).
- Install the torque tube (Refer to 'Torque Tube', page 5-1-2).
- Manual Gearbox Only
Install the transaxle (Refer to 'Manual Transmission (07.03)', page 7-3-1)
- Automatic Gearbox Only
Install the rear subframe complete with the transaxle (Refer to 'Rear Subframe', page 2-1-4).
Parts & tools for this job For 2005 Aston Martin DB9
- PARTEngine gasket setSearch: Aston Martin DB9 2005 engine gasket set
- TOOLTorque wrenchSearch: 3/8 inch torque wrench
- TOOLFeeler gauge setSearch: feeler gauge set
Links open Amazon search results in a new tab. As an Amazon Associate I earn from qualifying purchases.