| Removal and Installation Hot air gun Pneumatic knife with offset blade Interior auto glass cut - out knife kit Removal | | -
Disconnect the battery ground cable. | | | -
NOTE:Should the ambient temperature fall below 10°C, heat the cartridges for approximately 15 minutes by placing them on a warm radiator, or by using a hot air gun set at approximately 25°C. Heat the polyurethane (PU) adhesive if necessary. | | | -
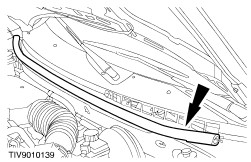
Remove the cowl panel weatherstrip. | | | -
Remove the windshield wipers. - Lift the wiper arm covers.
- Remove the wiper nuts.
- Remove the washers.
- Remove the wiper arms.
| | | -
Remove the cowl grille panel. | | | -
Remove the windshield side weatherstrips. | | | -
Remove the windshield top weatherstrip. | | | -
Remove the sun visor screws. | | | -
Remove the sun visor clip. - Detach the pin.
- Remove the clip.
| | | -
Detach the front of the headliner. - Place a small block of suitable material between the headliner and the roof to act as a spacer.
| | | -
Remove the rear view mirror. | | | -
WARNING:Wear gloves and eye protection when working with the glass cutting tool as the cutting operation may produce splinters. When using the cutter wear ear protectors. Failure to follow these instructions may result in personal injury. Cut around the windshield using the pneumatic knife with a 28 mm hooked blade. | | | -
Cut the bottom edge of the windshield using the pneumatic knife with a 60 mm hook blade. | | | -
WARNING:Wear gloves and eye protection when working with the glass cutting tool as the cutting operation may produce splinters. When using the cutter wear ear protectors. Failure to follow these instructions may result in personal injury. NOTE:Lubricate the PU adhesive where it meets the glass with EC7784 lubricant or equivalent (10:1 ratio of water to soap) to aid interior auto glass cut - out knife kit, when cutting the PU adhesive. NOTE:If the original heated windshield is to be reinstalled, make sure the cutter blade is kept low when cutting in the area of the heated windshield connectors. Use the interior auto glass cut - out knife to cut out the PU adhesive, using the four inch cutter blade on the top and the side edges of the windshield. | | | -
Cut the bottom edge of the windshield using auto glass cut - out knife fitted with the eight inch cutter blade. | | | -
Using suction pads and with the aid of another technician remove the windshield. | Installation | | -
CAUTION:Avoid touching the trimmed surface as this will inhibit the new adhesive from bonding. NOTE:If the original heated windshield is to be re - installed, remove the excess PU adhesive from the glass as described in step 14. Remove the excess PU adhesive from the opening. - Carefully trim the remaining PU adhesive from the windshield opening to leave approximately 1 mm of trimmed PU adhered to the bodywork.
| | | -
Check the pinch weld sealing area for damaged sheet metal, rust or foreign material which may have caused, or may cause, glass breakage. | | | -
NOTE:To make sure that the PU adhesive cures, it is essential that all bonding surfaces are free of all moisture. Using a hot air gun, apply warm air (25°C) to the windshield opening and glass bond line to remove all traces of moisture. | | | -
Prepare the glass, windshield opening and trimmed PU adhesive in accordance with the instructions supplied with the adhesive kit. | | | -
NOTE:Discard the first 100 mm of PU adhesive as this may have a reduced working time. NOTE:To avoid water leaks, any breakage in the continuous bead should be overlapped by 20 mm. Apply the PU adhesive in a continuous bead of between 8 and 10 mm height to the windshield flange along the bond line. | | | -
Using suction pads and with the aid of another technician install the windshield. | | | -
Should the ambient temperature fall below 10°C, use a hot air gun at a distance of approximately 50 mm from the substrate and apply warm air (25°C) continuously for 15 minutes (inside or outside the vehicle). | | | -
Install the rear view mirror. | | | -
Install the sun visor clip. - Install the clip.
- Push in the pin.
| | | -
Install the sun visor screws. | | | -
Install the windshield top weatherstrip. | | | -
Install the windshield side weatherstrip. | | | -
Install the cowl grille panel. | | | -
Install the windshield wipers. | | | -
Install the cowl grille panel weatherstrip. | | | -
Connect the battery ground cable. | | |