
Timing Belt: Diagrams (page 7 of 11)
- Make
- Honda
- Model
- Odyssey
- Engine
- L4-2.2L SOHC
- Year
- 1995
- Section
- Timing Belt
MaintenanceDiagrams · page 7 of 11
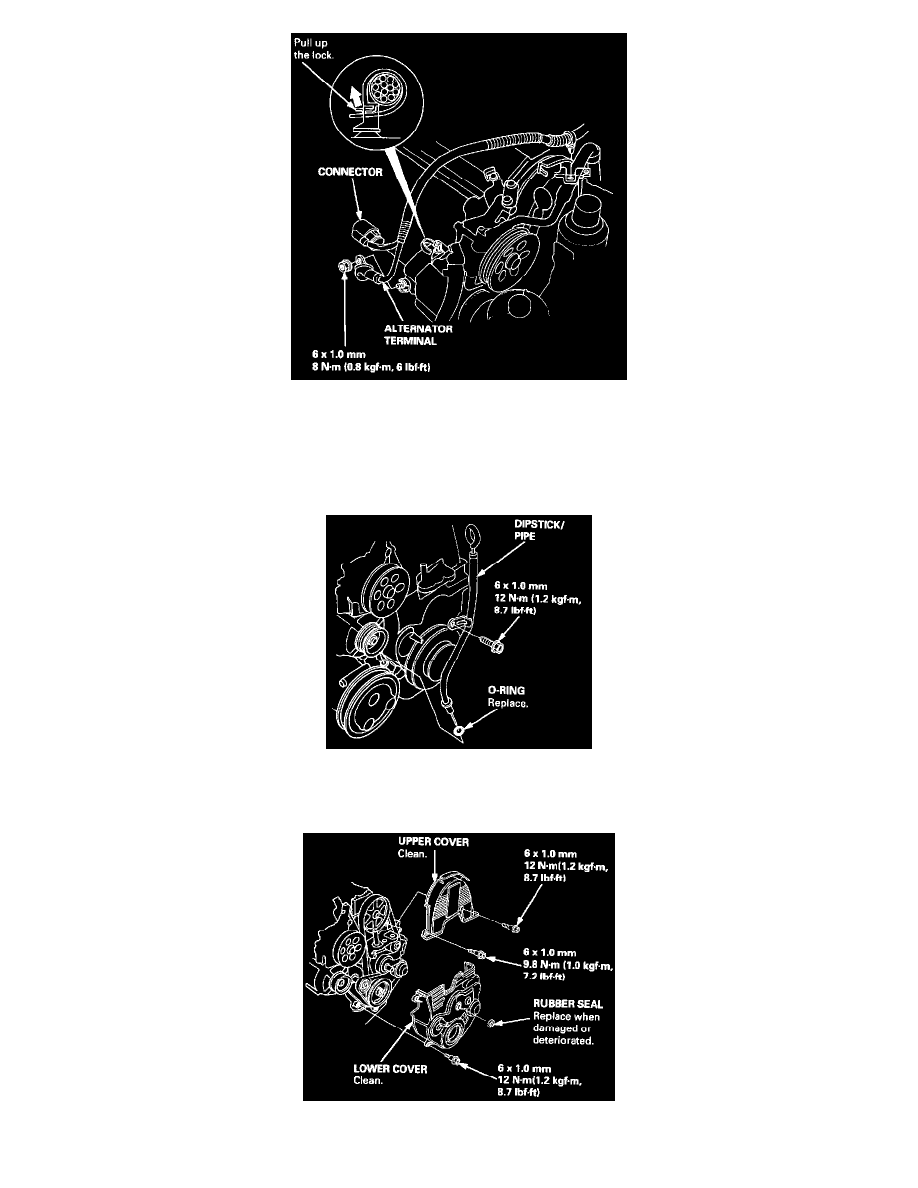
6. Remove the alternator terminal and connector.
7. Remove the side engine mount.
NOTE:
-
Use the jack to Support the engine before the side engine mount is removed.
-
Make sure to place a cushion between the oil pan and the jack.
8. Remove the dipstick and the pipe.
9. Remove the cylinder head cover.
10. Remove the pulley bolt and crankshaft pulley.
11. Remove the rubber seal from the adjusting nut, then remove the upper and lower covers.
Pinch or Ctrl + scroll to zoom. Double-tap to reset.
The same page in: Odyssey L4-2.2L SOHC (1995).
Parts & tools for this job For 1995 Honda Odyssey 2.2L
- PARTTiming belt kitSearch: Honda Odyssey 1995 2.2L timing belt kit
- TOOLEngine timing tool setSearch: Honda engine timing tool set
- TOOLTorque wrenchSearch: 3/8 inch torque wrench
Links open Amazon search results in a new tab. As an Amazon Associate I earn from qualifying purchases.