
Timing Belt: Diagrams (page 4 of 19)
- Make
- Hyundai
- Model
- Elantra
- Engine
- L4-2.0L
- Year
- 2004
- Section
- Timing Belt
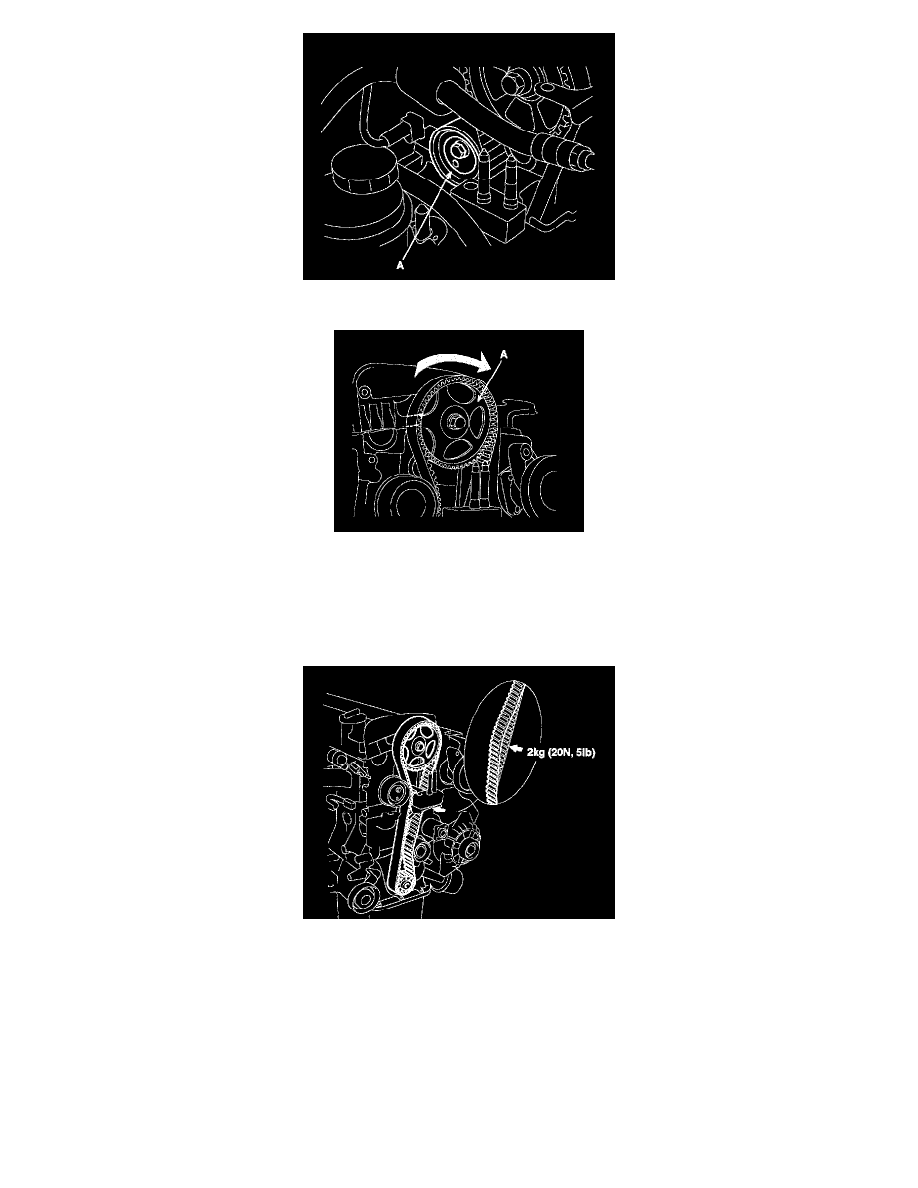
5. Temporarily loosen tensioner pulley (A) by center bolt.
6. Timing belt tension adjusting
1. Rotate crankshaft in regular direction (clockwise view from front) through angle equivalent to two teeth (18°) of camshaft sprocket (A).
2. Give tension to timing belt rotating tensioner in arrow direction tool and set timing belt not to give slack to tension side.
3. Tightening tensioner bolt.
Tightening torque
Tensioner bolt: 43 - 55 Nm (430 - 550 kgf-cm, 32 - 40 ft. lbs.)
4. Recheck the belt tension, When the tension side of timing belt is pushed horizontally with a moderate force [approximately 2 kg (20 N, 5
lbs.)], the timing belt cog end segs in approximately 4 - 6 mm (0.16 - 0.24 inch)
7. Turn the crankshaft two turns in the operating direction (clockwise) and realign crankshaft sprocket and camshaft sprocket timing mark.
Pinch or Ctrl + scroll to zoom. Double-tap to reset.
The same page in: Elantra L4-2.0L (2004).
Parts & tools for this job For 2004 Hyundai Elantra 2.0L
- PARTTiming belt kitSearch: Hyundai Elantra 2004 2.0L timing belt kit
- TOOLEngine timing tool setSearch: Hyundai engine timing tool set
- TOOLTorque wrenchSearch: 3/8 inch torque wrench
Links open Amazon search results in a new tab. As an Amazon Associate I earn from qualifying purchases.