
Latch assembly - rear squab - RH
- Make
- Land Rover
- Model
- Freelander Body Repair Manual
- Year
- 1998 on
- Section
- Seats and seat belts › Latch assembly - rear squab - RH
BodyLatch assembly - rear squab - RH
LATCH ASSEMBLY - REAR SQUAB - RH
Service repair no - 78.80.05
Remove
- Remove rear seat squab cover. See this section.
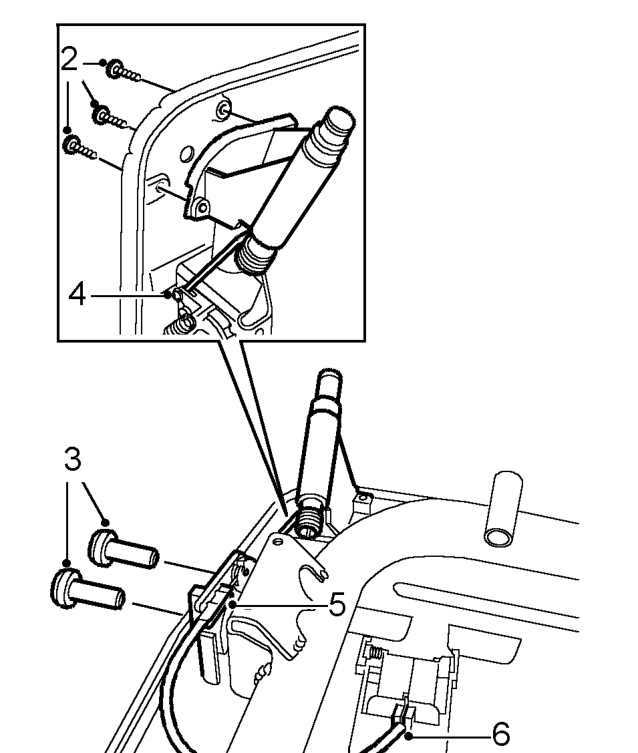
- Remove 3 screws from lock button.
- Remove 2 Torx screws from squab lock.
- Release lock button from lock.
- Release cable from abutment and remove from lock.
- Release cable from lever abutment and remove from lever.
Refit
- Position cable to lever and locate in abutment.
- Fit cable to lock and locate in abutment.
- Fit lock button to lock.
- Fit Torx screws to squab lock.
- Fit screws to lock button.
- Fit squab cover. See this section.
LATCH ASSEMBLY - REAR SQUAB - LH
Service repair no - 78.80.16
Remove
- Remove rear seat squab cover. See this section.
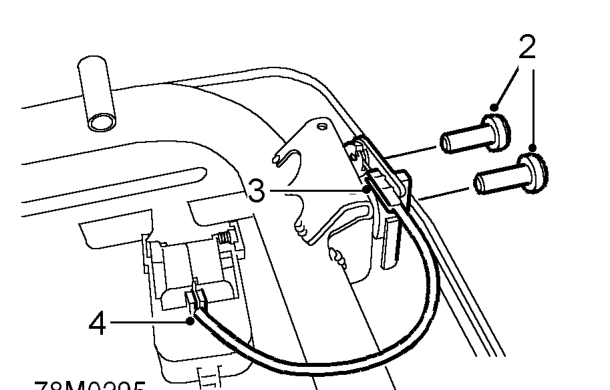
- Remove 2 Torx screws from squab lock.
- Release cable from abutment and remove from lock.
- Release cable from lever abutment and remove from lever.
Refit
- Position cable to lever and locate in abutment.
- Fit cable to lock and locate in abutment.
- Fit and tighten Torx screws to lock.
- Fit squab cover. See this section.
Parts & tools for this job For 1998 Land Rover Freelander
- TOOLOBD2 scanner with SRSSearch: OBD2 scanner ABS SRS
- TOOLTrim removal tool kitSearch: trim removal tool kit
Links open Amazon search results in a new tab. As an Amazon Associate I earn from qualifying purchases.