
Washer tube (page 2 of 2)
- Make
- Mini
- Model
- Mini Workshop Manual
- Year
- 1996–2000
- Section
- Repairs
Wipers & washersWasher tube · page 2 of 2
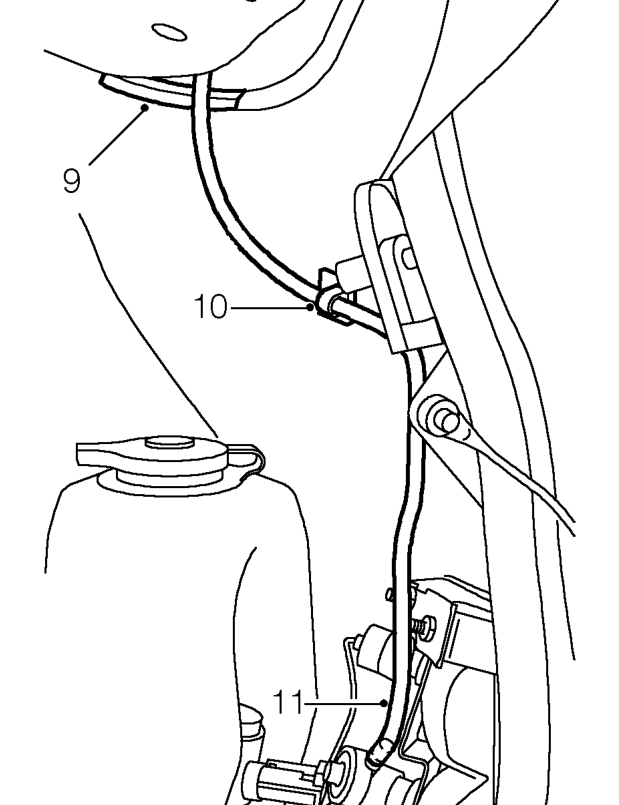
- Remove foam strip from between body panels in boot.
- Release washer tube from clip on body.
- Disconnect washer tube from one-way. valve.
- Pull tube through body into boot space.
- Remove tape securing draw string to washer tube.
- Remove washer tube.
Refit
- Measure and cut new length of washer tube.
- Attach washer tube to draw string and secure with tape.
- Using assistance feed/draw washer tube through body.
- Remove tape securing draw string to washer tube and remove draw string.
- Connect washer tube to one-way valve.
- Secure washer tube to clip on body and fit foam strip between body panels.
- Pass tube through grommet in bulkhead into engine compartment.
- Secure sound deadening pad to bulkhead.
- Fit air vent tube.
- Fit air vent to fascia and secure with locking ring.
- Secure sound deadening pad to bulkhead underbonnet.
- Connect washer tube to ’T’ connector.
- Top up washer reservoir.
Parts & tools for this job For 1996 Mini Mini
- PARTWiper bladesSearch: Mini Mini 1996 wiper blades
- PARTWasher pumpSearch: Mini Mini 1996 washer pump
Links open Amazon search results in a new tab. As an Amazon Associate I earn from qualifying purchases.