
Wiper arm (page 2 of 2)
- Make
- Mini
- Model
- Mini Workshop Manual
- Year
- 1996–2000
- Section
- Repairs
Wipers & washersWiper arm · page 2 of 2
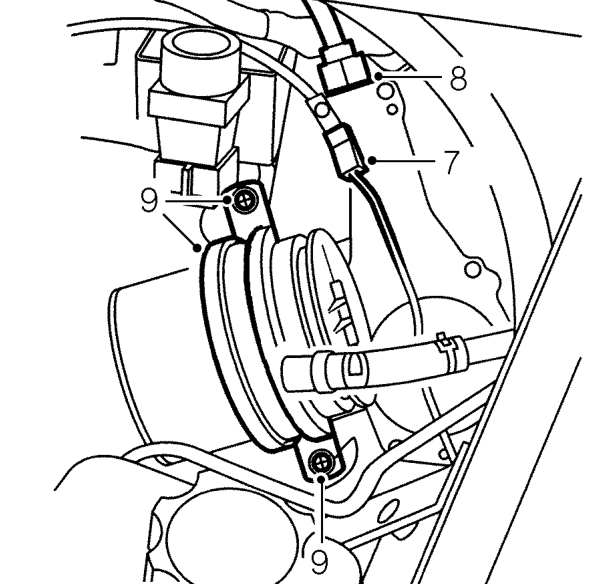
- Disconnect earth lead from wiper motor.
- Loosen nut securing cable rack tube to wiper motor.
- Remove 2 screws securing wiper motor calmp to body and remove clamp.
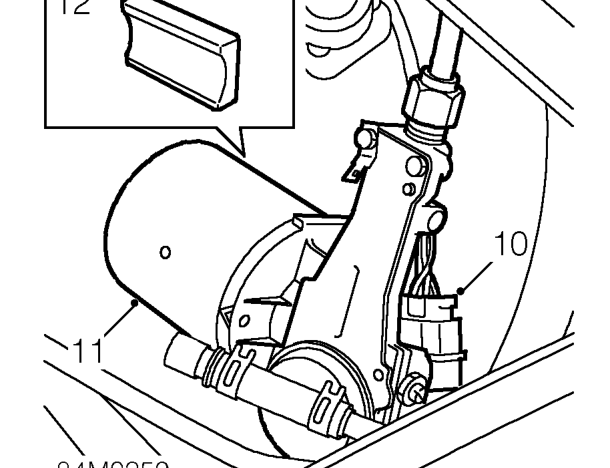
- Disconnect multiplug from wiper motor.
- Remove wiper motor complete with cable rack.
- Collect wiper motor mounting pad.
Do not carry out further dismantling if component is removed for access only.
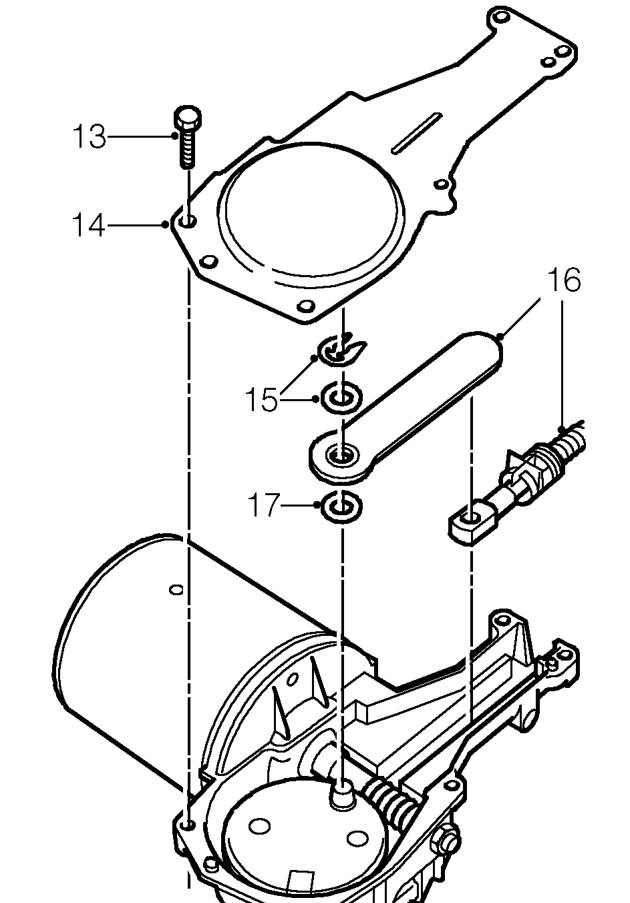
- Remove 4 bolts securing cover to wiper motor gearbox.
- Remove cover from wiper motor gearbox. Note position of earth lead lug.
- Remove circlip and washer securing cable rack connecting rod to wiper motor crank.
- Remove connecting rod and cable rack assembly.
- Collect flat washer from under cable rack connecting rod.
- Fit flat washer to wiper motor crank.
- Fit cable rack connecting rod to wiper motor crank and secure with flat washer and circlip.
- Position cover and earth lead lug to wiper motor gearbox and secure with screws.
Parts & tools for this job For 1996 Mini Mini
- PARTWiper bladesSearch: Mini Mini 1996 wiper blades
- PARTWasher pumpSearch: Mini Mini 1996 washer pump
Links open Amazon search results in a new tab. As an Amazon Associate I earn from qualifying purchases.