
Primary bearing
- Make
- Rover
- Model
- 200 Workshop Manual
- Year
- 1995–1999
- Section
- Repairs › Primary bearing
Automatic gearboxPrimary bearing · page 1 of 4
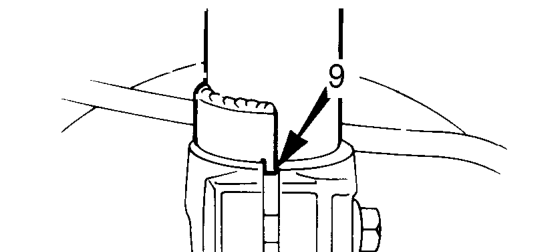
- Connect front hub to front damper. Ensure locating lug on damper engages in slot on hub.
- Locate front hub on suspension lower arm ball joint.
- Fit castellated nut securing hub to suspension lower arm and tighten to 55 Nm, then align next slot in nut with split pin hole.
- Secure castellated nut with new split pin.
- Fit pinch bolt securing damper to front hub and tighten to 80 Nm.
- Fit brake caliper to front hub.
- Fit 2 bolts and washer securing brake caliper to front hub and tighten to 108 Nm.
- Models with ABS: Fit ABS sensor to front hub, fit Torx bolt and tighten to 10 Nm.
- Align brake hose bracket to front damper , fit bolt and tighten to 10 Nm.
- Connect steering rack track rod end to front hub, fit nut and tighten to 45 Nm.
- Fit road wheel(s) and tighten nuts to correct torque. See INFORMATION, Torque wrench settings.
- Remove container positioned to collect gearbox fluid.
- Connect multiplug to starter inhibitor/reverse switch.
- Remove stand(s) and lower vehicle.
- Top-up gearbox fluid. See AUTOMATIC GEARBOX - ’CVT’, Adjustments.
PRIMARY BEARING
Service repair no - 44.36.14
Remove
- Remove air cleaner. See ENGINE MANAGEMENT SYSTEM - MEMS, Repairs.
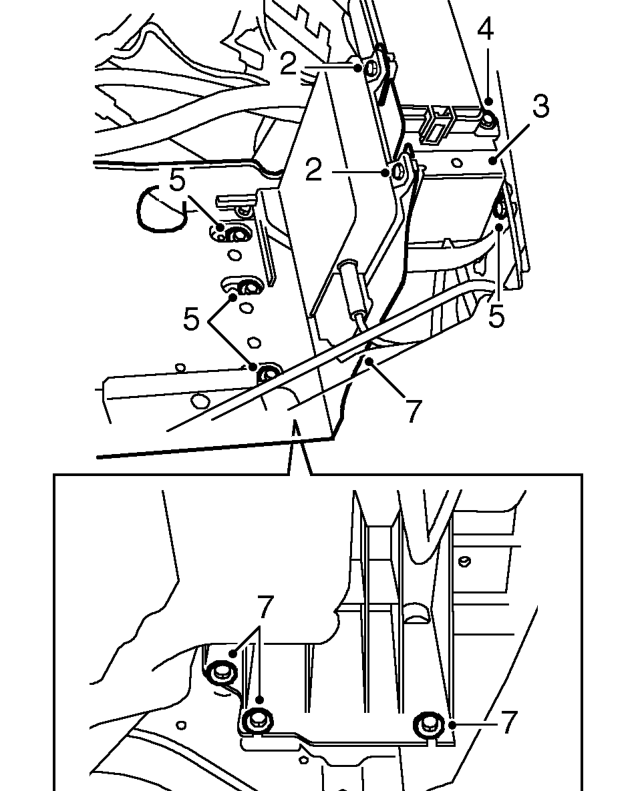
- Loosen 2 bolts and release engine management ECM from battery tray and move aside.
- Release relay module and ABS fuse holder from battery tray and move aside.
- Remove bolt securing engine compartment fuse box to battery tray.
- Remove 4 bolts securing battery tray to body.
- Remove bolt securing engine compartment fuse box to body and move fuse box aside.
- Loosen 3 bolts securing battery tray to body and remove battery tray.
Parts & tools for this job For 1995 Rover 200
- PARTTransmission filter kitSearch: Rover 200 1995 transmission filter kit
- FLUIDAutomatic transmission fluidSearch: Rover automatic transmission fluid
- TOOLFluid transfer pumpSearch: fluid transfer pump
Links open Amazon search results in a new tab. As an Amazon Associate I earn from qualifying purchases.