
Windscreen (page 4 of 5)
- Make
- Rover
- Model
- 400 Body Repair Manual
- Year
- 1995–2000
- Section
- Screens
BodyWindscreen · page 4 of 5
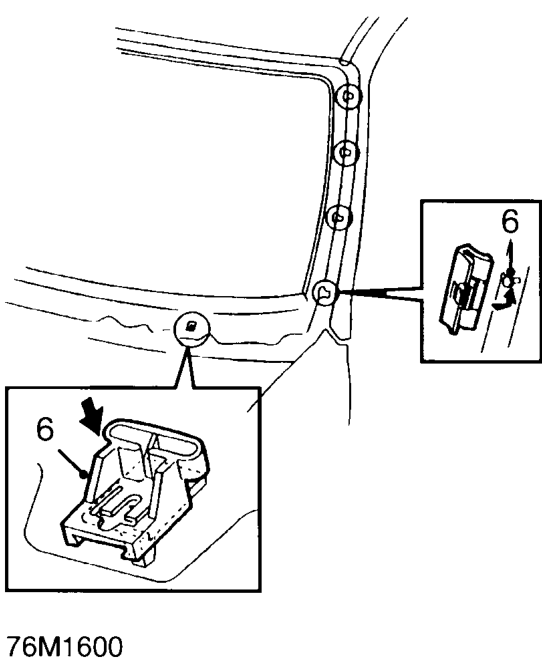
- Fit windscreen support brackets, do not tighten screws and fit side finisher retainers.
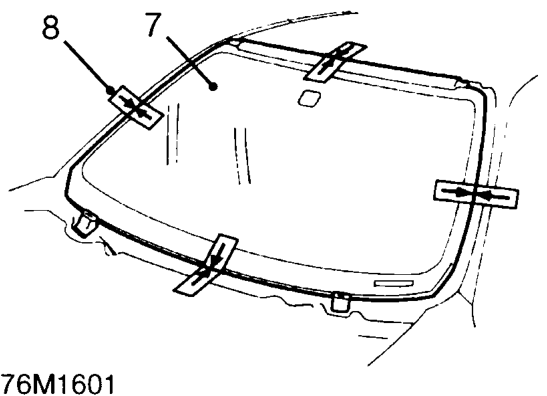
- Attach suction cups to glass, locate glass on brackets and position to body and with assistance, align glass to body and tighten bracket screws.
- Apply tape from glass to body in four positions shown and cut tape at glass edge for fitting reference. Remove glass.
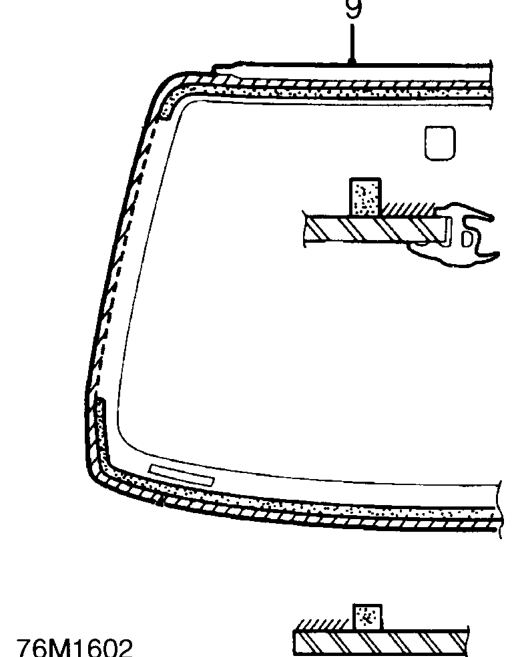
- Apply Glass Primer around glass as indicated.
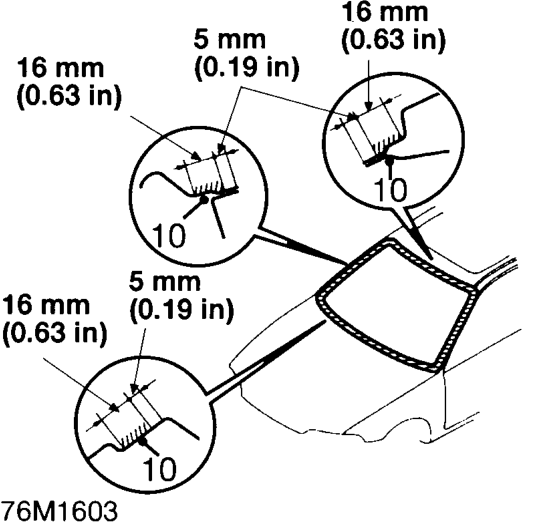
- Apply Body Primer to body flange as indicated.
CAUTION: Use a new sponge for each primer.
- Fit pre-cut nozzle to sealer cartridge, and install in applicator gun
Parts & tools for this job For 1995 Rover 400
- TOOLTrim removal tool kitSearch: trim removal tool kit
- PARTTouch-up paintSearch: Rover touch up paint
- PARTPanel clip assortmentSearch: Rover panel clips assortment
Links open Amazon search results in a new tab. As an Amazon Associate I earn from qualifying purchases.