
Crankshaft front oil seal
- Make
- Rover
- Model
- 400 Workshop Manual Supplement
- Year
- 1999
- Section
- Repairs › Crankshaft front oil seal
Engine - K SeriesCrankshaft front oil seal
Refit
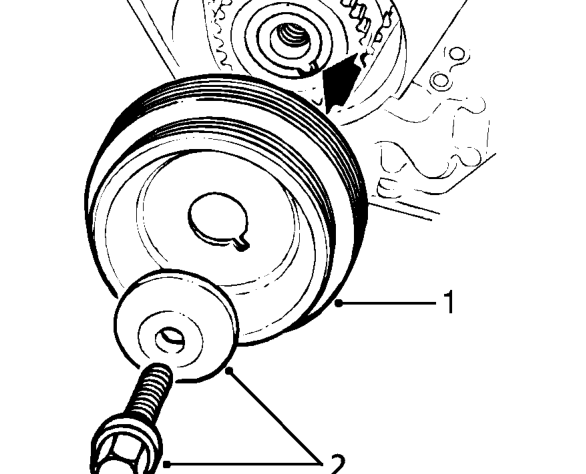
- Fit crankshaft pulley to crankshaft gear ensuring that indent on pulley locates over lug on gear (arrowed in illustration).
- Fit washer and bolt securing crankshaft pulley to crankshaft and tighten to 205 Nm.
- Remove 2 bolts securing tool 18G 1571 to flywheel housing and remove tool 18G 1571.
- Fit starter motor. See WORKSHOP MANUAL - ELECTRICAL, Repairs.
- Fit alternator drive belt. See WORKSHOP MANUAL - ELECTRICAL, Repairs.
- Connect battery earth lead.
CRANKSHAFT FRONT OIL SEAL
Service repair no - 12.21.14
Remove
- Remove camshaft timing belt. See this section.
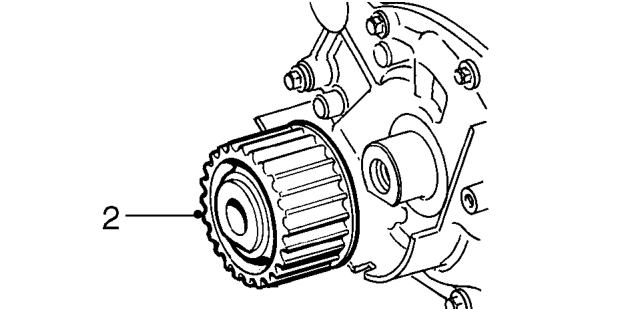
- Remove crankshaft gear.
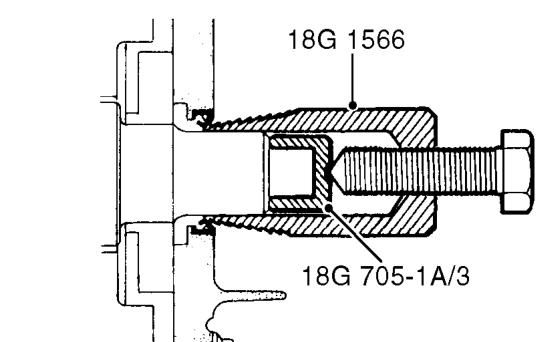
- Fit tool 18G 705-1A/3 to end of crankshaft.
- Ensure bore of tool 18G 1566 is free from burrs.
- Screw tool 18G 1566 into crankshaft front oil seal.
- Tighten centre bolt of tool 18G 1566 to remove seal
- Discard crankshaft front oil seal.
- Remove 18G 705-1A/3 from crankshaft.
Parts & tools for this job For 1999 Rover 400
- PARTEngine gasket setSearch: Rover 400 1999 engine gasket set
- TOOLTorque wrenchSearch: 3/8 inch torque wrench
- TOOLFeeler gauge setSearch: feeler gauge set
Links open Amazon search results in a new tab. As an Amazon Associate I earn from qualifying purchases.