
Thermostatic switch
- Make
- Rover
- Model
- 400 Workshop Manual
- Year
- 1995–2000
- Section
- Repairs › Thermostatic switch
Cooling system - L SeriesThermostatic switch
THERMOSTATIC SWITCH
Service repair no - 26.25.35
Remove
- Disconnect battery earth lead.
- Loosen coolant filler cap and release coolant pressure.
WARNING: Protect hands if system is hot.
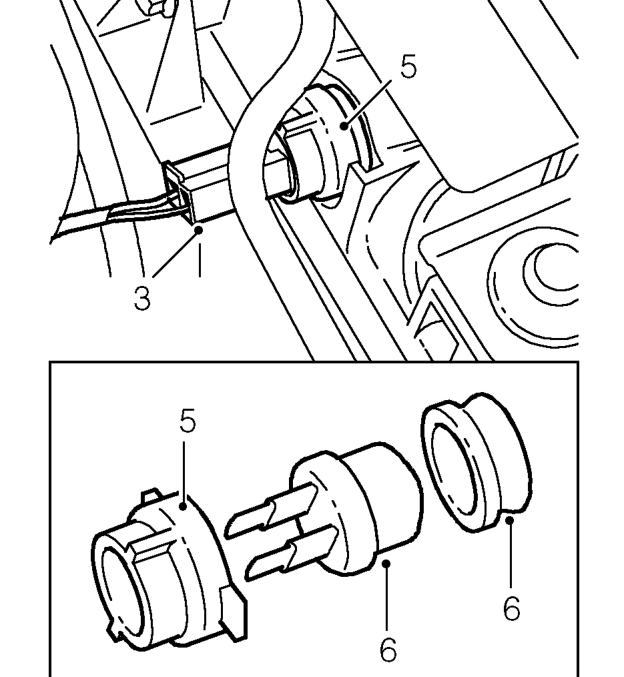
- Disconnect 2 Lucars from thermostatic switch. Position absorbent cloth below switch.
- Rotate switch locking ring through 90˚ anti-clockwise and remove.
- Remove thermostatic switch from radiator and discard seal.
Refit
- Fit NEW seal to radiator and insert thermostatic switch.
- Secure switch with locking ring.
- Connect Lucars to switch.
- Top-up cooling system. See MAINTENANCEMaintenance.
- Connect battery earth lead.
RADIATOR
Service repair no - 26.40.01
Remove
- Drain cooling system. See Adjustments.
- Remove radiator cooling fan. See this section.
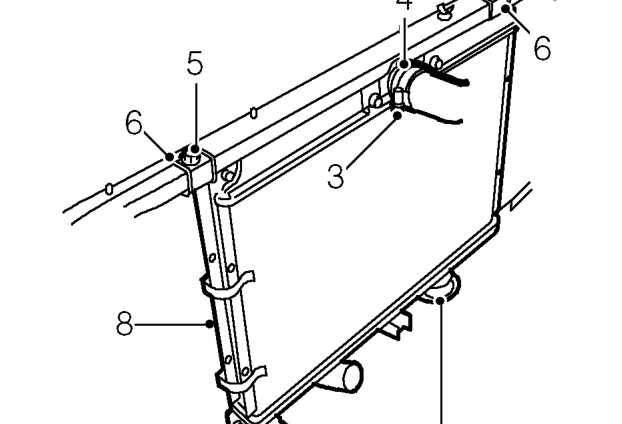
- Loosen clip securing top hose to radiator.
- Release top hose from radiator.
- Remove 2 bolts securing radiator top mounting brackets to bonnet platform.
- Remove 2 radiator top mounting brackets.
- Release radiator from 2 lower mountings.
- Remove radiator from vehicle. Do not carry out further dismantling if component is removed for access only.
- Remove 2 lower mounting rubbers from old radiator.
- Fit lower mounting rubbers to new radiator.
Refit
- Manoeuvre radiator into position and locate on lower mountings.
- Fit top mountings to radiator and align to body.
- Fit bolts securing radiator to bonnet platform and tighten to 9 Nm.
- Connect top hose to radiator and secure with clip.
- Fit radiator cooling fan. See this section.
- Fill cooling system. See Adjustments.
Parts & tools for this job For 1995 Rover 400
- TOOLOBD2 scannerSearch: OBD2 scanner
- TOOLDigital multimeterSearch: automotive digital multimeter
- TOOLBack-probe test leadsSearch: back probe test leads
Links open Amazon search results in a new tab. As an Amazon Associate I earn from qualifying purchases.