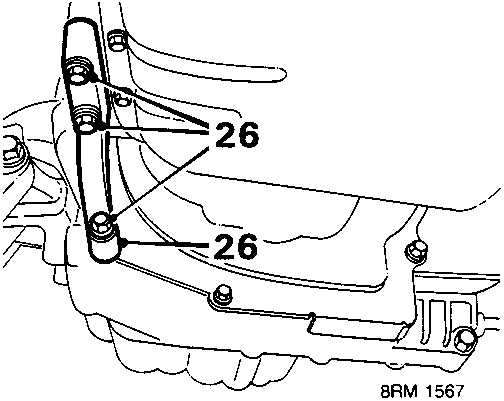
**26.** Remove 2 bolts, anti – bearing bracket to crankcase and 1 bolt to torque converter housing. Remove anti – bearing bracket.
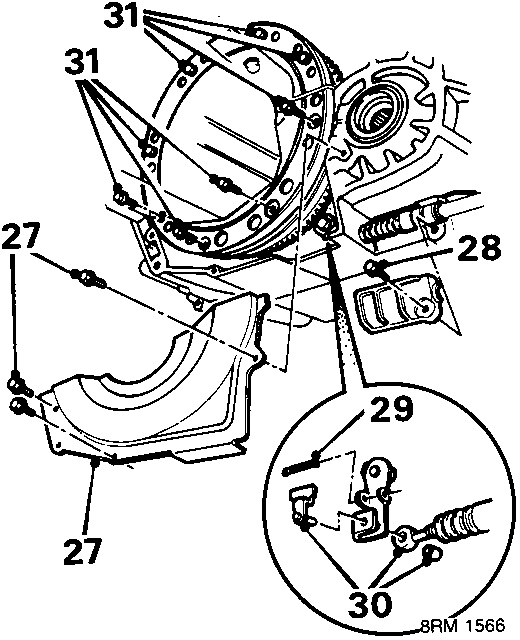
**27.** Remove 3 bolts, cover to torque converter housing and remove cover.
**28.** Remove bolt, selector cable holder to gearbox.
**29.** Remove split pin securing selector cable control pin.
**30.** Remove control pin and roller, release selector cable from gearbox.
**31.** Remove 8 bolts, drive plate to torque converter, rotate crankshaft pulley anti – clockwise to gain access.
**CAUTION:** *Crankshaft pulley bolt may loosen during above operation. If this occurs, fit tool 18G1603 to starter motor aperture, tighten bolt to 165 Nm and remove tool.*
**32.** Position trolley jack beneath engine sump and support engine.
**CAUTION:** *Use block of wood or hard rubber to protect sump.*
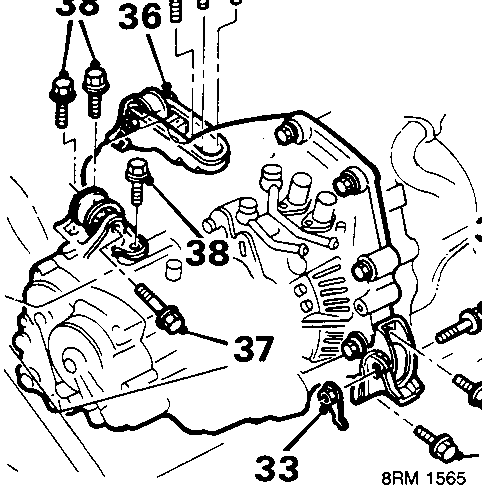
**33.** Remove through bolt, front mounting to body; collect special nut.
**34.** Remove 2 bolts, front mounting to gearbox and remove mounting.
**35.** Remove 3 bolts, rear mounting bracket to gearbox.
**36.** Slacken through bolt and raise mounting bracket clear of gearbox.
**37.** Remove through bolt, R.H. mounting to body.
**38.** Remove 3 bolts securing R.H. mounting plate to gearbox.
**39.** Remove the distributor, see **ENGINE MANAGEMENT SYSTEM – Repairs – PGM – Fi.**
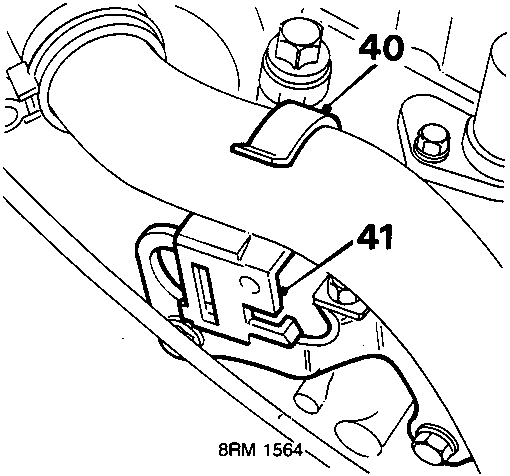
**40.** Release bottom radiator hose from clip.
**41.** Release clip from lifting bracket.
Links open Amazon search results in a new tab. As an Amazon Associate I earn from qualifying purchases.
Help keep workshop manuals free
workshop-manuals.com provides free online workshop manuals.
If they helped you fix your car, please consider sharing or
making a small donation to keep the servers running.