
Refit
- Make
- Rover
- Model
- Coupé, Cabriolet & Tourer 200/400 Coupé, Cabriolet & Tourer Workshop Manual
- Section
- Repairs › Refit
Automatic gearboxRefit · page 1 of 2
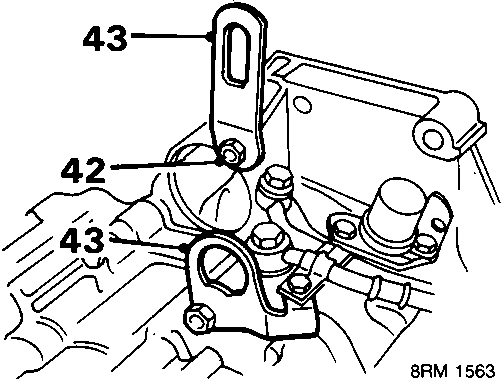
- Attach an additional lifting bracket to starter motor flange, tighten bolt to 40 Nm.
- Attach lifting chains to gearbox brackets and support weight of gearbox.
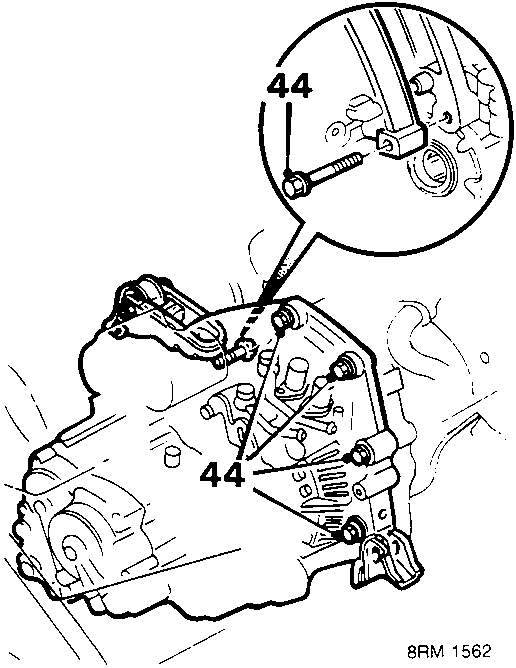
- Remove 5 bolts, torque converter housing to cylinder block.
CAUTION: Note fitted position of bolts for assembly.
- Manoeuvre gearbox away from engine.
- Using assistance: Lower gearbox on to a trolley jack.
- Remove lifting chains and withdraw gearbox from beneath vehicle.
Refit
- Clean torque converter and cylinder block mating surfaces; ensure locating dowels are fitted and dowel holes are clear.
- Position gearbox below vehicle on trolley jack.
- Attach lifting chains to brackets.
- Using assistance: Raise and manoeuvre gearbox into position on 2 locating dowels.
- Fit torque converter housing to cylinder block bolts, tighten bolts progressively to 58 Nm.
- Fit R.H. mounting plate on gearbox; tighten bolts to 39 Nm.
- Fit R.H. mounting through bolt, do not tighten.
- Fit rear mounting bracket to gearbox, tighten bolts to 55 Nm.
- Fit front mounting to gearbox, tighten bolts to 55 Nm.
- Fit nut and NEW through bolt to front mounting, do not tighten.
- Tighten through bolts in sequence as follows:
Rear mounting through bolt to 60 Nm.
Front mounting through bolt to 60 Nm.
R.H. mounting through bolt to 60 Nm. - Remove lifting chains.
- Remove additional lifting bracket.
- Fit clip and secure bottom radiator hose.
- Remove jack from beneath engine sump.
- Fit but do not tighten drive plate to torque converter bolts, rotate crankshaft pulley anti - clockwise to gain access.
CAUTION: Crankshaft pulley bolt may loosen during above operation. If this occurs, fit tool 18G 1603 to starter motor aperture, tighten bolt to 165 Nm and remove tool.
- Tighten drive plate bolts in diagonal sequence to 12 Nm.
- Connect selector cable to lever, fit control pin and roller.
- Secure control pin with a NEW split pin.
- Fit torque converter housing cover and anti - bearing bracket; tighten bolts to:
Anti - bearing bracket to gearbox 45 Nm.
Anti - bearing bracket to cylinder block 24 Nm.
Torque converter housing cover 12 Nm. - Fit selector cable holder, locate cable in holder and tighten bolt to 27 Nm.
- Fit R.H. tie rod, see SUSPENSION – Repairs.
- Fit intermediate drive shaft, see DRIVE SHAFTS – Repairs.
- Fit R.H. drive shaft, see Differential oil seal – R.H. – Repairs
- Fit front exhaust pipe, see MANIFOLD & EXHAUST – Repairs.
Parts & tools for this job For Rover Coupé, Cabriolet & Tourer
- PARTTransmission filter kitSearch: Rover Coupé, Cabriolet & Tourer transmission filter kit
- FLUIDAutomatic transmission fluidSearch: Rover automatic transmission fluid
- TOOLFluid transfer pumpSearch: fluid transfer pump
Links open Amazon search results in a new tab. As an Amazon Associate I earn from qualifying purchases.