Workshop Manuals Factory service & repair Rover
01 General information02 Information03 Maintenance04 Engine 1.4 K805 Engine 1.606 Engine 1.6 D.O.H.C.07 Engine 2.0 T1608 Engine management system - PGM-Fi09 Modular engine management system - SPi10 Modular engine management system - MPi11 Fuel delivery system12 Cooling system13 Manifold and exhaust14 Clutch15 Manual gearbox 1.416 Manual gearbox 1.617 Automatic gearbox18 Drive shafts19 Steering20 Suspension21 Brakes22 Body23 Heating and ventilation24 Air conditioning25 Wipers and washers26 Electrical27 Instruments28 Supplementary restraint system (SRS)
Rover 200/400 Coupé, Cabriolet & Tourer Workshop Manual15 · Manual gearbox 1.4
15 · Transmission

Refit

Make
Rover
Model
Coupé, Cabriolet & Tourer 200/400 Coupé, Cabriolet & Tourer Workshop Manual
Section
Repairs › Refit
Manual gearbox 1.4Refit
Illustrates alignment of vehicle front suspension components
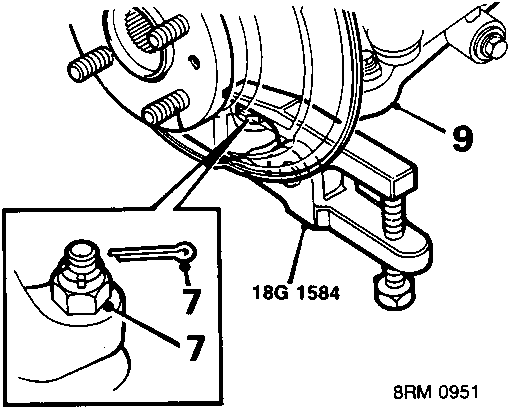
Diagram showing lower ball joint, split pin, nut, and tool 18G 1584 being used to break a taper joint on the hub assembly.
7. Remove split pin from lower ball joint nut and remove nut. 8. Break taper joint using tool 18G 1584. 9. Release lower arm from hub.
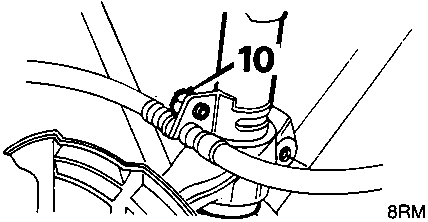
Diagram showing a bolt securing a brake hose bracket to a damper.
10. Remove bolt brake hose bracket to damper.
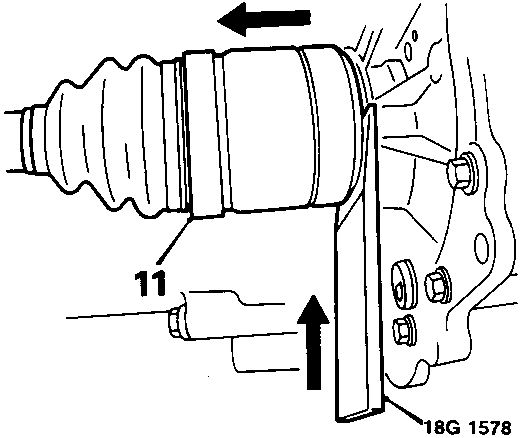
Diagram showing tool 18G 1578 being used to release a drive shaft from a differential housing.
11. Using tool 18G 1578, release drive shaft from differential.
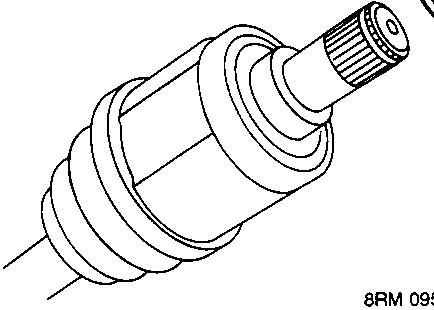
Diagram of a drive shaft end with a circlip (part 12) shown removed or in position.
12. Remove and discard circlip from drive shaft. 13. Retain drive shaft clear of gearbox to give access to oil seal.
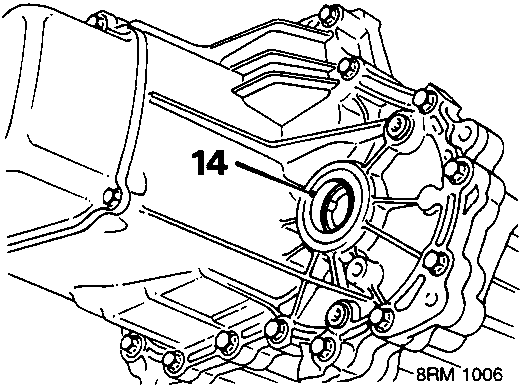
Diagram showing an oil seal recess in a gearbox housing, with arrows indicating the direction to prise the seal out.
14. Carefully prise oil seal out of housing; discard oil seal.

Refit

  1. Thoroughly clean oil seal recess and splines of drive shaft.
  2. Lubricate oil seal with clean gearbox oil, see INFORMATION – CAPACITIES, FLUIDS AND LUBRICANTS.
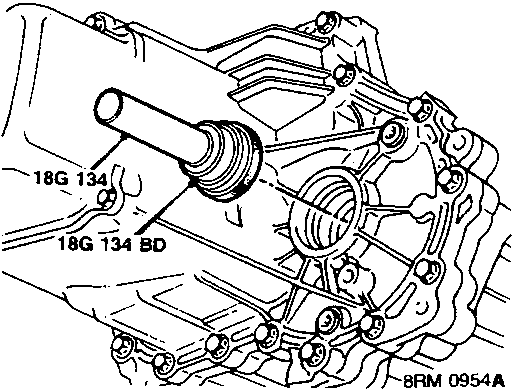
Diagram showing a new oil seal being located on tool 18G 134 and replacer 18G 134BD, positioned for installation into the housing.
3. Locate new seal on tool 18G 134 and replacer 18G 134BD with sealing lip facing towards housing. 4. Carefully drift seal into housing until it is fully seated in recess. 5. Remove tool 18G 134BD. 6. Fit new circlip to drive shaft. 7. Engage drive shaft in differential and push fully home

Parts & tools for this job For Rover Coupé, Cabriolet & Tourer

Links open Amazon search results in a new tab. As an Amazon Associate I earn from qualifying purchases.