
Determining the piston type
- Make
- Rover
- Model
- Engine & gearbox overhaul TUD5 Diesel Engine Overhaul Manual
- Section
- Overhaul › Determining the piston type
DETERMINING THE PISTON TYPE
VERY IMPORTANT: If you are replacing pistons, determine the piston type to install for each cylinder.
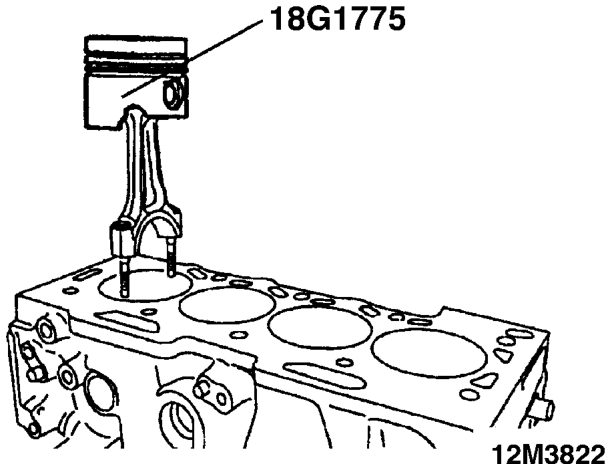
Mount the No. 4 cylinder connecting rod on the calibration piston, using calibration piston tool 18G1775, which does not have a groove for the wrist pin/gudgeon pin retaining ring. Place a new bearing half on the big end of the connecting rod. Insert the calibration piston tool 18G1775 assembly into cylinder No. 4.
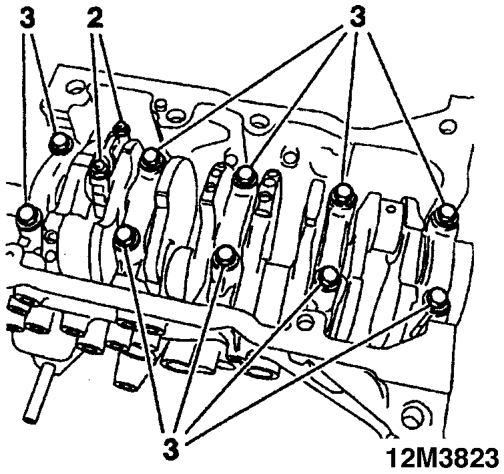
Install the connecting rod end cap, equipped with a new bearing half which you have oiled.
TIGHTEN:
- Both nuts (2): to 40 Nm.
- The main journal end caps (3): to 20 Nm + 50° using a proprietary angle measurement tool.
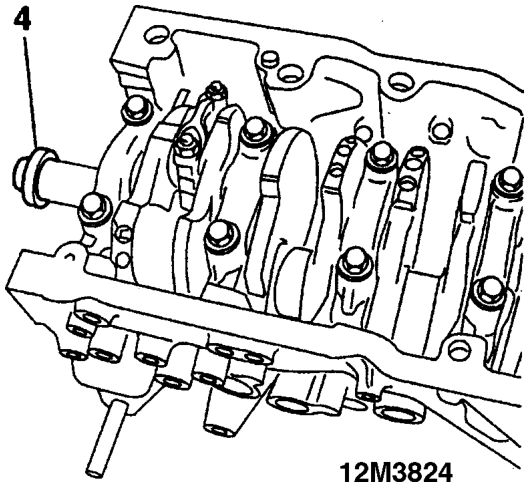
- Install the crankshaft bolt (4).
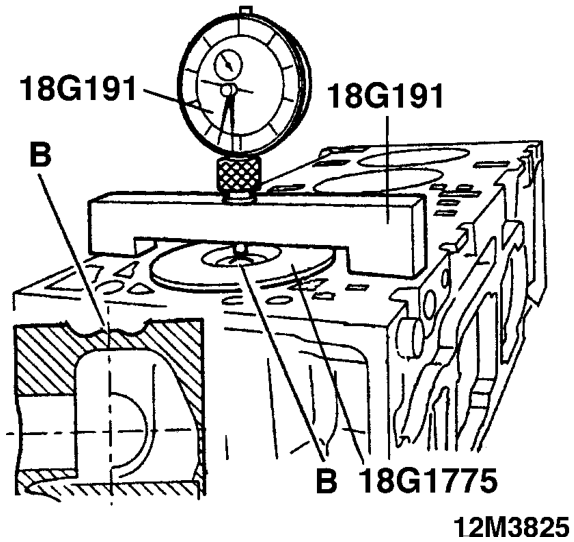
Install dial indicator tool 18G191. Place the dial indicator/mount assembly above the calibration piston tool .
18G1775
Turn the crankshaft to put the dial indicator test needle in contact with the piston boss (B). Bring the calibration piston tool 18G1775 to TDC. Zero out the dial indicator.
Parts & tools for this job For Rover Engine & gearbox overhaul
- PARTEngine gasket setSearch: Rover Engine & gearbox overhaul engine gasket set
- TOOLTorque wrenchSearch: 3/8 inch torque wrench
- TOOLFeeler gauge setSearch: feeler gauge set
Links open Amazon search results in a new tab. As an Amazon Associate I earn from qualifying purchases.