BodyPillar and side trim panels
| Removing and installing top trim panel of pillar D |
| –
| Remove side trim panel of pillar D in the luggage compartment → Chapter. |
| –
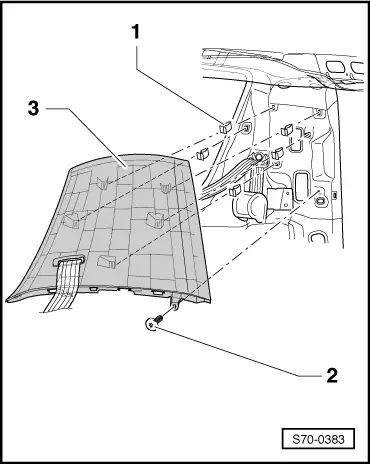
| Remove screw -2- below the bottom trim panel of pillar D (2 Nm). |
| –
| Remove the screw for bottom deflection fitting → Chapter. |
| –
| Remove top trim panel of pillar D -3- from the clips -1- of pillar D with e.g. removal tool for the inner lining of the door panel -MP8-602/1-. |
|
|
|
| –
| Pull seat belt throught the opening in the top trim panel of pillar D. |
| –
| Take top trim panel of pillar D out of the vehicle. |
| –
| Installation is carried out in the reverse order; pay attention to the following points: |
| t
| Recondition the clips -1- in the top trim panel of pillar D -3- or in case of damage replace with new ones. |
| t
| Before installing, pull the seat belt through the opening into the trim panel. |
|
|
|
03 Body & interior