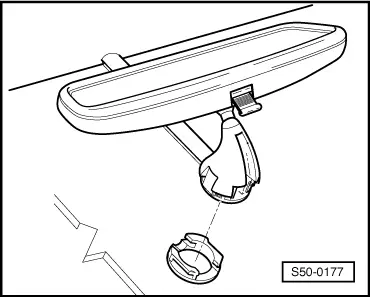
BodyInterior rear-view mirror
| Attaching the pedestal retaining plate |
| Special tools and workshop equipment required |
| t
| Cleaning solution -D 009 401 04- |
Diagram not available
Note | t
| By applying the following repair procedure, you can avoid having to replace the windscreen. |
| t
| It is possible to reuse the old, fallen off retaining plate. |
| –
| On the outside of the windscreen, mark the position of the retaining plate, using a felt-tip pen for example. |
| –
| Any remaining glue or primer must be removed down to the ceramic layer. |
Diagram not available
WARNING | Do not damage the ceramic layer, as scratches will be permanently visible. |
|
| –
| Clean the bonding surface with cleaning solution -D 009 401 04-. |
| –
| Leave to dry for min. 10 minutes. |
| –
| Apply primer -D009 200 02- to the glass. |
| –
| Leave to dry for min. 10 minutes up to max. 1 hour. |
| Preparing the retaining plate for adhesive |
| –
| Remove any residual adhesive. |
| –
| Sand the bonding surface with very fine sandpaper (grade 800 - 1200). |
| –
| Clean the bonding surface with cleaning solution -D 009 401 04-. |
| Attaching the retaining plate |
| –
| Apply adhesive -2K D 180 KD2 A1- directly to the bonding surface of the retaining plate. |
| –
| Glue bead diameter approx. 3 mm. |
|
|
|
| –
| Immediately after application, press the retaining plate onto the windscreen. |
| –
| Arrange the retaining plate within the position provided on the ceramic layer, and secure with adhesive tape. |
| –
| Carefully remove the adhesive tape after about one hour. |
| –
| Remove excess glue with a cloth and clean with a cleaning solution. |
Diagram not available
Note | The interior rear-view mirror can be mounted after a minimum of 2.5 minutes. |
|
|
|
02 Body & interior