
Differential Output Seal (RH)
- Make
- Aston Martin
- Model
- DB9 Factory Workshop Manual
- Year
- Issue 2, 2005
- Section
- Automatic Transmission › Differential Output Seal (RH)
07 TransmissionDifferential Output Seal (RH)
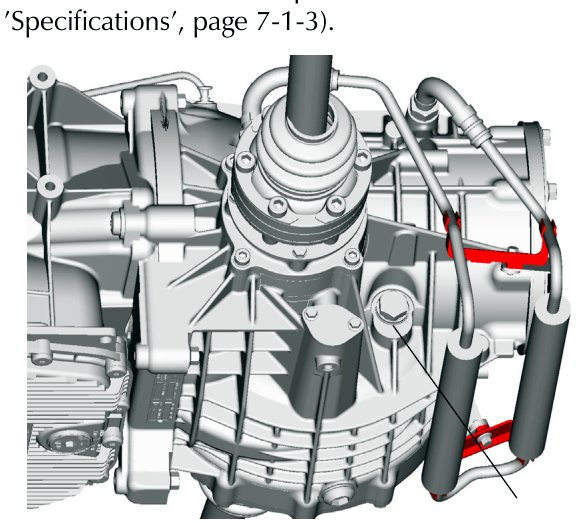
- Ensure the drain plug is installed (Torque 49 Nm.). Fill the differential with the specified oil (Refer to ‘Specifications’, page 7-1-3).
- Install the road wheel arch and road wheel (Refer to ‘Road Wheel Nut Torque Tightening’, page 4-5-7).
- Run the vehicle a short distance to ensure that the differential cooling system has been completely filled. Check / Top if required.
- Install the undertray.
Differential Output Seal (RH)
| Repair Operation Time (ROT) | |
|---|---|
| Item | Code |
| Differential Output Seal (RH) Renew | TBA |
Removal
- Disconnect the vehicle battery.
- Raise the vehicle and make safe.
- Remove the RH road wheel and road wheel arch liner.
- Remove the rear undertray.
- Remove the brake and handbrake calipers (Refer to ‘Brake System (06.00)’, page 6-1-1).
- Remove the vertical link (Refer to ‘Rear Suspension (04.02)’, page 4-3-1).
- Drain the differential oil.
- Remove the halfshaft bolts (x6) and washers (x3). Withdraw the halfshaft.
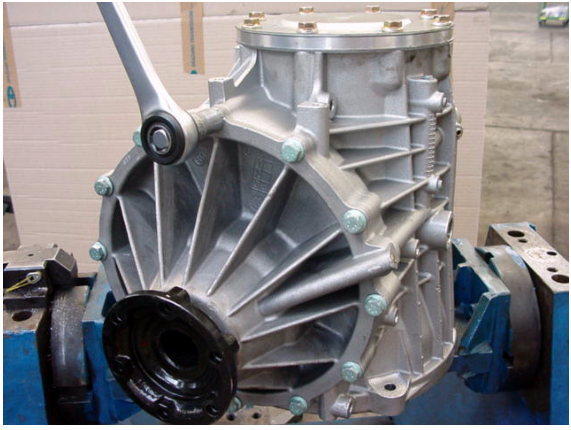
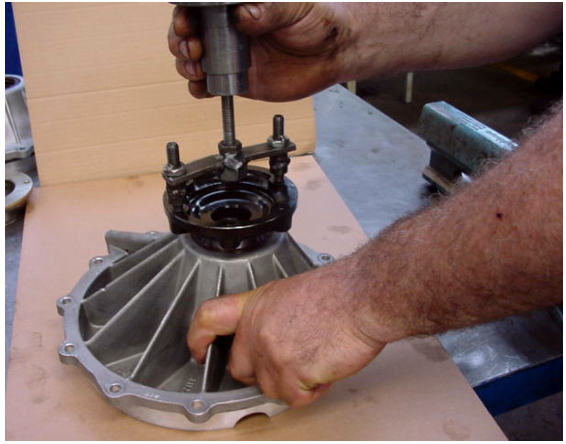
- Remove bolts (x12), attach a slide hammer and withdraw the differential housing cover complete with output shaft. Discard the ‘O’ ring.
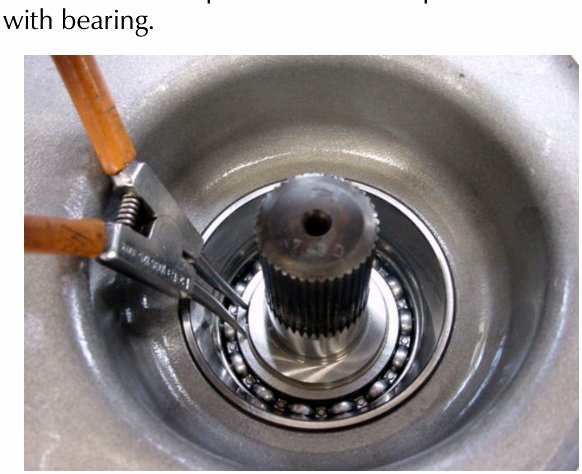
- Remove the circlip. Remove the output shaft complete with bearing.
Parts & tools for this job For 2005 Aston Martin DB9
- PARTTransmission filter kitSearch: Aston Martin DB9 2005 transmission filter kit
- FLUIDAutomatic transmission fluidSearch: Aston Martin automatic transmission fluid
- TOOLFluid transfer pumpSearch: fluid transfer pump
Links open Amazon search results in a new tab. As an Amazon Associate I earn from qualifying purchases.