
Continental Conversion
- Make
- Aston Martin
- Model
- DB9 Factory Workshop Manual
- Year
- Issue 2, 2005
- Section
- Front Lights › Continental Conversion
17 LightingContinental Conversion
Headlight alignment should be carried out with vehicle at design weight, i.e.,
- Vehicle at kerb weight, plus
- All fluids at normal full level, plus
- A 75 kg weight in each front seat
- Remove the access panel from the road wheel arch liner.
- Switch the ignition to position ‘II’ then back to position ‘0’.
This will motor the headlight units to their ‘set’ position.
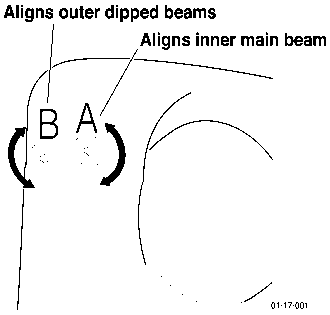
- ROW Only.
Align the headlamps so that the cut off of the dipped beam is 1.5% below the horizontal.
| LHD Headlamps |
|---|
| RHD Headlamps |
|---|
- Federal Only.
Align the headlamps so that the LH cut off of the dipped beam is 0.7% below the horizontal.
| Federal Headlamps |
|---|
- Switch the ignition to position ‘II’ then back to position ‘0’ to ensure that the headlight units are at their set position.
- Check the headlight unit alignment again to confirm correct alignment.
Continental Conversion
(UK Spec only)
- Disconnect the vehicle battery.
- Gain access to the headlight unit by removing the access panel in the road wheel arch liner.
- Remove both rubber covers.
Warning
HID bulbs start-up voltage can be as much as 1000v. Ensure power to HID bulbs has been disconnected before attempting to service them. Failure to do this may result in a severe injury or death.
Warning
HID bulbs get hot during operation. Allow at least 15 minutes for headlamp assemblies to cool before attempting to service them. Failure to do this may result in burns to skin or clothing.
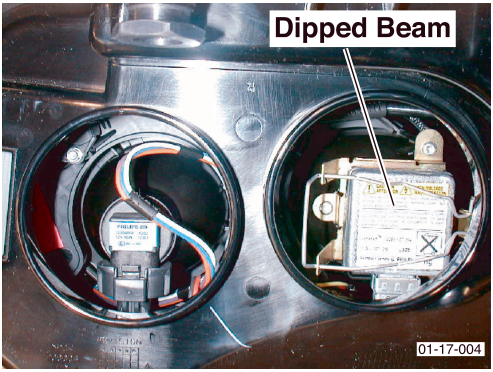
- Disconnect the dipped beam bulb unit wiring harness plug. Remove the spring clip and withdraw the bulb unit.
Parts & tools for this job For 2005 Aston Martin DB9
- PARTReplacement bulbsSearch: Aston Martin DB9 2005 bulbs
- TOOLDigital multimeterSearch: automotive digital multimeter
Links open Amazon search results in a new tab. As an Amazon Associate I earn from qualifying purchases.