
Lighting (17.00)
- Make
- Aston Martin
- Model
- DB9 Factory Workshop Manual
- Year
- Issue 2, 2005
- Section
- Front Lights › Lighting (17.00)
17 LightingLighting (17.00)
Lighting (17.00)
Front Lights (17.01)
Specifications
Bulbs
| Rating | Type (European) | Type (Federal) | |
|---|---|---|---|
| Headlight dipped beam | 35W | D1S | D1S |
| Headlight main beam | 65W | H9 | H9 |
| Front Indicators | 27W / 29W | PY27W | 3457 AK |
| Front Position Lamp | 5W | W5W (Blue) | W5W (Blue) |
| Side Repeater | 5W | WY5W | WY5W |
| Side marker (front and rear) | 5W | N/A | W5W |
| Headlamp Alignment | European | Federal |
|---|---|---|
| Main Beam Alignment | 1.5% Down | 0.7% Down Vol. |
| Dipped Beam Alignment | 1.5% Down | 0.7% Down Vol. |
Main beam is fixed to the Dipped beam.
Maintenance
Headlamp Unit
| Repair Operation Time (ROT) | ||
|---|---|---|
| Item | Code | |
| Headlamp Unit Renew | LH | 17.01.AB |
| RH | 17.01.BB | |
(Including side light and indicator)
Removal
- Raise the vehicle and make safe.
- Remove the road wheel and road wheel arch liner.
- Remove the air box (Refer to 'Air Charging (03.12)', page 3-13-1).
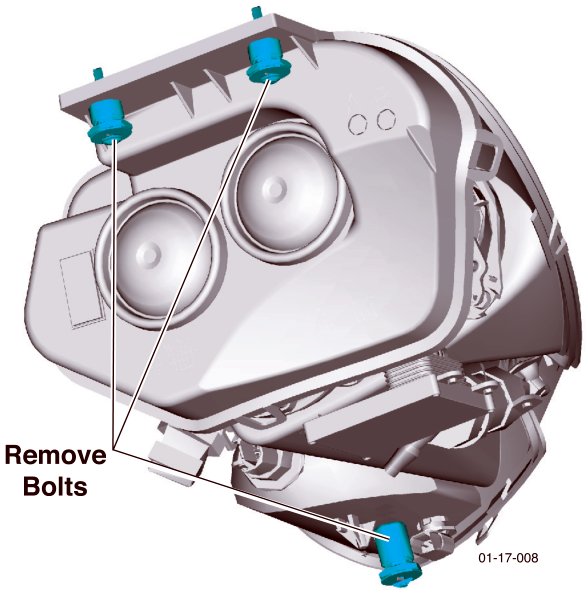
- Remove bolts (x3) securing the headlamp unit bracket.
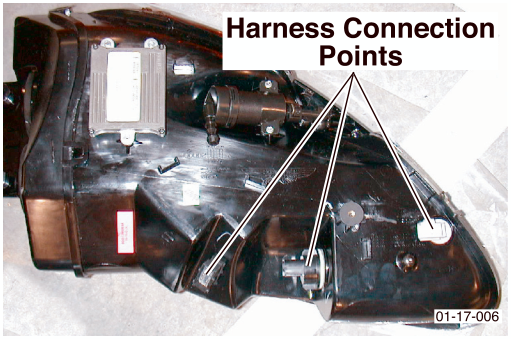
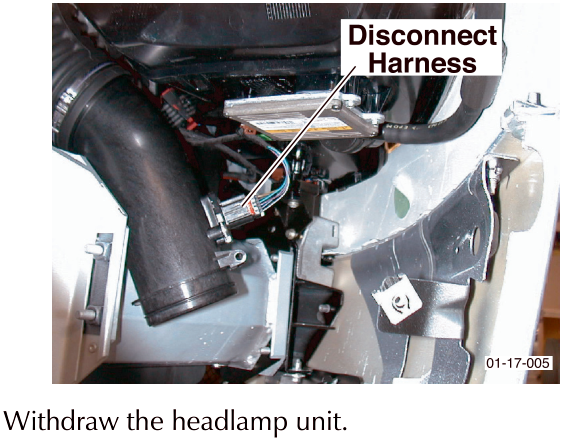
- Disconnect the headlamp unit wiring harness plugs (x3)
- Withdraw the headlamp unit.
Installation
- Install the headlamp unit.
- Install the air box (Refer to 'Air Charging (03.12)', page 3-13-1).
- Install the road wheel arch liner.
- Install the road wheel (Refer to 'Road Wheel Nut Torque Tightening', page 4-5-7).
- Carry out headlamp unit alignment procedure.
Parts & tools for this job For 2005 Aston Martin DB9
- PARTReplacement bulbsSearch: Aston Martin DB9 2005 bulbs
- TOOLDigital multimeterSearch: automotive digital multimeter
Links open Amazon search results in a new tab. As an Amazon Associate I earn from qualifying purchases.