
Positioning the replacement part
- Make
- Fiat
- Model
- Bravo /Brava (182) Factory Service Manual
- Year
- 1995–2001
- Section
- Replacing body panels › Positioning the replacement part
70 BodyworkPositioning the replacement part
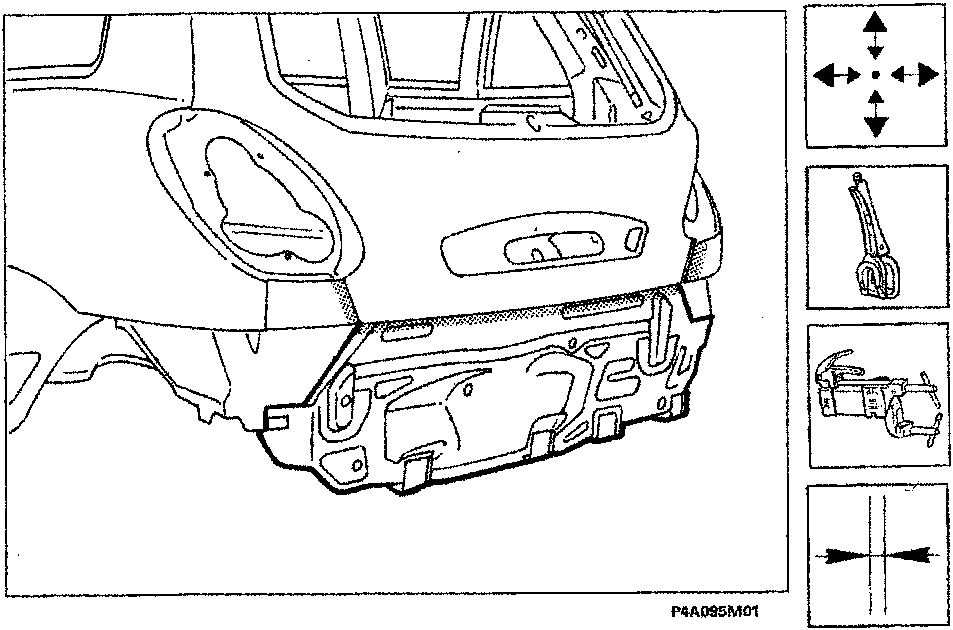
Positioning the replacement part
- Carefully place the replacement part in position .
- Check that the cross member lining is perfectly positioned.
- Fix the replacement part to the bodyshell using the special self-locking clamps.
- Tack the replacement part making several spot welds.
- Close the boot lid and check the alignment and the eveness of the surrounding gap.
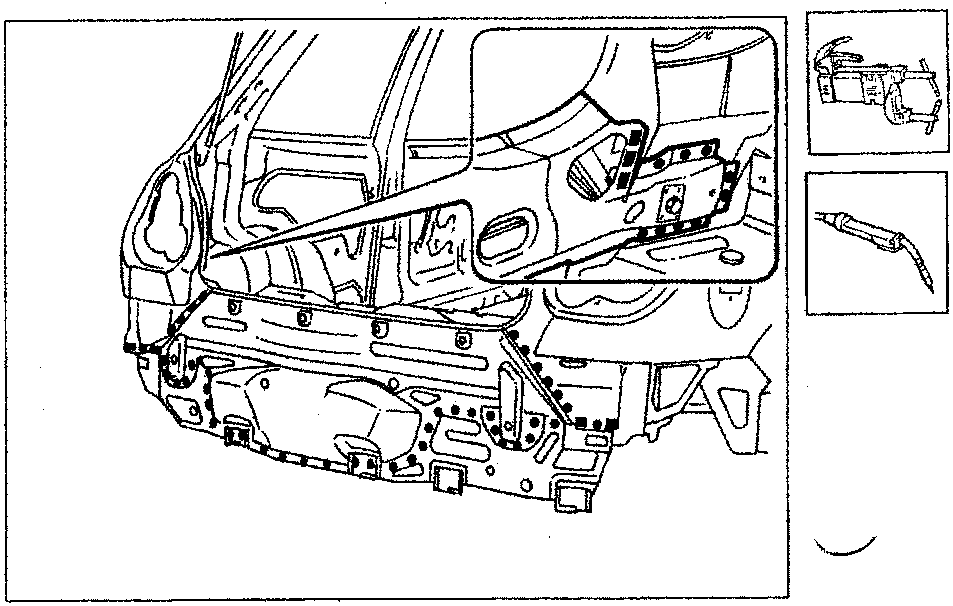
Welding the spare part
- Carry out spot welding at the contact edges between the rear cross member liding and the wing and the internal reinforcement.
- Continue the spot welding on the contact edges near the spare wheel arch housing and the side edges.
- Using a MIG welder fill the holes made previously in the replacement part.
Parts & tools for this job For 1995 Fiat Bravo
- TOOLTrim removal tool kitSearch: trim removal tool kit
- PARTTouch-up paintSearch: Fiat touch up paint
- PARTPanel clip assortmentSearch: Fiat panel clips assortment
Links open Amazon search results in a new tab. As an Amazon Associate I earn from qualifying purchases.