
Reassembly
- Make
- Fiat
- Model
- Seicento Factory Service Manual
- Year
- 1998–2010
- Section
- Accessories › Reassembly
55 Electrical equipmentReassembly
(Op. 5570T62 continued)
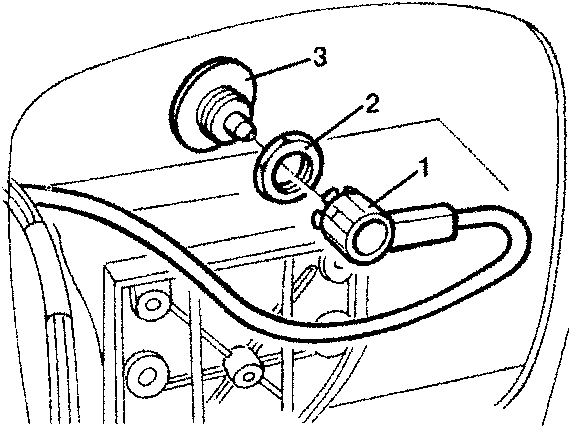
- Disconnect the radio aerial wire.
- Remove the retaining nut.
- From the vehicle roof, remove the radio aerial support.
Reassembly
- Check the radio aerial and support are not damaged. Replace the seal.
- Position the radio aerial to its seat and fasten it from the inside with the nut.
- Connect the aerial wire connection.
- Connect the volumetric sensors support electric connection.
- Position the volumetric sensor support and fasten with screws.
- Complete with Op. 7040E10 - FRONT CEILING LIGHT - r.r.
- If removed, screw the radio aerial back to its support.
- Check sound system operation.
5570T80 - RADIO - R.R.
Removal
- Insert the tool (1a) fully into the respective radio seats. The tool kit is provided with the Sound System Use Handbook.
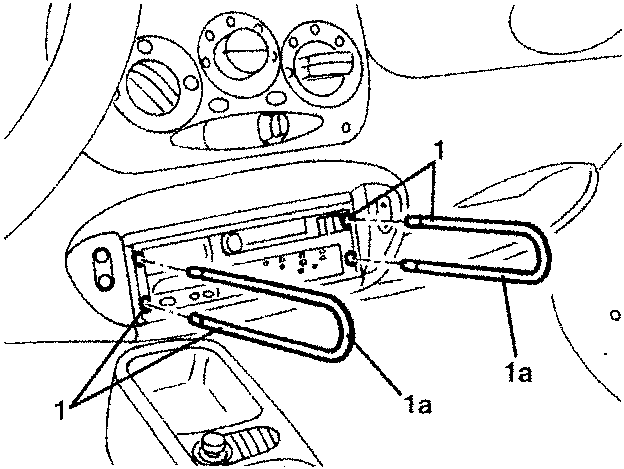
- Remove the radio.
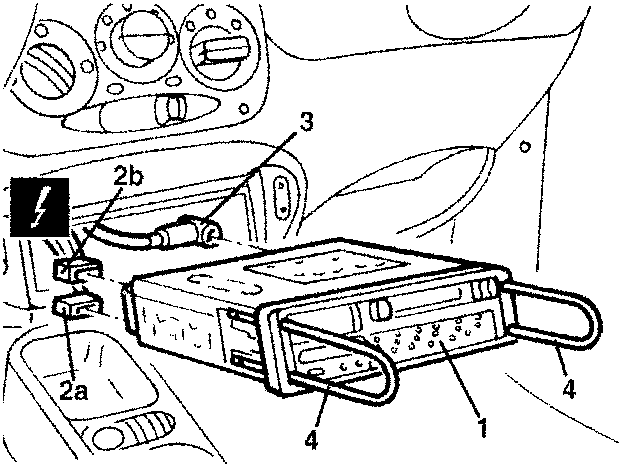
- Disconnect the electric connections (2a, 2b)
⚡ Description Connector
| Description | Connector | |
|---|---|---|
| 2a | Radio | P20A |
| 2b | Radio | P20B |
- Disconnect the aerial wire and take the radio.
- Remove the tools from the radio.
Reassembly
- Check the radio is not damaged.
- Connect the connections.
- Assemble the radio.
- Check sound system operation.
5570T90 - FRONT SPEAKER (ONE), LH OR RH - R.R.
Removal
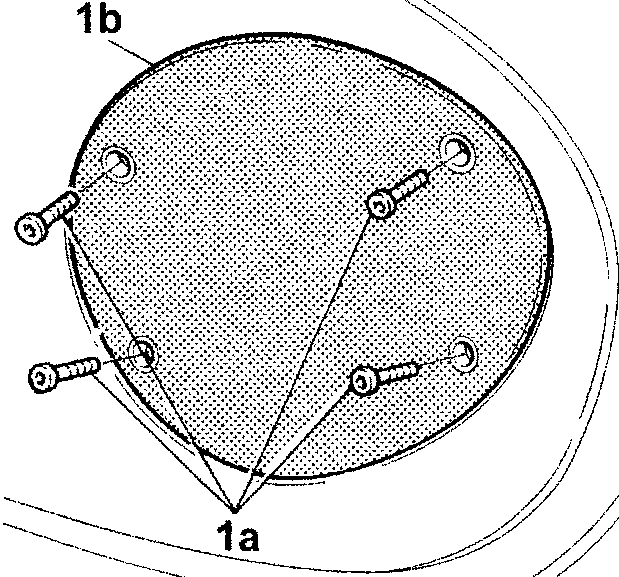
- Remove the four fastening screws (1a) from the speaker mesh (1b).
Parts & tools for this job For 1998 Fiat Seicento
- TOOLDigital multimeterSearch: automotive digital multimeter
- PARTAssorted fuse kitSearch: car fuse assortment kit
- TOOLWire crimper and connector kitSearch: wire crimper connector kit
Links open Amazon search results in a new tab. As an Amazon Associate I earn from qualifying purchases.