
Kickdown cable adjustment
- Make
- Land Rover
- Model
- Defender 90 Workshop Manual (NAS)
- Section
- Adjustment › Kickdown cable adjustment
Automatic gearboxKickdown cable adjustment
KICKDOWN CABLE ADJUSTMENT
Service repair no - 44.30.02
- Release and remove kick-down cable clevis pin.
- Loosen locknut and release kickdown cable from abutment bracket.
- Release outer cable sleeve from clip on rear of LH cylinder head.
- Holding cable as straight as possible, extend inner cable to first detent.
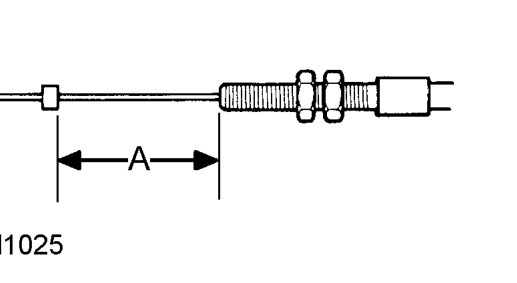
- With inner cable extended, check dimension A between end of threads and crimped sleeve. Dimension A = 42 mm ± 3 mm, 1.65 ± 0.10 in.
- Tighten locknut.
- Connect cable to abutment bracket and fit locknut.
- Secure outer cable sleeve to clip on rear of LH cylinder head.
- Connect kick-down cable to throttle lever and secure with clevis pin.
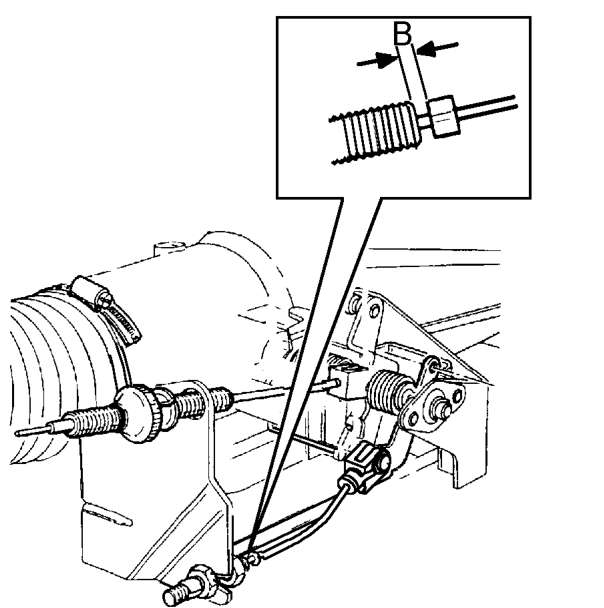
- Adjust outer cable until crimped sleeve is dimension B from end of outer cable. Dimension B = 1 mm, 0.04 in.
Parts & tools for this job For Land Rover Defender
- PARTTransmission filter kitSearch: Land Rover Defender transmission filter kit
- FLUIDAutomatic transmission fluidSearch: Land Rover automatic transmission fluid
- TOOLFluid transfer pumpSearch: fluid transfer pump
Links open Amazon search results in a new tab. As an Amazon Associate I earn from qualifying purchases.