
Fit constant velocity joint to axle
- Make
- Land Rover
- Model
- Defender 90 Workshop Manual (NAS)
- Section
- Overhaul › Fit constant velocity joint to axle
‹ Prev Front stub axle, constant velocity joint and swivel pin housingNext › Swivel pin housing assembly
Front axle and final driveFit constant velocity joint to axle
- Examine all components in particular inner and
outer track, cage balls and bearing surfaces for damage and excessive wear.
- Maximum acceptable end-float on assembled joint 0,64mm, 0.025 in. Renew if worn or damaged. Lubricate with a recommended oil during assembly.
Fit constant velocity joint to axle
- Fit collar and a new circlip.
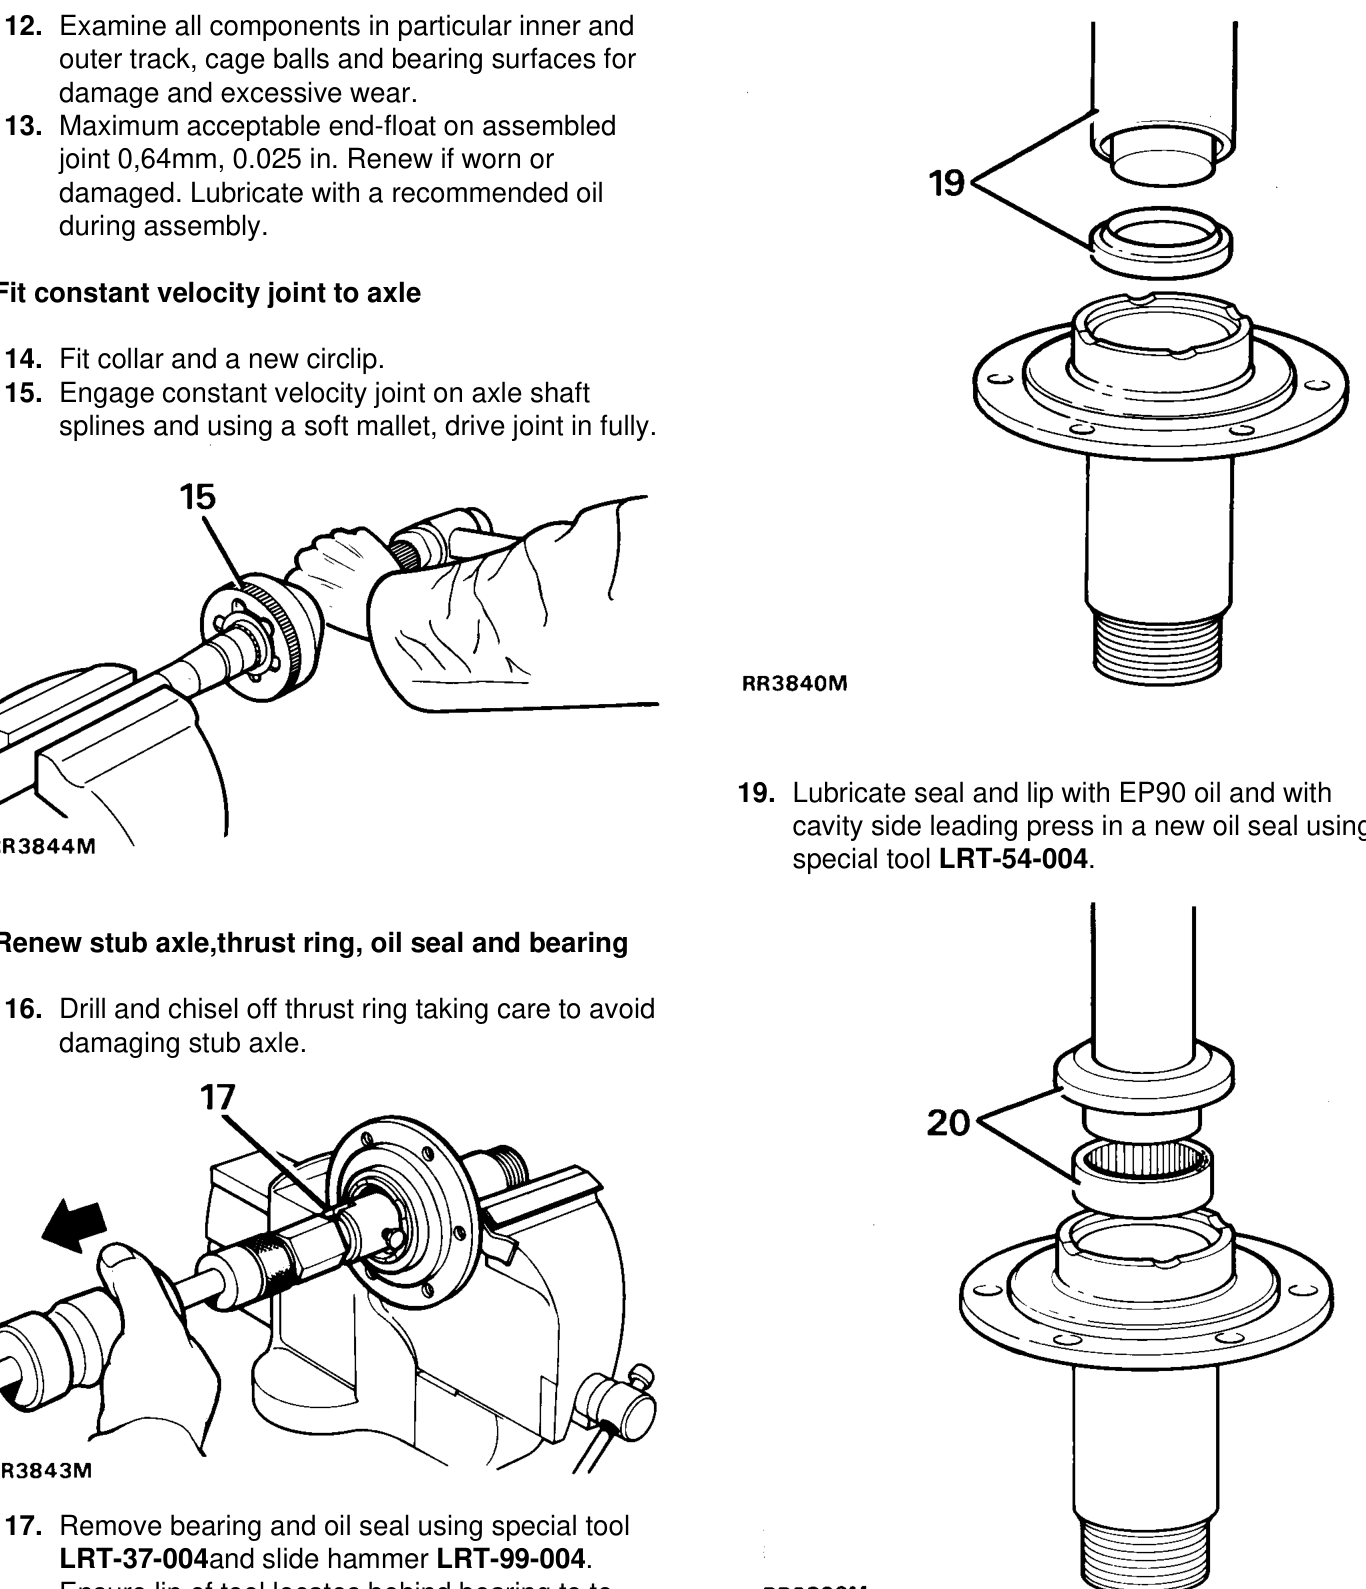
- Engage constant velocity joint on axle shaft splines and using a soft mallet, drive joint in fully.
- Lubricate seal and lip with EP90 oil and with cavity side leading press in a new oil seal using special tool LRT-54-004.
Renew stub axle,thrust ring, oil seal and bearing
- Drill and chisel off thrust ring taking care to avoid damaging stub axle.
- Remove bearing and oil seal using special tool LRT-37-004and slide hammer LRT-99-004. Ensure lip of tool locates behind bearing to to drive it out.
- Repeat instruction for removal of oil seal. 20. Using special tool
- Press fit a new thrust ring onto stub axle.
LRT-54-005, fit bearing with its part number visible when fitted, and flush with end face of stub axle.
‹ Prev Front stub axle, constant velocity joint and swivel pin housingNext › Swivel pin housing assembly
Parts & tools for this job For Land Rover Defender
- TOOLTorque wrenchSearch: 3/8 inch torque wrench
- TOOLSocket setSearch: socket set metric
- BOOKHaynes manualSearch: Haynes manual Land Rover Defender
Links open Amazon search results in a new tab. As an Amazon Associate I earn from qualifying purchases.