
Rear hub components
- Make
- Land Rover
- Model
- Defender 90 Workshop Manual (NAS)
- Section
- Repair › Rear hub components
Rear axle and final driveRear hub components
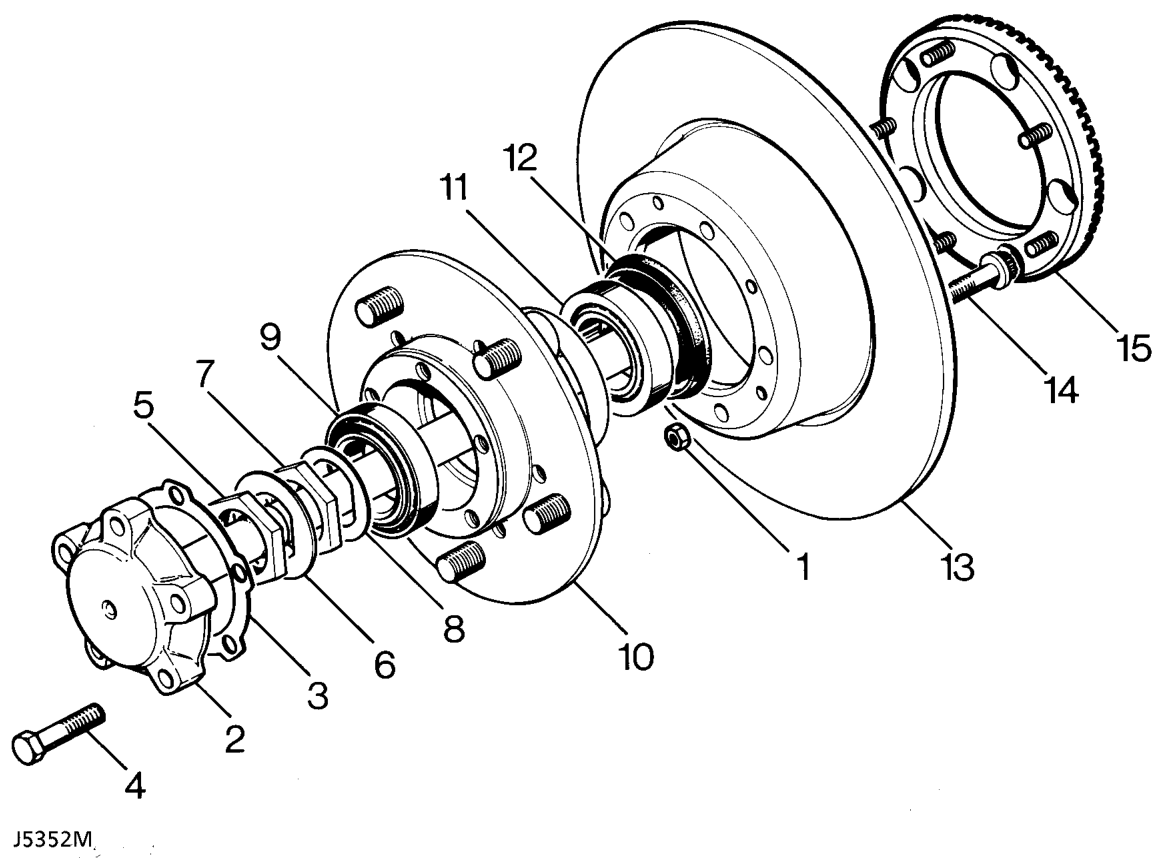
Rear hub components
- Nut - sensor ring
- Axle shaft. 10. Hub.
- Axle shaft joint washer. 11. Inner bearing.
- Axle shaft retaining bolt - 5 off. 12. Grease seal.
- Lock nut. 13. Brake disc.
- Lock washer. 14. Disc retaining bolt - 5 off.
- Hub adjusting nut. 15. Sensor ring - engine management
- Spacing washer.
REAR HUB ASSEMBLY
Service repair no - 64.15.01
Remove
- Raise rear of vehicle and support rear axle onto axle stands. Remove appropriate road wheel.
- Release brake hose clips and remove brake caliper bolts. Secure caliper to one side.
WARNING: Take care not to kink brake hose.
- Outer bearing.
- Remove 5 bolts and withdraw axle shaft.
- Remove and discard joint washer.
- Bend back lock washer tabs.
- Remove locknut and lock washer. Discard lock washer.
- Remove hub adjusting nut.
- Remove spacing washer.
- Remove hub and brake disc assembly complete with bearings.
Parts & tools for this job For Land Rover Defender
- PARTRear wheel bearingSearch: Land Rover Defender rear wheel bearing
- TOOLBearing puller kitSearch: wheel bearing puller kit
- PARTCV boot kitSearch: Land Rover Defender cv boot kit
Links open Amazon search results in a new tab. As an Amazon Associate I earn from qualifying purchases.