
Rocker shaft - overhaul (page 2 of 2)
- Make
- Land Rover
- Model
- Discovery II
- Section
- OVERHAUL
ENGINE - V8
12-2-60 OVERHAUL
3. Remove and discard rocker cover gaskets.
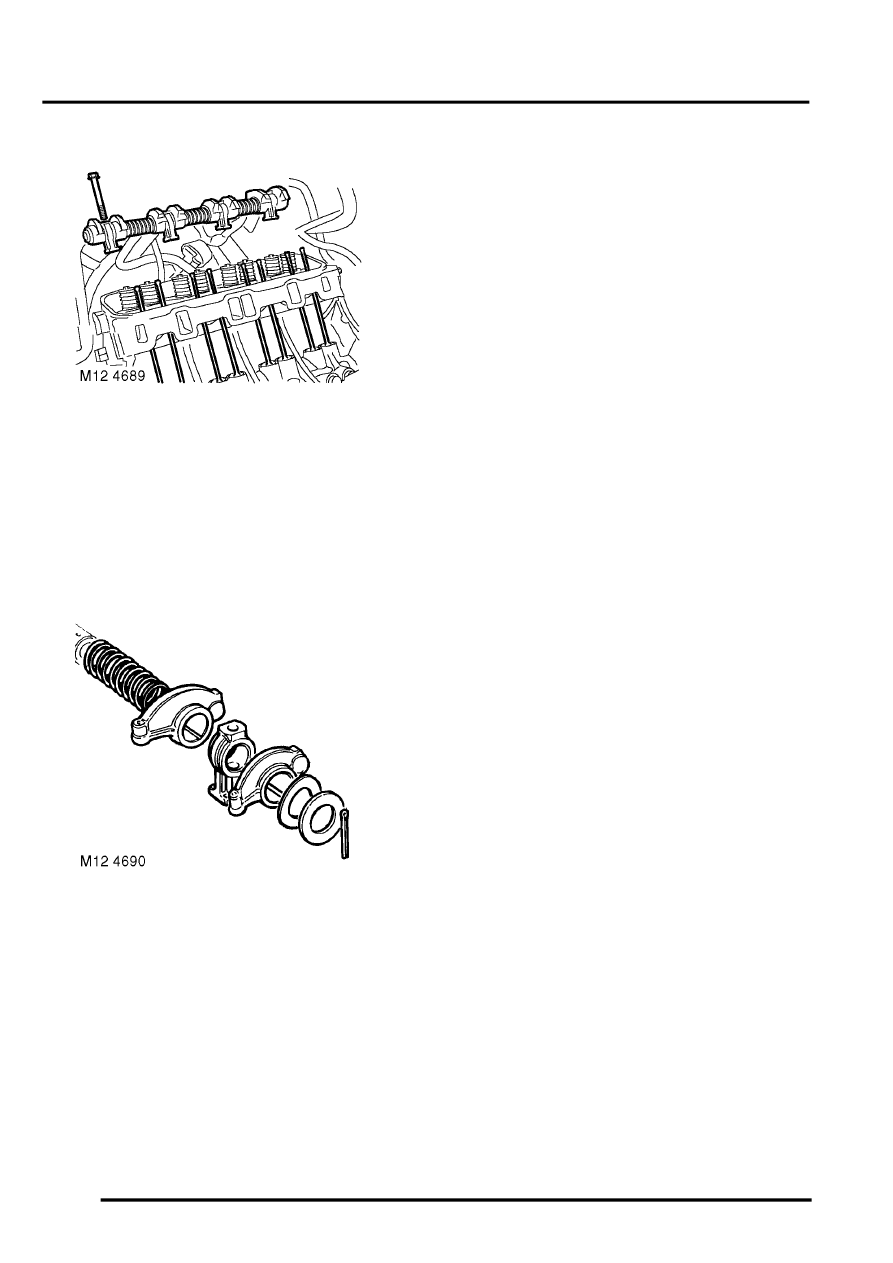
4. Progressively remove 4 bolts securing rocker
shaft assembly to cylinder head, release
rocker shaft from push rods and remove rocker
shaft.
5. Ensure push rods remain located in tappets
when rocker shaft is removed. Retain all
components in their removed sequence for
re-assembly.
6. Remove and discard split pin from one end of
rocker shaft.
7. Collect plain and wave washers.
8. Remove the rocker arms, rocker pillars and
springs.
9. Remove and discard remaining split pin and
collect plain and wave washers.
Inspect
1. Clean all components.
2. Inspect rocker shaft and rocker arms for wear
and scoring. Replace as required.
3. Replace weak or broken springs.
4. Lubricate moving parts with clean engine oil.
Reassembly
1. Reassemble rocker shafts, ensuring that
components are returned to their original
positions, secure plain washers with new split
pins.
2. Ensure shaft identification groove is positioned
at one o'clock, with push rod locations of rocker
arms to the right. Oil feed restriction will
result if rocker shafts are incorrectly
assembled.
3. Ensure that rocker shaft bolt holes are clean
and dry.
4. Position rocker shaft assembly to cylinder
head ensuring push rods are engaged in
rocker arms.
5. Fit rocker shaft bolts and progressively tighten
to 40 Nm (30 lbf.ft).
6. Clean mating faces of rocker cover and cylinder
head, ensure that bolt holes are clean and dry.
7. Fit new rocker cover gasket, dry, position
rocker cover, ensuring that gasket is correctly
located.
8. Fit new, 'patched' multi-hex bolts ensuring that
2 short bolts are on side of rocker cover nearest
centre of engine.
9. Tighten bolts by diagonal selection to:
l
Stage 1 - 3 Nm (2.5 lbf.ft)
l
Stage 2 - 8 Nm (6 lbf.ft)
10. Ensure that gasket is correctly positioned
around periphery of rocker cover.
11. Secure ht leads to rocker cover.
Parts & tools for this job For Land Rover Discovery
- PARTEngine gasket setSearch: Land Rover Discovery engine gasket set
- TOOLTorque wrenchSearch: 3/8 inch torque wrench
- TOOLFeeler gauge setSearch: feeler gauge set
Links open Amazon search results in a new tab. As an Amazon Associate I earn from qualifying purchases.