
Seal - sun roof tray
- Make
- Land Rover
- Model
- Freelander Workshop Manual
- Year
- 1998–2000
- Section
- Sunroof › Seal - sun roof tray
BodySeal - sun roof tray
SEAL - SUN ROOF TRAY
Service repair no - 76.83.61
Remove
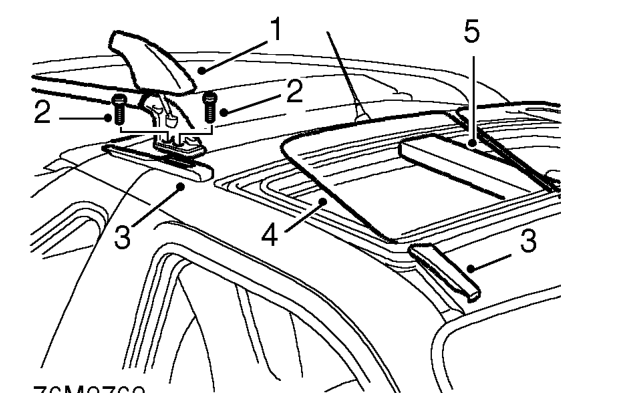
- Remove side rail front end covers.
- Unscrew 4 Torx bolts securing front of side rails and side rails.
- Remove front and rear roof finishers.
- Remove roof glass.
- Remove ’T’ bar.
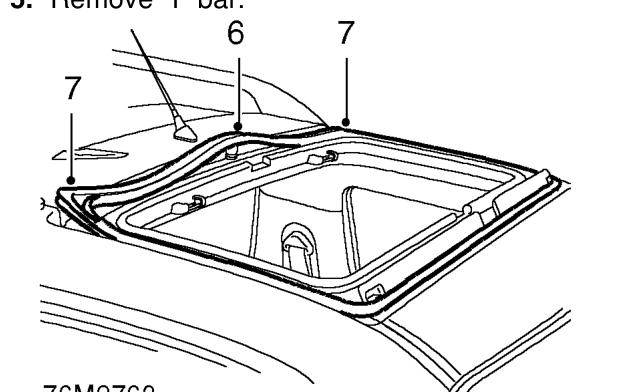
- Release seal from inner part of tray.
- Release seal from corners of tray and ease from between roof and tray.
- Remove tray seal.
Refit
- Position seal to roof.
CAUTION: Do not use sharp tools to locate seal
- Locate seal to corners of tray and fit between roof and tray.
- Fit seal to inner part of tray.
- Fit ’T’ bar.
- Fit roof glass.
- Fit roof finishers.
- Ensure gaskets are in position on side rails. Tighten Torx bolts to 22 Nm. to secure side rails.
- Fit side rail end covers.
Parts & tools for this job For 1998 Land Rover Freelander
- TOOLTrim removal tool kitSearch: trim removal tool kit
- PARTTouch-up paintSearch: Land Rover touch up paint
- PARTPanel clip assortmentSearch: Land Rover panel clips assortment
Links open Amazon search results in a new tab. As an Amazon Associate I earn from qualifying purchases.